Hello friends, I hope you are very well. I am pleased to be able to show you a super simple step by step of a hidden pocket. This type of pocket can usually be found in flannels or blazers. So it is a very useful pocket in tailoring!
Hola amigos, espero que estén muy bien. Tengo el gusto de poder mostrarles un paso a paso super sencillo de un bolsillo escondido. Este tipo de bolsillo generalmente lo podemos encontrar en franelas o blazer. Asi que es un bolsillo muy util en la confección!
Materials I used for the sample
- 2 Rectagunlos
- 2 rectangular ribbons of 9 cm X 4 cm
- Pins
- Sewing machine
- Thread
Materiales que utilicé para la muestra
- 2 Rectagunlos
- 2 cintas rectangulares de 9 cm X 4 cm
- Alfileres
- Maquina de coser
- Hilo
Step By Step - Paso a Paso
1
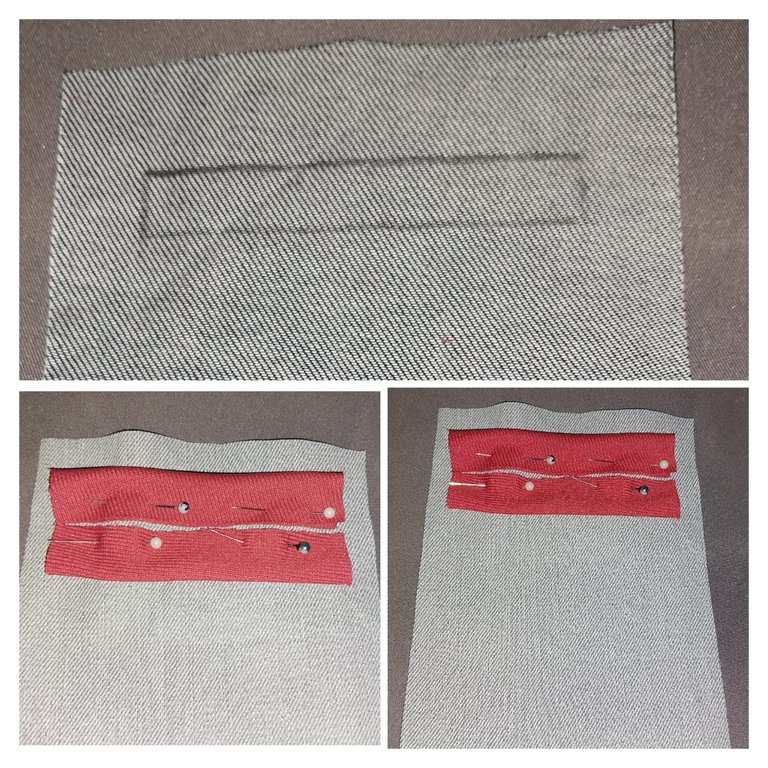
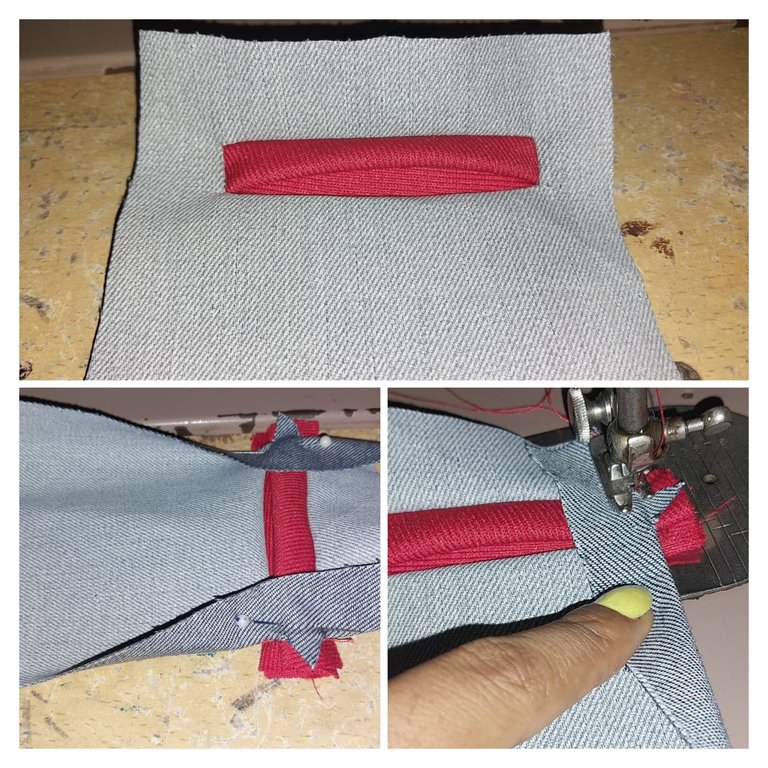
We must make a rectangle of 1.5 cm wide X the length in which you want to have the pocket. In this case the length is 7 cm. Then in the front part of this rectangle we must match the edges of the ribbons. The ribbons should be folded and the edge part should be sewn inside the rectangle as you can see.
Debemos hacer un rectángulo de 1,5 cm de ancho X el largo en el cual desea tener el bolsillo. En este caso el largo es de 7 cm. Luego en la parte delantera de este rectángulo debemos hacer coincidir los bordes de las cintas. Las cintas las debemos doblar y la parte del borde se debe coser hacia dentro del rectángulo como pueden ver.
2
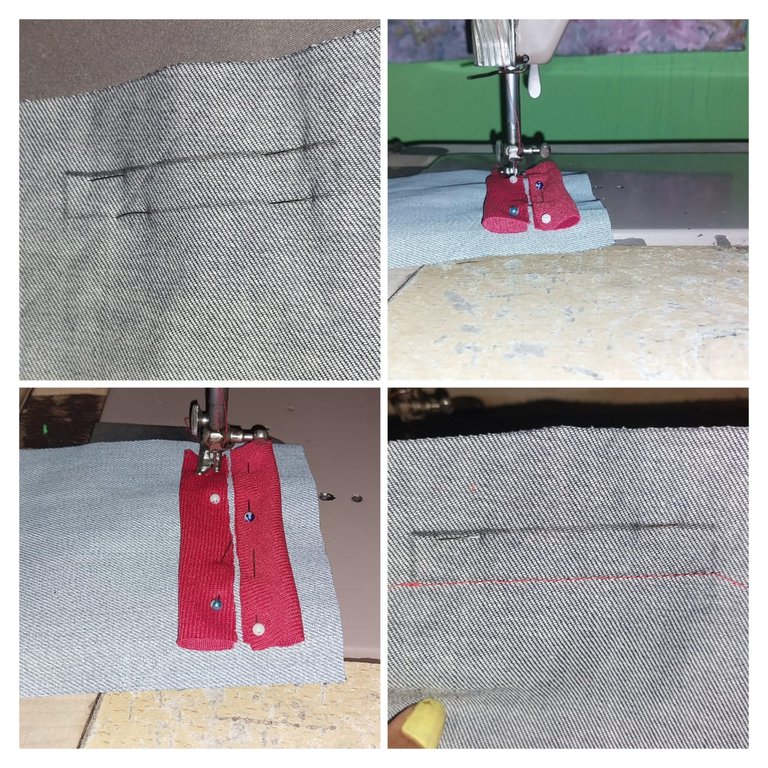
We proceed to sew only the horizontal lines, as you can see.
Procedemos a coser solo las líneas horizontales, como pueden observar.
3
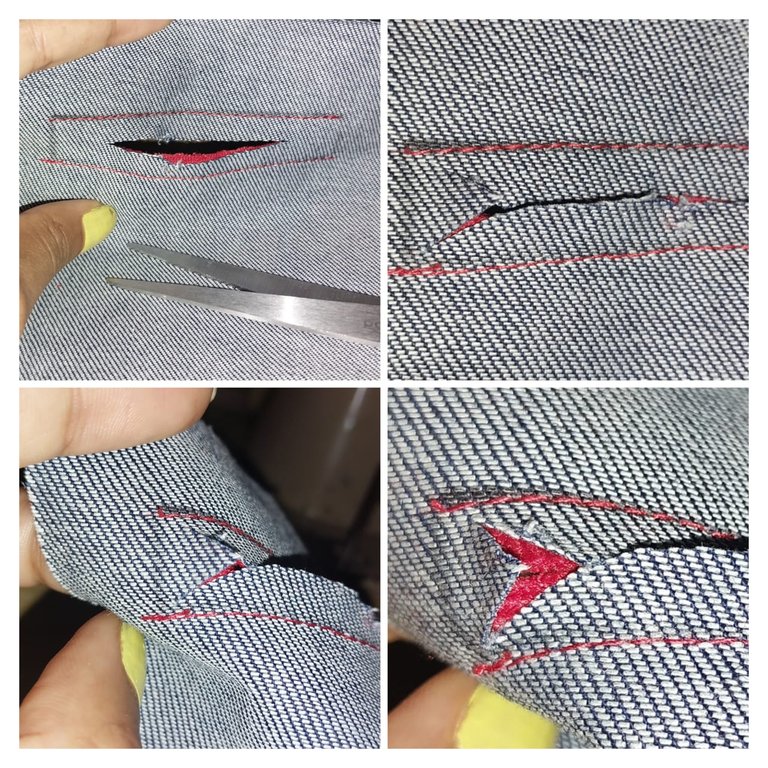
Once we sew the horizontal lines, we must make or open the fabric with the scissors in the form of a horizontal line. When we have 1 cm before reaching the rectangle we must make a v until we reach the vertex points of the rectangle.
Una vez que cosimos las líneas horizontales, debemos hacer o abrir la tela con la tijera es forma de línea horizontal. Lugo al tener 1 cm antes de llegar al rectángulo debemos hacer una v hasta llegar a los puntos de vértice del rectángulo.
4
Then we must tuck in the red lines or ribbons.
Luego debemos meter hacia dentro las líneas o las cintas rojas.

In this way we were able to hide the seam we made.
De esta manera logramos esconder la costura que hicimos.
5
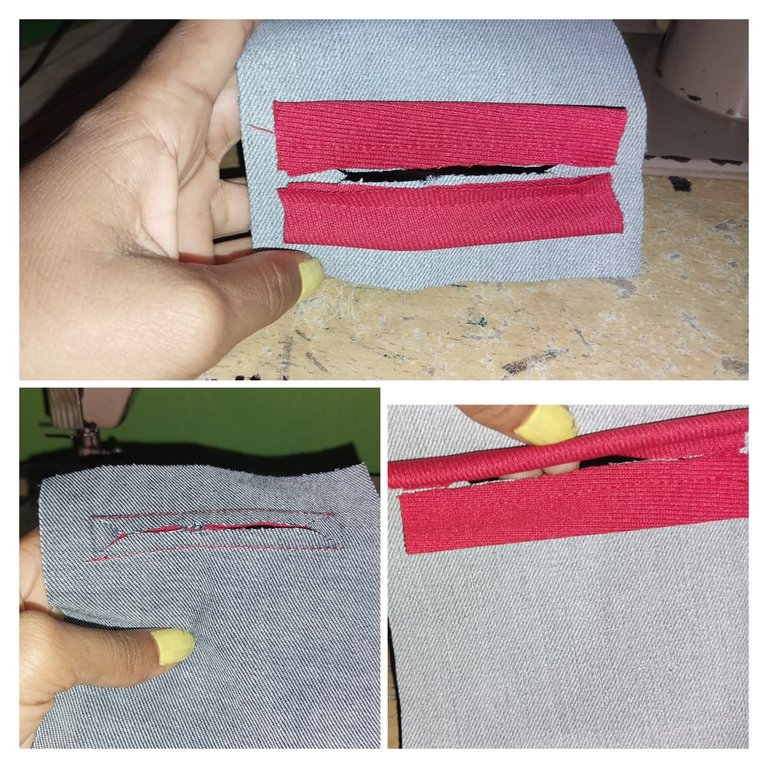
Then we sew the sides of the rectangle, so we sew the final line of the rectangles.
Luego cosemos los laterales del rectangulo, Asi cosemos la linea final de los rectangulos.
6
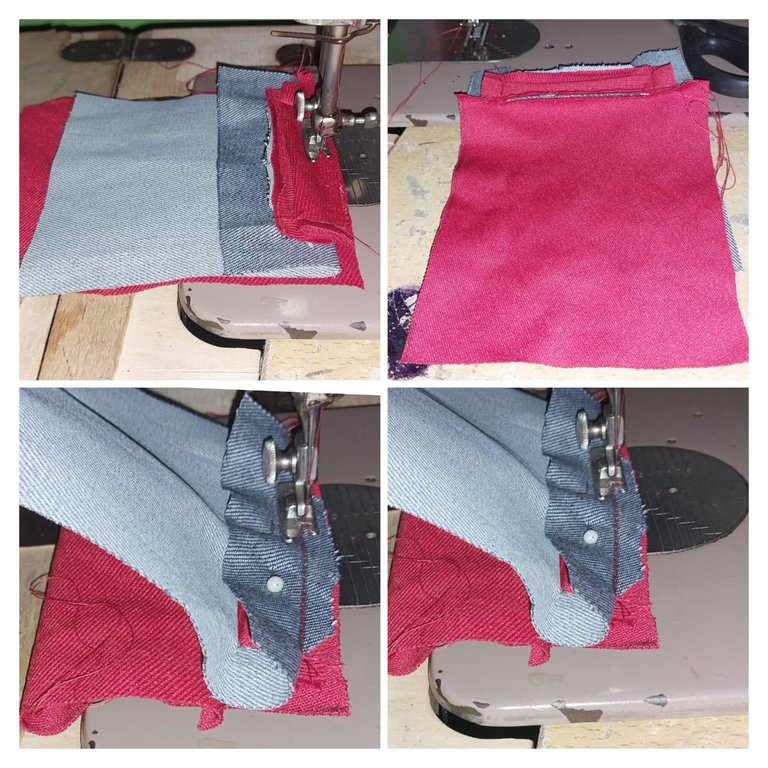
Then we take the red rectangle to make the pocket, the way this is done is by placing the edge of the rectangle on the bottom seam line of the rectangle that we made the base of the pocket, then the other end of the large rectangle is placed on the line of the top pocket.
Luego tomamos el rectángulo rojo para hacer el bolsillo, la forma en la que se hace este es colocando el borde del rectángulo sobre la línea de costura inferior del rectángulo que hicimos de base en el bolsillo, luego el otro extremo del rectángulo grande se coloca en la linea del bolsillo superior.
7
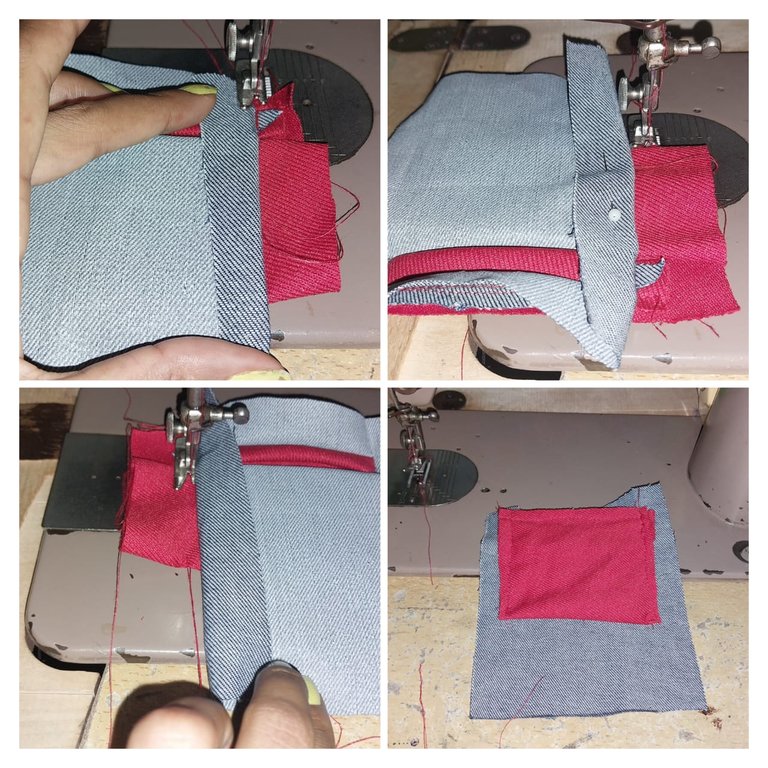
Finally we must sew the sides to close the pocket.
Finalmente debemos coser los laterales para cerrar el bolsillo.
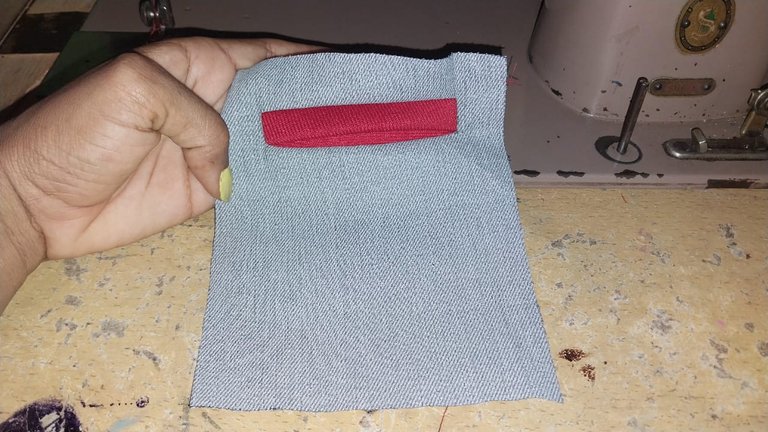
This is the final result. I hope you like it! Thank you very much.
Este es el resultado final. Espero que les guste! Muchas gracias.