Que tal amigos? Espero se encuentren muy bien! ♥️ Desde mi linda Venezuela les deseo amor, salud y prosperidad.
Las flores, con su belleza y delicadeza, han sido una fuente de inspiración constante para el mundo de la joyería. Desde tiempos ancestrales, los diseñadores han recurrido a estos maravillosos elementos de la naturaleza para crear piezas únicas y llenas de significado que enaltecen la
Las flores inspiran todo tipo de joyas. Los pendientes con forma de lirios, tulipanes, las famosas rosas, margaritas o jazmines son una forma delicada y femenina de lucir la belleza de la naturaleza.
Y este año los diseños florales cobran vida y están más vigentes que nunca en la moda, en los nuevos diseños de los artesanos y personas que hacen vida en el maravilloso mundo del arte.
Hoy pude ver unas flores muy bonitas, esta a pesar de ser una flor pequeña imperaba por su color rojo profundo y sus oetalos ovalados, muy semejante a la forma de una rosa pero con un tallo corto.
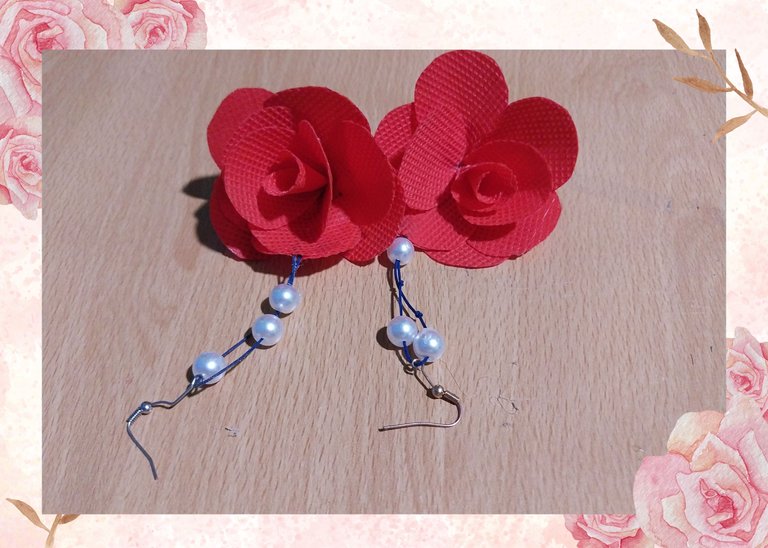
Es así que he dado vida a estos aretes y he creado unos hermosos Aretes de flores. Espero les guste! 👌♥️
Materiales
- Tela Roja rígida
- 6 perlas
- Hilo chino
- Pistola de silicon
- Tijera
- Gancho
Paso a Paso
1
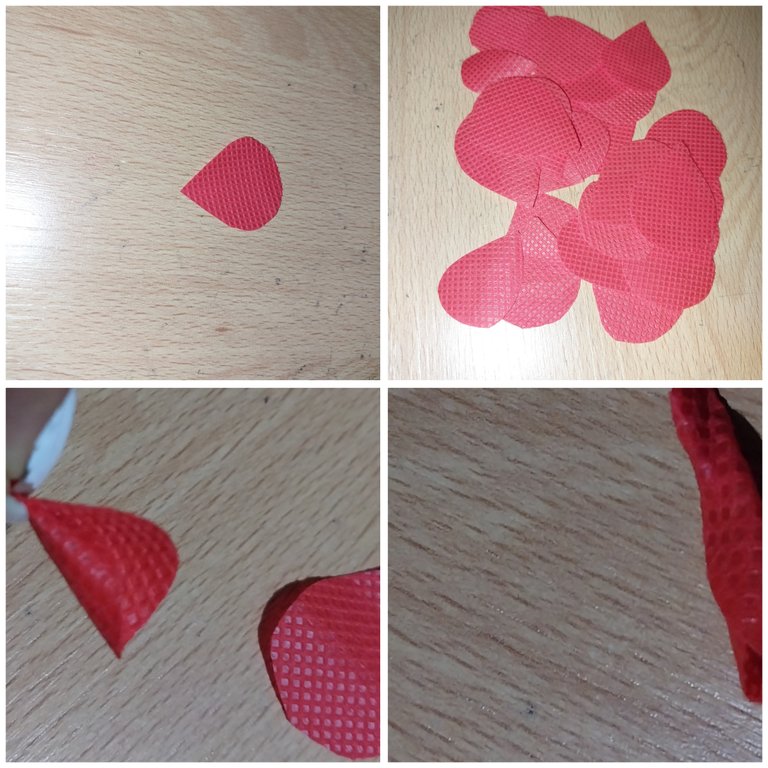
Iniciamos recortando pétalos medianos de la tela, aproximadamente de 3 cm de largo y 3 cm en su punto más ancho.
Cada flor lleva 12 pétalos para su formación.
Iniciamos enrollando un pétalo de forma que este quede cerrado y lo unimos con la ayuda del silicon caliente.
2
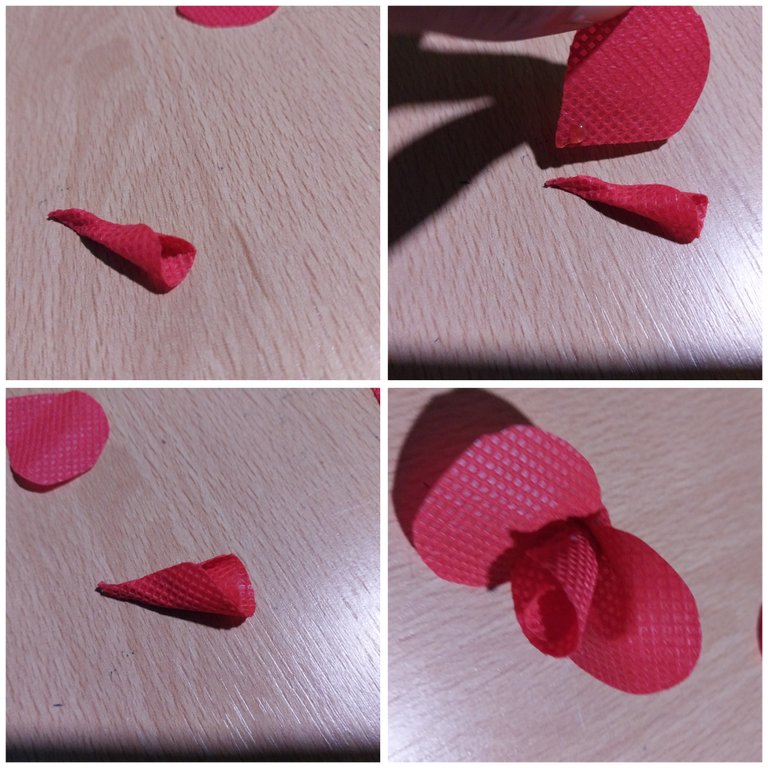
Seguidamente al formar el pétalo base que esta enrollado, debemos ir pegando capa a capa los pétalos con la ayuda de la pistoñaa de silicon. Debemos pegar los pétalos de forma equitativa.
3
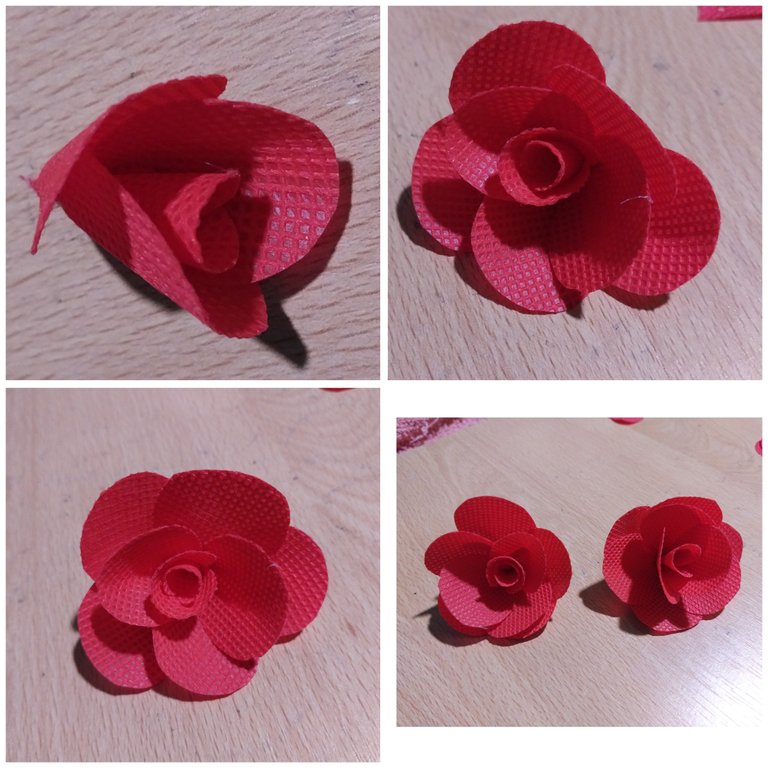
De esta manera vamos formando poco a poco los pétalos, de forma intercalada y opuesta al losnpetalos que vamos pegando.
4
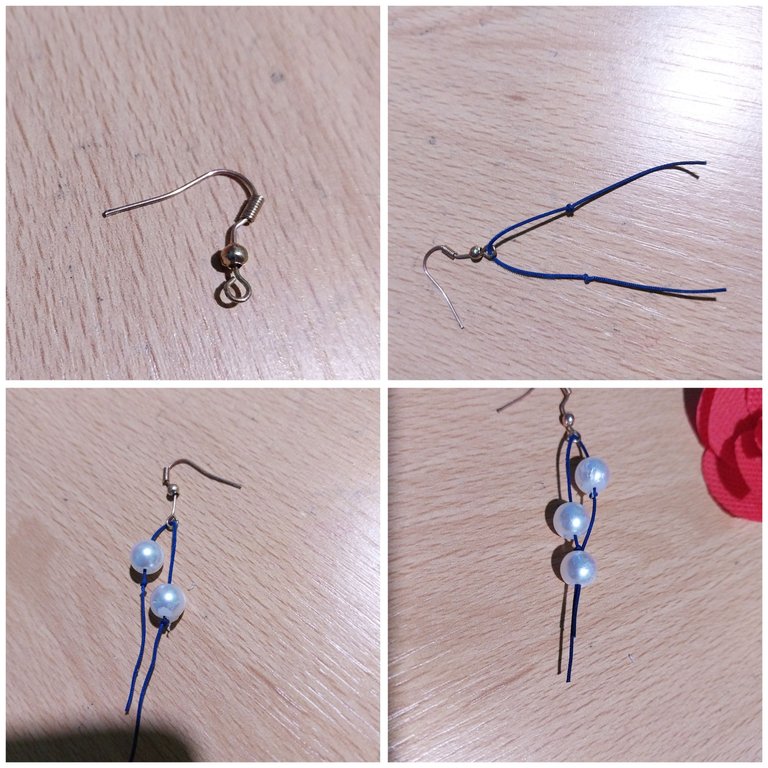
Luego debemos insertar el hilo chino dentro de la argolla del gancho y luego insertar las perlas en ambos extremos. Y luego una en el medio de forma que metemos ambos hilos por el agujero de esta última perla.
5
( )
)
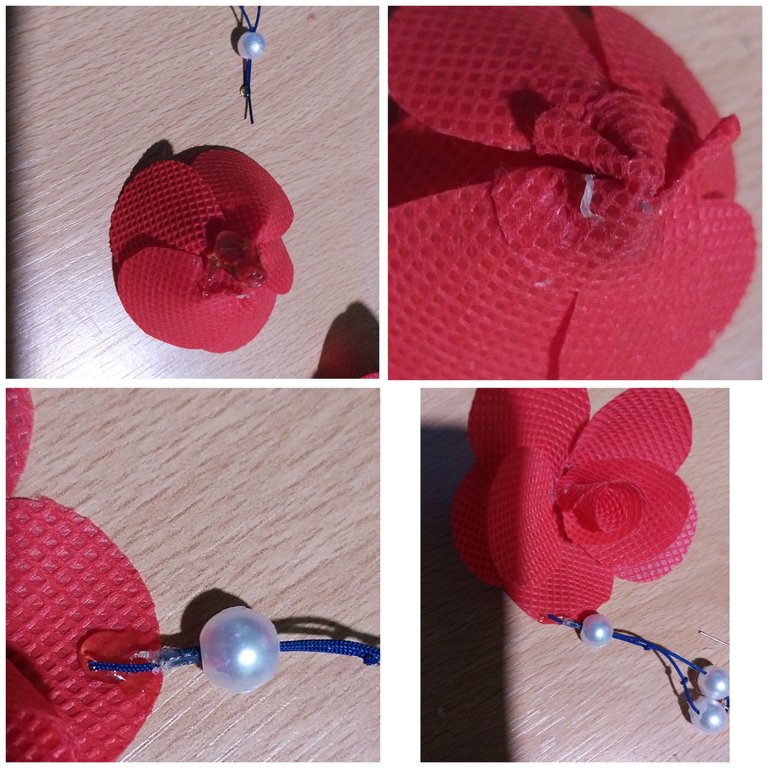
En la parte trasera de la flor pegamos un pedazo de tela para tapar los residuos de silicon formados en la parte trasera de la flor.
Depues el hilo chino se debe pegar en uno de los pétalos traseros utilizados el silicon, seguidamente se pega sobre este uno de los pétalos delanteros para que el hilo quede escondido en la misma flor.
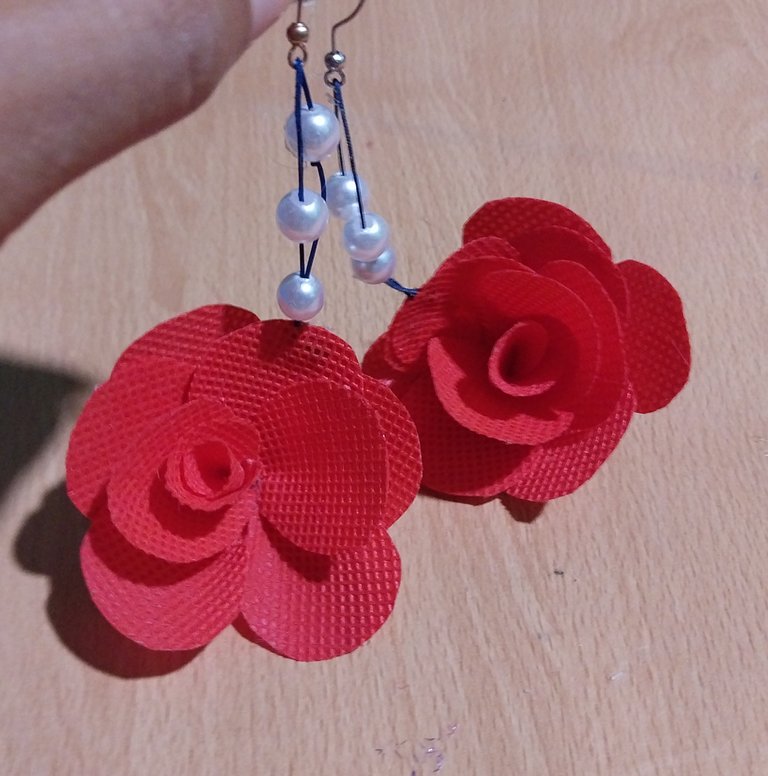
Luego debemos hacer el otro par siguiendo los mismos pasos de nuestra flor. Obtendremos este resultado!
Una recomendación sería utilizar tela rígida al momento de realizar la flor ya que esta queda muy bien armada y además es ligero de llevar en nuestras orejas.
Muchas gracias por visitar este espacio, siempre agradecida por su apoyo! Espero seguir viendo cada una de sus creaciones fantásticas, sus joyas y accesorios que hacen lucir genial a esta comunidad.
Con mucho amor para todos ustedes, espero que les haya gustado. Espro ver tambien sus comentarios y sugerencias! ❤️❤️❤️
- Las imágenes me pertenecen
- Traductor: Deelp traslator
- Edicion: Canva
How are you folks? I hope you are doing well! ♥️ From my beautiful Venezuela I wish you love, health and prosperity.
Flowers, with their beauty and delicacy, have been a constant source of inspiration for the jewelry world. Since ancient times, designers have resorted to these marvelous elements of nature to create unique and meaningful pieces that enhance the beauty and beauty of the natural world.
Flowers inspire all kinds of jewelry. Earrings in the shape of lilies, tulips, the famous roses, daisies or jasmines are a delicate and feminine way to show off the beauty of nature.
And this year floral designs come to life and are more alive than ever in fashion, in the new designs of artisans and people who make life in the wonderful world of art.
**Today I could see some very beautiful flowers, this one in spite of being a small flower prevailed by its deep red color and its oval oetals, very similar to the shape of a rose but with a short stem.

So I have brought these earrings to life and created some beautiful flower earrings. I hope you like them! 👌♥️
Materials.
- Stiff red fabric
- 6 beads
- Chinese thread
- Silicone gun
- Scissors
- Hook
Step by Step
1

We start by cutting out medium petals from the fabric, approximately 3 cm long and 3 cm at their widest point.
Each flower takes 12 petals to form.
We start by rolling a petal so that it is closed and we join it with the help of the hot silicon.
2

Next to form the base petal that is rolled up, we must go gluing layer by layer the petals with the help of the silicone gun. We must glue the petals evenly.
3

In this way we are forming little by little the petals, in an intercalated and opposite way to the petals that we are gluing.
4

Then we must insert the Chinese thread inside the ring of the hook and then insert the pearls at both ends. And then one in the middle so that we put both threads through the hole of this last bead.
5
( )
)
On the back of the flower we glue a piece of fabric to cover the silicon residues formed on the back of the flower.
Then the Chinese thread should be glued on one of the back petals used the silicon, then glue on this one of the front petals so that the thread is hidden in the same flower.

Then we must make the other pair following the same steps of our flower. We will get this result!
A recommendation would be to use rigid fabric at the time of making the flower as this is very well armed and it is also light to carry in our ears.
Thank you very much for visiting this space, always grateful for your support! I hope to continue seeing each of your fantastic creations, your jewelry and accessories that make this community look great.
With much love to all of you, I hope you liked it. I hope to see your comments and suggestions too! ❤️❤️❤️
- Images belong to me
- Translator: Deepl Traslator
- Editing: Canva
