Hello dear friends of Hive, I hope you are well. It is a pleasure to be able to greet you again. We are approaching a month full of happiness, union and peace for families, but also a lot of creativity in Christmas decorations.

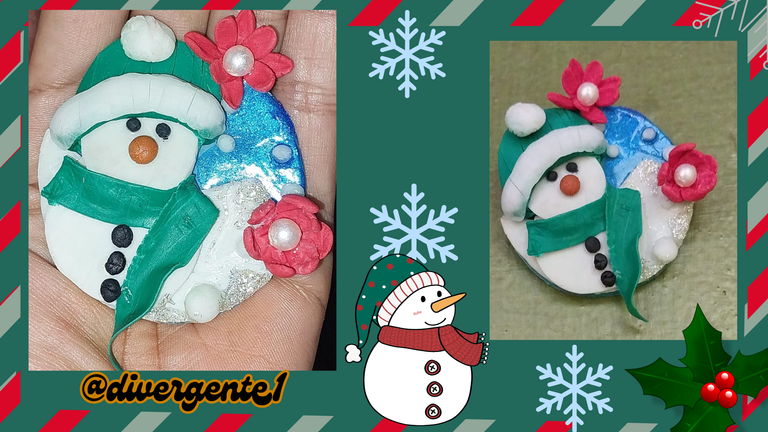
Today I want to present you the elaboration of a snowman made in flexible dough as a Christmas and decorative applique for our home, I hope you like it!

Materials
- Flexible Dough
- Oil paint
- Stakes
- Magnet
- Instant glue
- Beads
- Circular caps of various sizes

Step by Step
1

We take some flexible dough and the blue color and we create the dough of this color giving light massages to the dough. Once the tone is unirmore, we must flatten the dough with the help of a rolling pin, then we take the circular cap as a mold element to create the circle on the dough.
2

Then we take the dough and also flatten it and with the lid we make the circular shape of the dough. This area will be the frozen mountains.
This way we create half a circle and then we give the shape of the mountain with the stakes.
3

Then we must create the body of the snowman, we make the head with the smaller lid and the body with another lid of a slightly larger diameter.

Then we take the black color and apply it on the dough. With this dough we are going to create small circles for the eyes and then 3 medium sized buttons.
To make the hat we turn the dough green and create a little hat for our snowman.
4

Then we glue the body of the snowman on the first piece formed by the sky and the mountains.
Then we glue the eyes and the nose of our snowman.
5

Then we make the scarf with a thin rectangular piece, we glue it on the neck of our doll.
I put some white color on the edge of the hat and also a little ball on the top of the hat.
6

We should also glue on the black buttons and I particularly created some red flowers to make the snowman more eye-catching.
On the back of our design we should place a magnet using instant glue.
We have also created some little white balls with the flexible dough to create a snowy shape. .

This is the final design of our design!

Thank you!
- Images belong to me
- Translator: Deepl Traslator
- Editing: Canva
Hola queridos amigos de Hive, espero que estén bien. Es un gusto poder saludarles nuevamente. Se acerca un mes cargado de mucha felicidad unión y paz para las familias, pero también de mucha creatividad en las decoraciones navideñas.

El día de hoy quiero presentarles la elaboración de un muñeco de nieve realizado en masa flexible como un aplique navideño y decorativo para nuestro hogar, espero que les guste!
Materiales
- Masa Flexible
- Pintura de oleo
- Estacas
- Iman
- Pegamento instantaneo
- Perlas
- Tapas circulares de diversos tamaños
Paso a Paso
1

Tomamos un poco de masa flexible y el color azul y creamos la masa de este color dando ligeros masajes a la masa. Una vez que el tono quede unirmore, debemos aplastar la masa con la ayuda de un rodillo, luego tomamos la tapa circular como elemento de molde para crear el circulo sobre la masa.
2

Luego tomamos la masa e igualmente la aplastamos y con la tapa hacemos la forma circular de esta. Esta zona serán las montañas congeladas.
Asi creamos medio circulo y luego le damos la forma de la montaña con las estacas.
3

Luego debemos crear el cuerpo del muñeco de nieve, hacemos la cabeza con la tapa más pequeña y el cuerpo con otra tapa de un diámetro un poco más grande.

Luego tomamos el color negro y aplicamos este en la masa, Con esta masa vamos a crear pequeños círculos pequeños para los ojos y luego 3 botones medianos.
Para hacer el gorro tornamos la masa de color verde y le creamos un gorrito a nuestro muñeco de nieve.
4

Luego debemos pegar el cuerpo del muñeco en la primera pieza formada por el cielo y las montañas.
Asi pegamos los ojos y la nariz de nuestro muñeco.
5

Luego hacemos la bufanda con una pieza delgada y rectangular, esta la pegamos en el cuello de nuestro muñeco-.
Coloqué un poco de color blanco en la orilla del gorro y tambien una bolita en la parte superior del gorro.
6

Asi mismo debemos pegar los botones negros y particularmente he creado algunas flores rojas para darle mayor vistosidad al muñeco de nieve.
En la parte de atrás de nuestro diseño debemos colocar un imán utilizado pegamento instantáneo.
Tambien hemos creado algunas bolitas blancas con la masa flexible para crear una forma de nieve. .

Este es el diseño final de nuestro diseño!
Muchas gracias!
- Las imágenes me pertenecen
- Traductor: Deelp traslator
- Edicion: Canva


