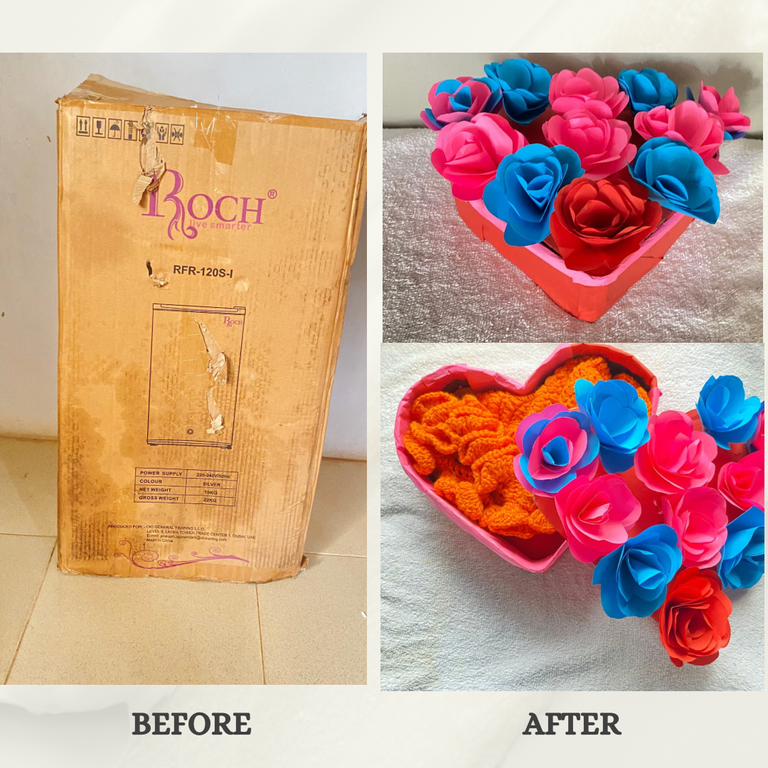
Hello everyone, so today I want to show you an interesting way to be creative with your old boxes. I know most of us throw our boxes away the minute we have no use for them but as an environmentalist, I am here again with another interesting upcycling project.
This is going to be my main entry to the #diylove contest. I was going to make a video like I did last week but since my area is always too windy, I was busy chasing my flying papers and couldn’t capture most of the procedures.
My Creative Journey
For a long time, I thought the only thing I could do with my hands were to crochet and then I literally became obsessed with crochet but after I became an environmentalist, my passion for nature ignited a whole new love for upcycling projects. Crocheting is definitely something I find joy doing but I think I’ve eventually developed love for upcycling projects and I am truly in love. I like it that I get to make new things from “waste”.
We’ve had this old box at home for so long and my mom wanted to burn it because it was taking up space. As usual I told her we dont do that here so I took it and made something out of it.
Anyway, I crocheted a ruffle bucket hat about a week ago and wanted to give it to a friend but I wanted it to be a little presentable so I decided on making a gift box to put the hat inside.
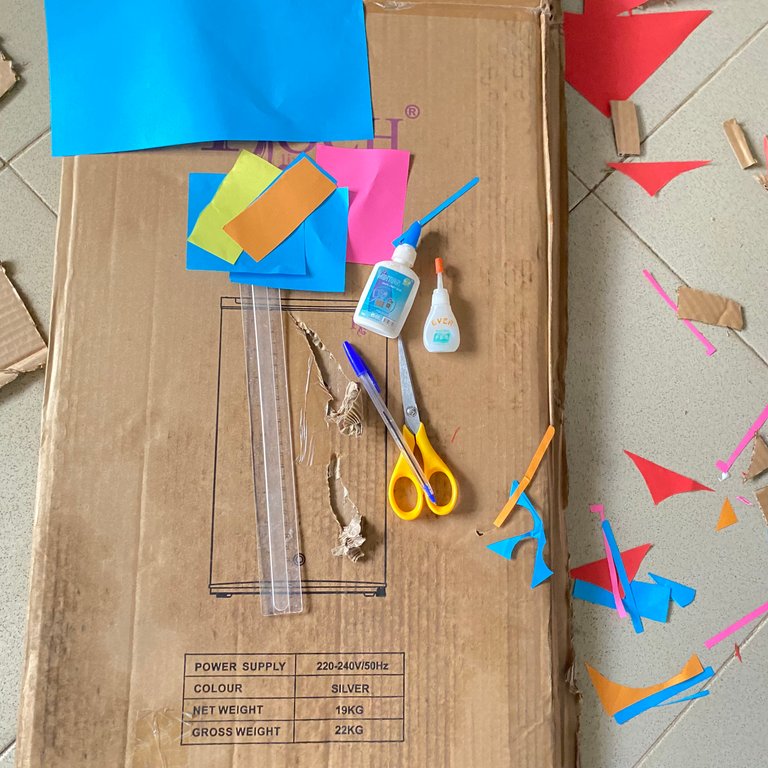
The materials I used were:
• An old box
• coloured papers and scrap papers
• pen
• paper glue and super glue
• a pair of scissors
• a ruler

I started by cutting part of the box where I’ll use for my project. After cutting, I drew a heart shape with a pen since valentine is associated with love.
After drawing the heart shape, I cut it from the box and and duplicated it on another box. So one will be the base and the other will be the cover. I now used my red colored paper to cover the heart shapes using a paper glue so they look “valentine pleasing”.


I now cut a very long rectangle from the box to cover the space between the base and the cover and also create the space in the gift box. In doing this, I used a super glue so the box will be strong. I also used some colored paper scrap to cover the inside of the box so it wouldn’t look so normal.


I now put the gift I made inside to see if it would fit and covered it with the cover I had already made and it was perfect.


So for the gift box, my plan was to decorate it with flowers so the next step was to make the flowers. I have already made a video explaining how I made the flowers but I’m going to do it again for those who might have missed it.
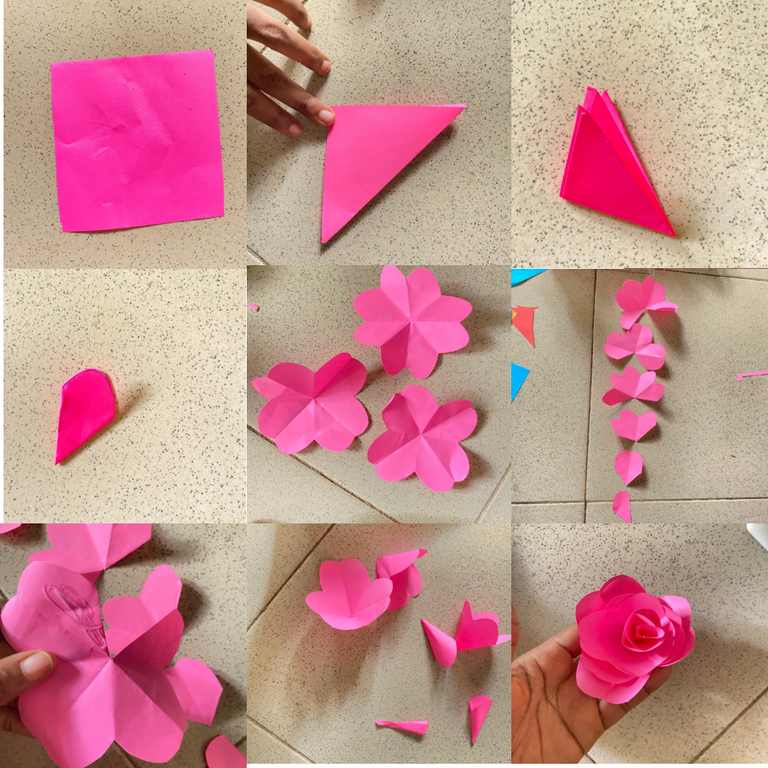
I started by marking and cutting 10 by 10cm squares from my coloured papers with the rule, pen and scissors. I then folded it into two, diagonally and folded that one also diagonally and then another diagonal fold for the third time. I then drew a bracket on it with a pen and cut it.
After cutting it, I opened it (I made three of these).
I started cutting the conical shapes made from the folding. I cut 1, 2 and 3 conical shapes respectively from each of them with a scissors.
I started gluing them together with the paper glue from the biggest to the smallest and finally, I made the flower.


After making the flowers, I glued them onto the cover of the gift box using a super glue so it will be able to stand well.

And finally the gift box was done.
The result


I truly enjoyed making this gift box and I love the result. I can’t wait to know what @olujay thinks of this project as I told him I was making something that would wow him.(haha)
I invite @doreenarch and @young-tari to make their entry to the #diylove contest.
All grids and thumbail design were made on canva
