Splinterlands is a complex game and it allows for various different cards and strategies. Each fight is different as there are various different rulesets applied and this can give specific cards an advantage depending on how you use them. In this post, I talk about a great battle where I won because I used Sand Worm.
Featured cards
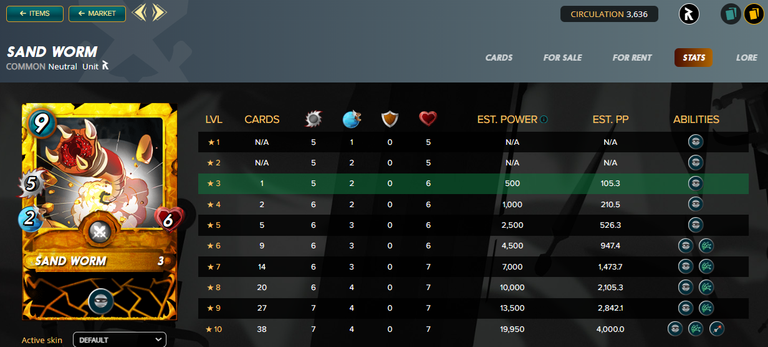
Sand Worm is a neutral monster that costs 9 mana. It starts with sneak. It learns snare at level 6 and piercing at level 10. This is one of the older cards so I am only using it in Guild Brawls.
Rule Set, Battle, and Plan

The ruleset this time is Target Practice, Blood & Sunder, and Broken Arrows. This means that all monsters gain the snipe and corrosive ward ability, and ranged monsters can attack from the first spot. There is also 46 mana available, and I can choose water, earth, death, or dragon splinter.
| Splinter | Mana Cost | Position | Reason |
|---|---|---|---|
| Wizard of Eastwood | 3 | Summoner | -2 armor |
| Pelacor Mercenary | 7 | 1st | Flying |
| Failed Summoner | 2 | 2nd | Magic Reflect |
| Sand Worm | 9 | 3rd | Sneak |
| Fungus Flinger | 3 | 4th | Martyr |
| Katrelba Gobson | 6 | 5th | Sneak and Double Strike |
| Venari Marksrat | 3 | 6th | Martyr |
| Total Mana: | 33 |
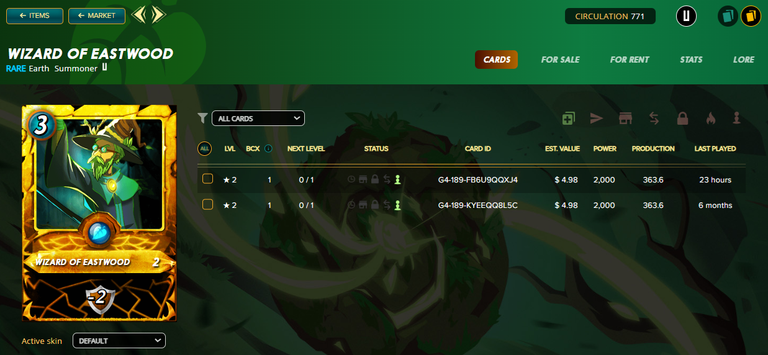
I use Wizard of Eastwood as my summoner for the -2 armor. Pelacor Mercenary is my tank with flying. Next up is Failed Summoner as my backup tank and to reflect damage to the magic monsters. Then I have Sandworm as my damage dealer. I have Karelba Gobson in my 5th spot as another sneak damage dealer with bloodlust. The 4th and 6th monsters are martyr monsters to buff up my sneak monsters.
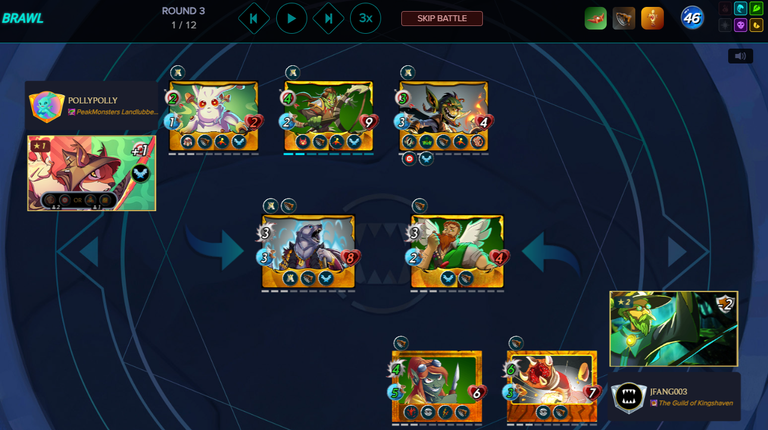
Round 1

At first glance, I think that this match could go either way. My opponent didn't use any magic monsters, but that flying ability is annoying. My monsters aren't that fast, but it should be enough to land most of my attacks.
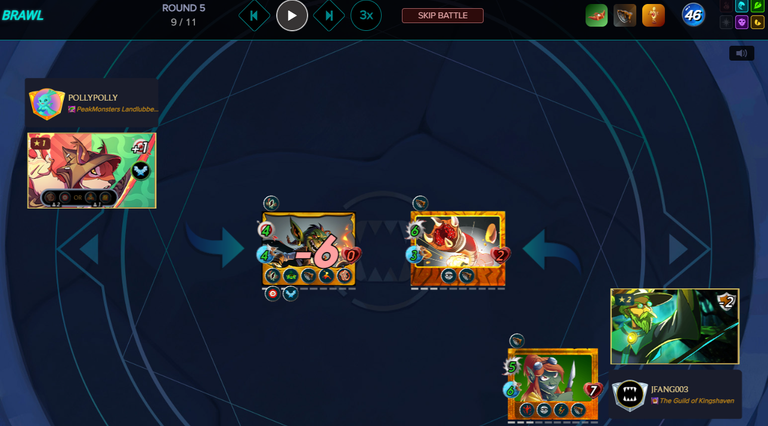
Round 3
My opponent lost two monsters, but I lost 3. Both of my martyr monsters are dead, so this match will be quite close. I missed more attacks than I would like, but if I miss too many attacks, I can still lose. I do think that I have a slight damage advantage right now.
I ended up winning this match a few rounds later. It was closer than I would like but Sandworm did a great job with all that damage.
Conclusion
The battle this time didn't play out the way I thought it would. With the martyr monsters in my lineup, I expected Katrelba Gobson to land more attacks, but it missed way too much. In a way, I think that Sandworm did more damage as Katrelba didn't gain much bloodlust. The buffed damage was more from the martyr monsters instead. It was a surprise too see how well Sandworm did because I always treated it more as a glass cannon with horrible accuracy, but I guess luck was on my side.
You can see my entire match here.
What did you think of my match? Was there anything you would have done differently? I think it is quite interesting to see how different players use the same card.
Posted Using INLEO
