Hello friends, I am happy to present you my work. This week my brother started his internship in a pharmacy, since he is studying in a technical school as a technician in pharmacy, so to go to present his internship I made him a medical kimono.
Hola amigos, estoy feliz de presentarles mi trabajo. Esta semana mi hermano inició sus pasantias en una farmacia, ya que él esta estudiando en una escuela tecnica como tecnico en farmacia, asi que para ir a presentar sus pasantias le realicé un quimono medico.

In this way I want to present you the elaboration of the trousers of the set, I hope you like it.
De esta manera quiero presentarles la elaboracion del pantalon del conjunto, espero que les guste.
These were the materials I used - Estos fueron los materiales que utilicé:
- 2.50 m of fabric
- Elastic
- 2 zippers
- Sewing machine
- navy blue thread
- 2.50 m de tela
- Elastica
- 2 cierres
- Maquina de coser
- hilo azul marino
Step by Step - Paso a Paso
1
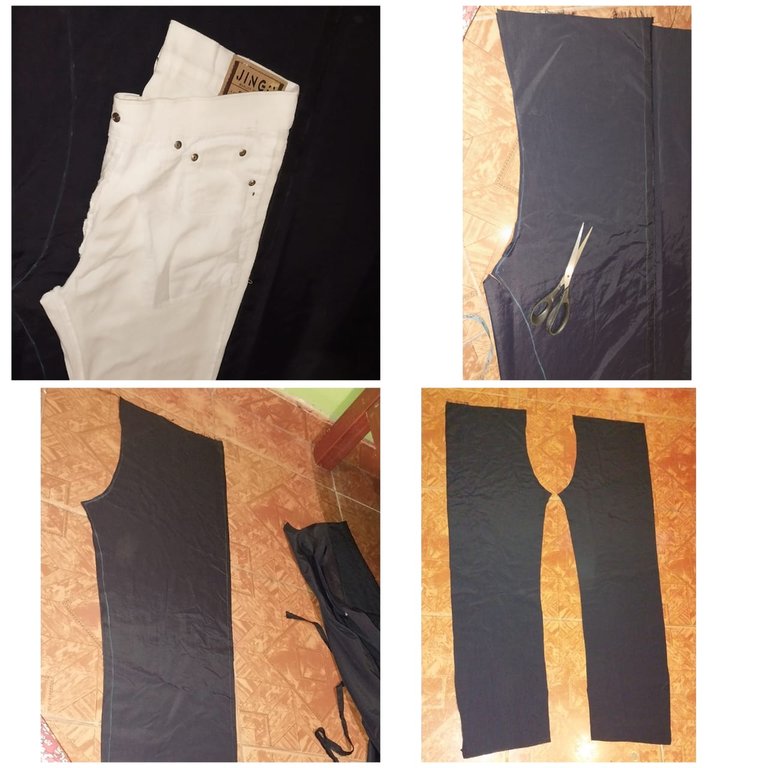
The first thing I did was to take a mold formed by a pair of pants that he uses, to this same pants I added a few centimeters more of width with the purpose of making the jumpsuit looser at the moment of wearing it. This way I get the front part formed by two pieces as you can see.
Lo primero que hice fue tomar un molde formado por un pantalon que él utiliza, a este mismo pantalon le añadi unos centimetros mas de anchura con el proposito de que el mono quede mas suelto al momento de el usarlo. Asi de esta manera obtengo la parte delantera formado por dos piezas como pueden ver.
2

In the upper area I have marked the area of the petrin to leave the necessary space to place the elastic and the area of the pockets.
En la zona superior he marcado la zona de la petrina para dejar el espacio neceario para colocar la elastica y el area de los bolsillos.
3
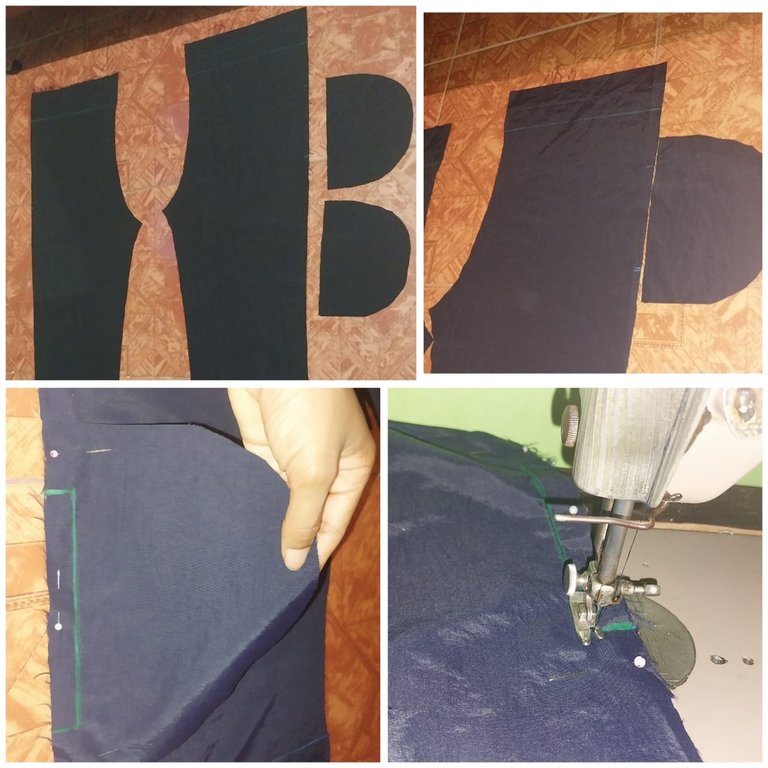
Then we must create the pocket area and the zipper area. This step by step of placing the zipper I highlighted it in a previous post, so you can check it out on my blog.
Luego debemos crear la zona de los bolsillos y el area del cierre. Este paso a paso de colocar el cierre lo resalté en un post anterior, asi que puden ir a verlo en mi blog.
5

Then I placed a pocket and fixed it right in the middle of the seam of the front piece and the back piece after about 3 cm from the zippered pocket.
Luego he colocado un bolsillo y lo fijo justo en el medio de la costura de la pieza delantera y la pieza trasera despues de unos 3 cm del bolsillo con cierre.
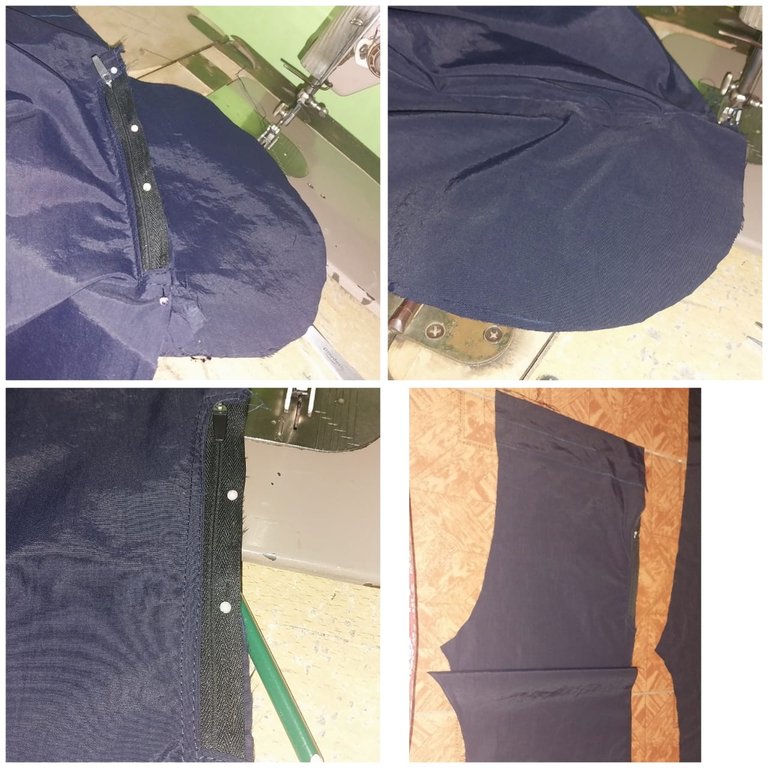
6
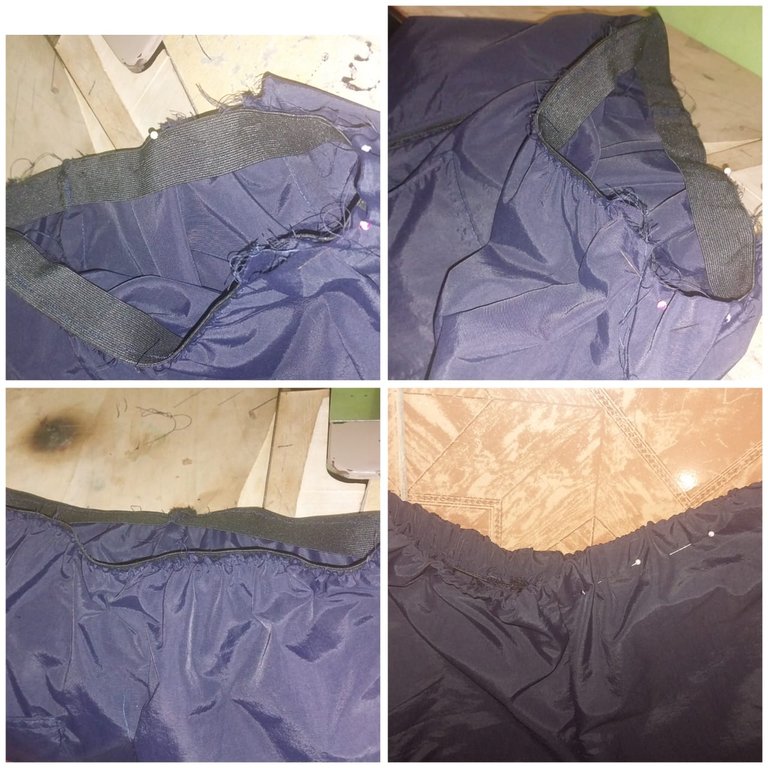
Then in the upper area we place the elastic and we use the pins to place it.
Luego en la zona superior colocamos la elástica y nos apoyamos de los alfileres para colocar esta.
7
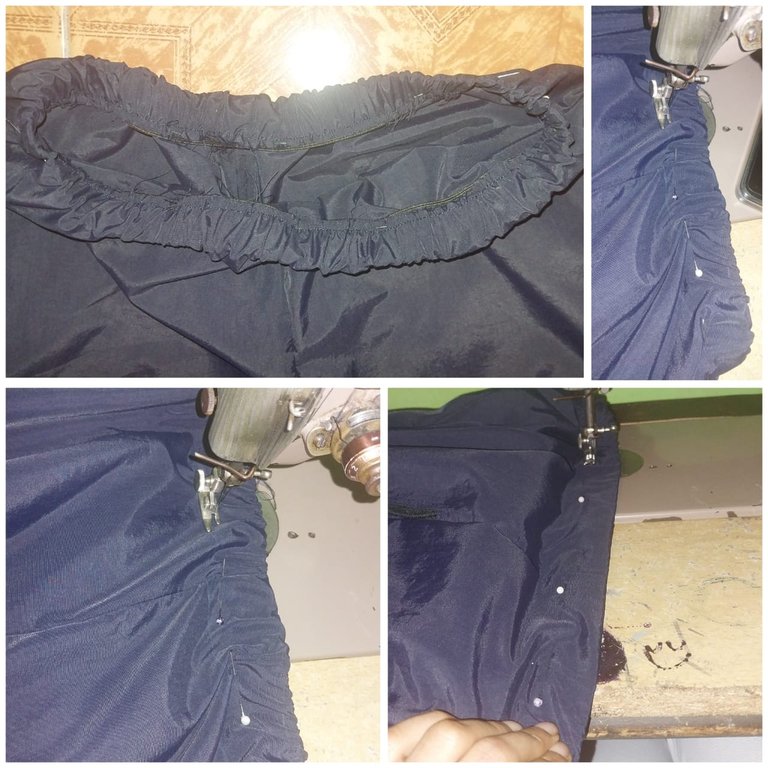
Then I stitched to fix the lower area of the petrin and the shape of the elastic.
Luego he pasado costura para fijar la zona baja de la petrina y la forma de la elastica.
8
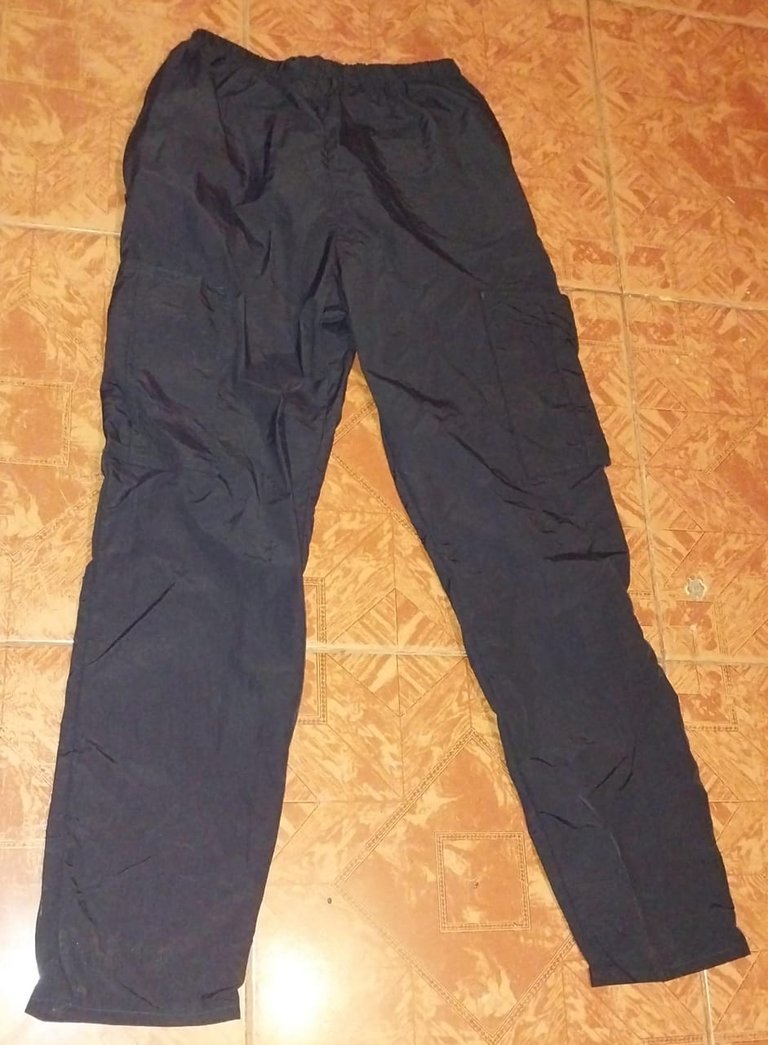
This is the final result, I hope you like it! Greetings friends.
Este es el resultado final, espero que les guste! Saludos amigos.