Greetings to the DIYHub community and the DIY community in general. I hope you're filled with energy and good ideas for your projects at the beginning of the month.
I'm a big fan of recycling, and I was very happy to read about the community's recycling initiative. I'm taking this opportunity to present my first recycling project this month.
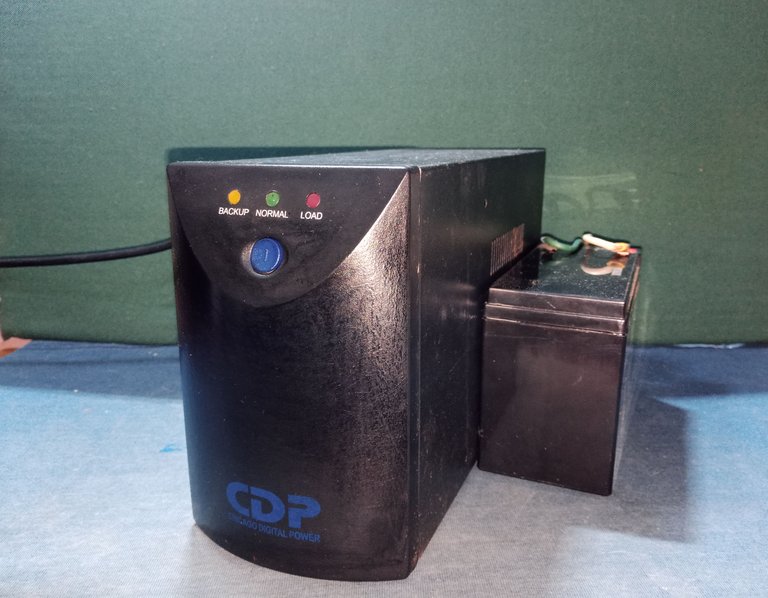
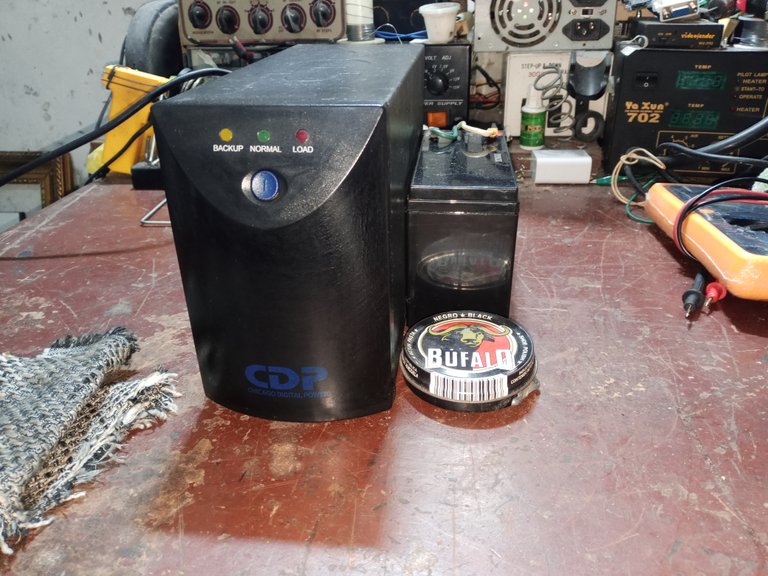
I found this old UPS in the trash, and I thought I'd take it apart and recycle the electronic components so I could finish fixing my computer's UPS, which was damaged by the local power outages.
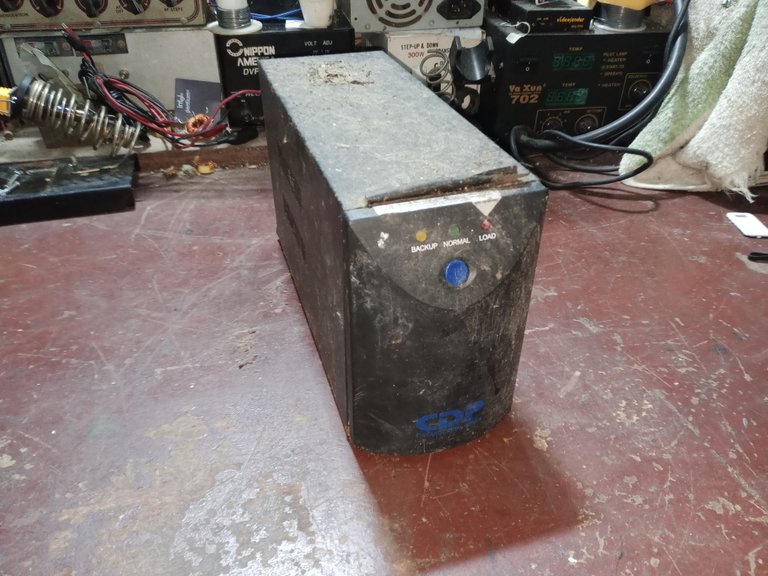
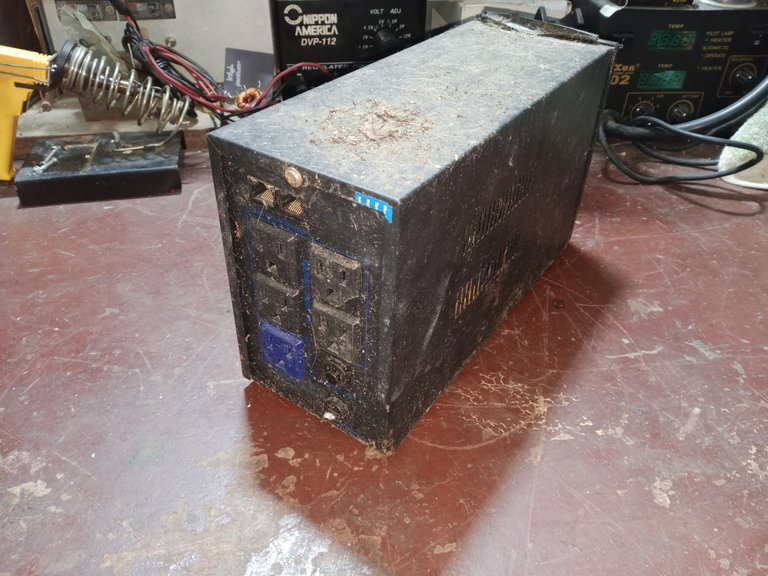
It was pretty messed up; they even cut the power cord. I'm surprised they didn't try to open it.
Note: After turning off the computer, the UPS has to be turned off as well, there are a couple of models that cannot be turned off, but if you want the UPS to last longer: turn off the UPS after turning off the computer.
This UPS had a common fault, very easy to fix, but difficult to diagnose. I hope you find this post useful.
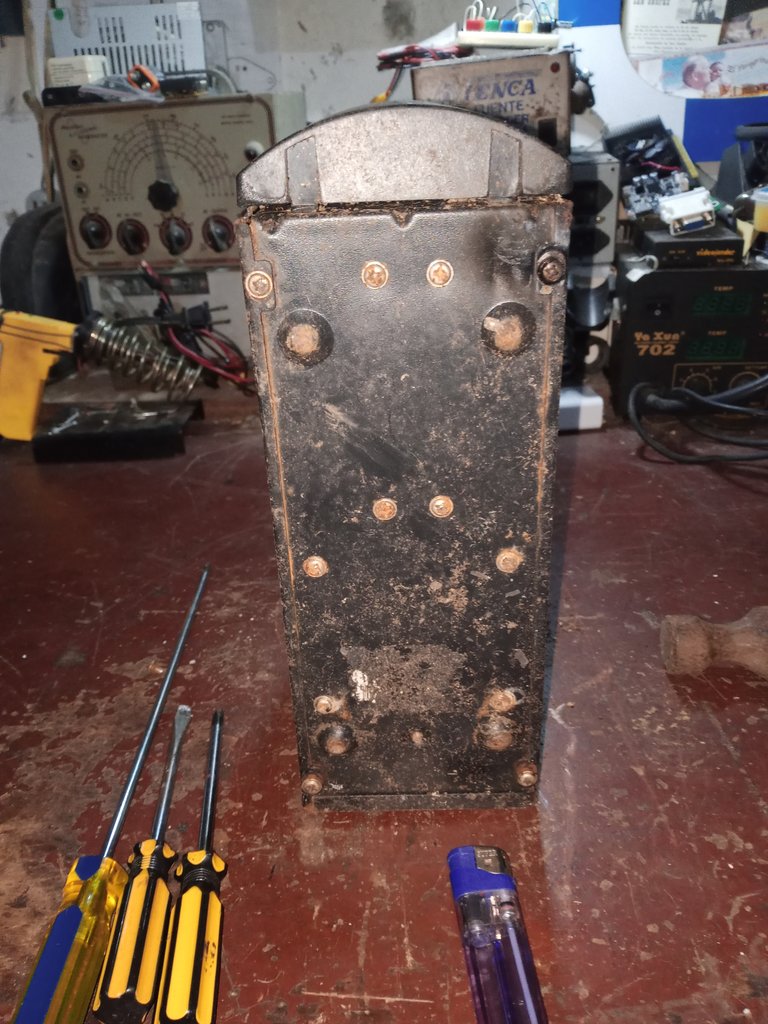
It didn't take long for me to realize that the screws were completely stuck with rust on the threads. To remove them, I had to heat them up a lot to loosen the rust. When the screws cooled, I applied WD-40 to lubricate them and was able to remove them.
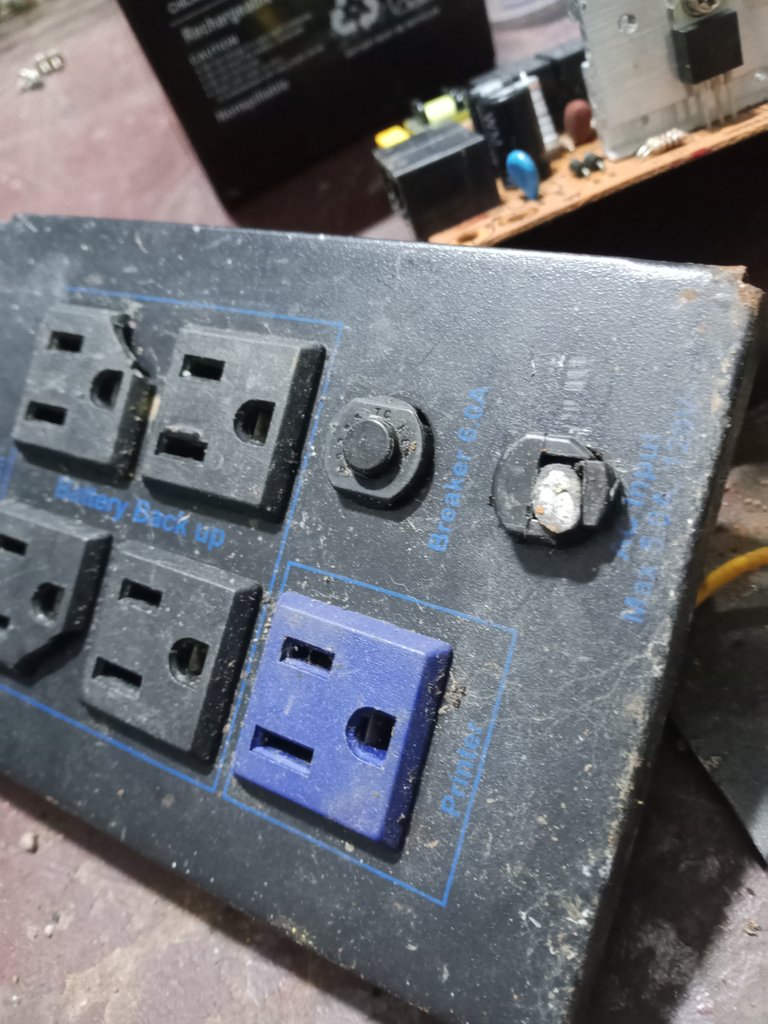
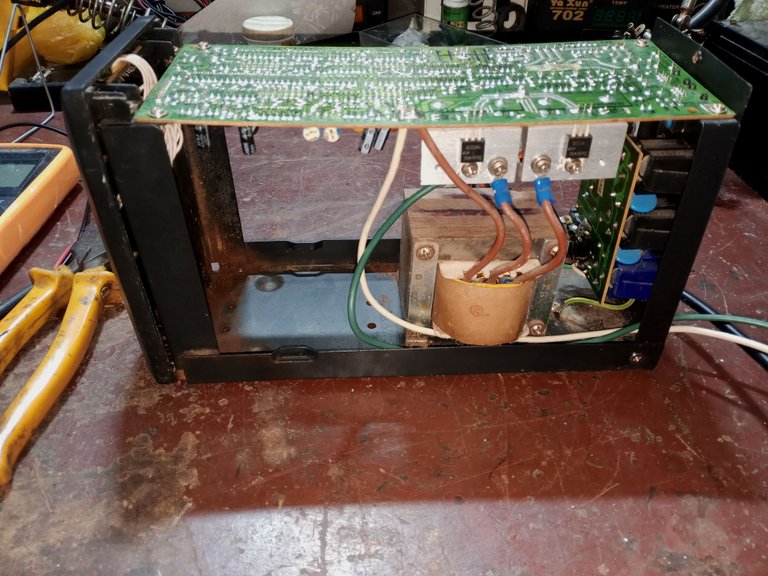
After removing the casing, I was able to check the UPS's condition. The battery holder and part of the chassis look quite corroded by rust, that's true, but the electronics look almost new.
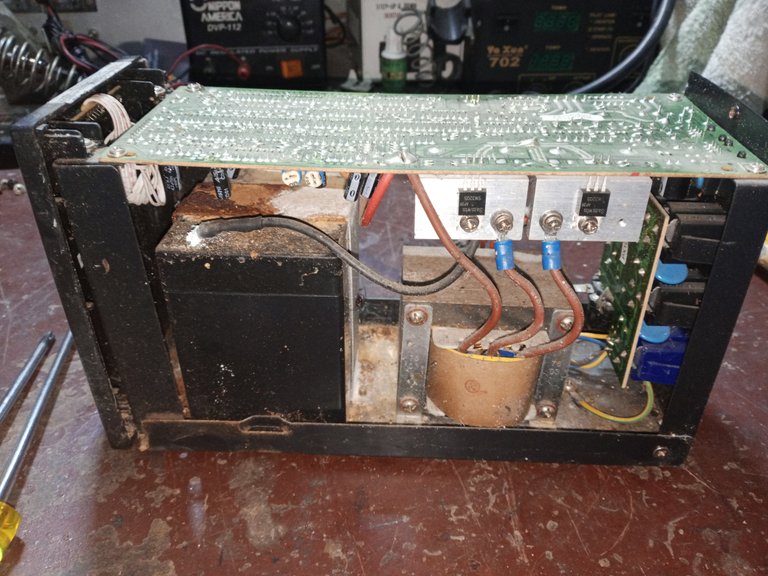
On visual inspection, after disconnecting the connectors and the screws holding the electronic board, no swollen capacitors or burned or cracked electronic components are visible.
More noticeable is the corrosion on the screws, the corrosion on the battery holder, and the sulfate or oxidation on the negative battery terminal (the black cable).

This UPS comes standard with this 12-volt battery and delivers 4.5 amp-hours.
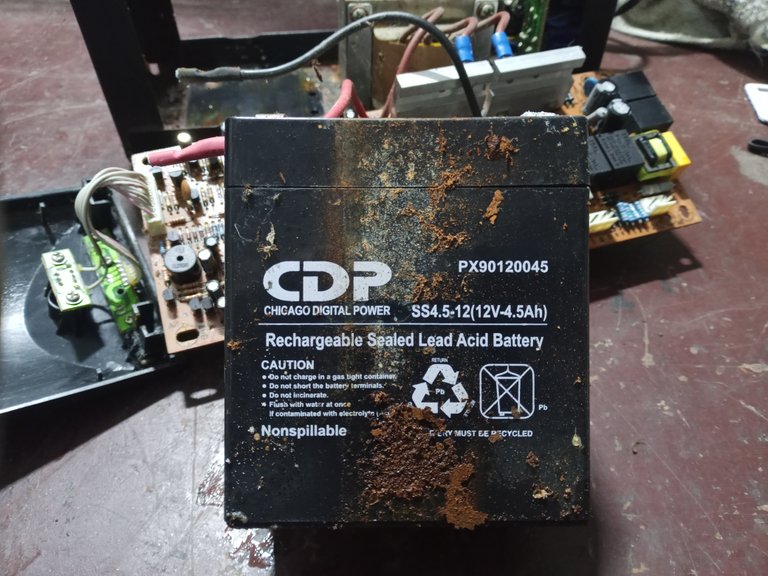
When a battery has this amount of oxide on one of its terminals, there is no proper electrical flow, and the battery will not charge. Most likely, the entire black cable on the negative terminal is also corroded, causing the UPS to fail.
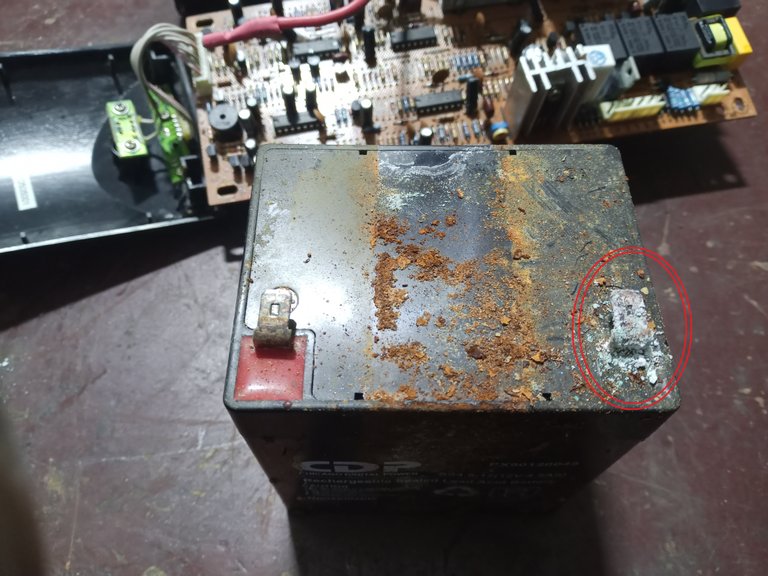
Based on everything we've seen so far, there may even be a chance of recovering this battery. To check its condition, use the tester to measure up to 20 volts DC and check the battery's remaining charge.
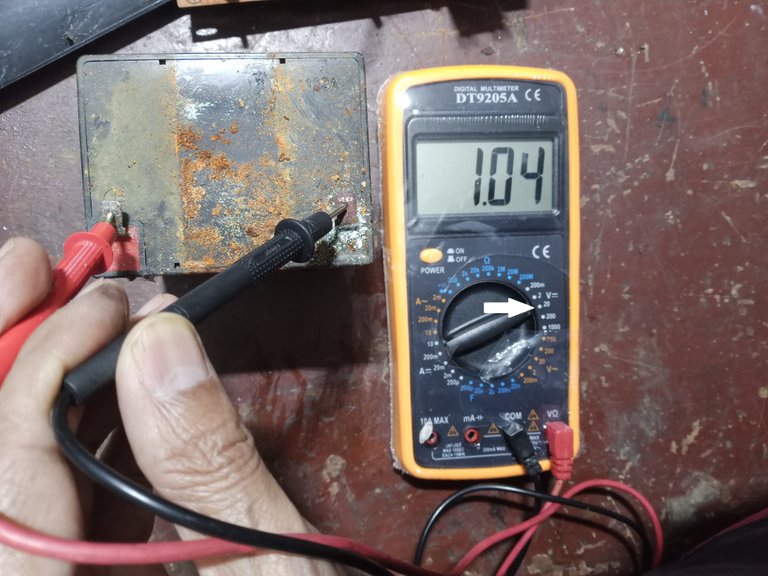
It was a bit disappointing; a rechargeable battery, when in good condition and discharged, should show half its voltage when measured with the tester.
In good condition, but discharged, it might measure about 5 or 6 volts when checked with the tester.
I took my UPS battery, which has a larger capacity and size, and checked it with the tester.

This battery gives me about 12.5 volts. If the UPS I'm testing is working, I might be able to use it somehow.
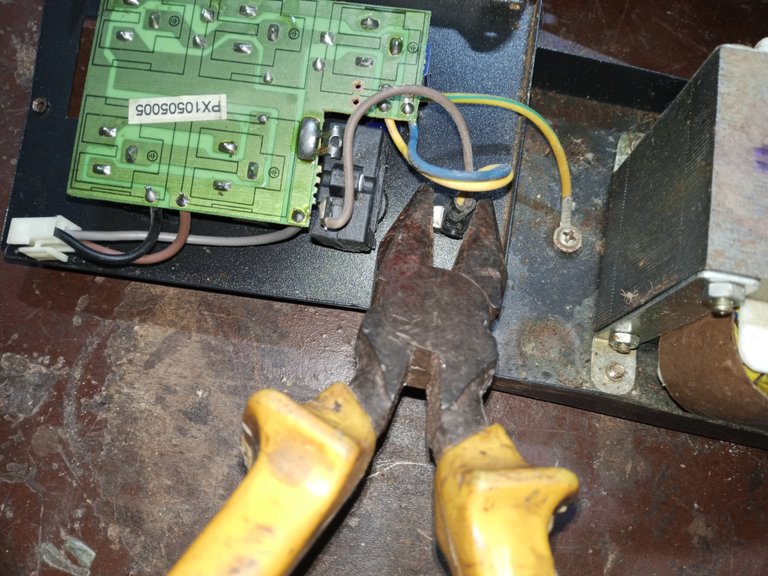
I need to apply power to determine whether to recycle or repair this UPS. Since the power cable was cut, I need to remove the lock holding it in place and use the remaining cable clippings to perform the tests.
It's a two-part plastic snap lock. To remove it for reuse, just gently squeeze it with pliers on the inside and carefully push it out.
I can use it to re-secure the replacement cable.
The brown wire is usually the line, and the blue is the neutral. I set aside the yellow or green wire, which is normally the ground, and never apply electricity to the ground wire.
Just as I imagined, the UPS is working. I placed the tester on 20 volts of DC current between the positive and negative cables that are supposed to feed the battery, and I got 14 volts DC (when the battery, which is the load for that circuit, is connected, that voltage gives a lower value).
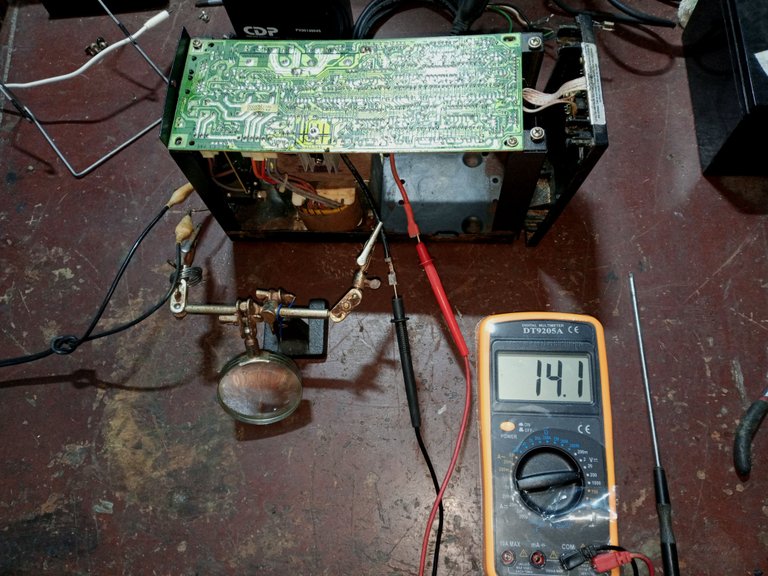
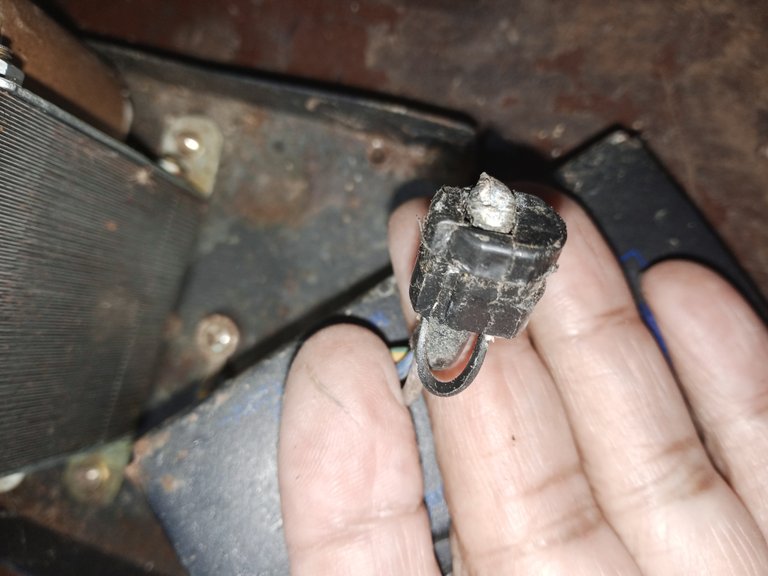
The UPS is going to be repaired: I check the black cable, which is the cable that goes to the sulfated negative terminal of the battery.
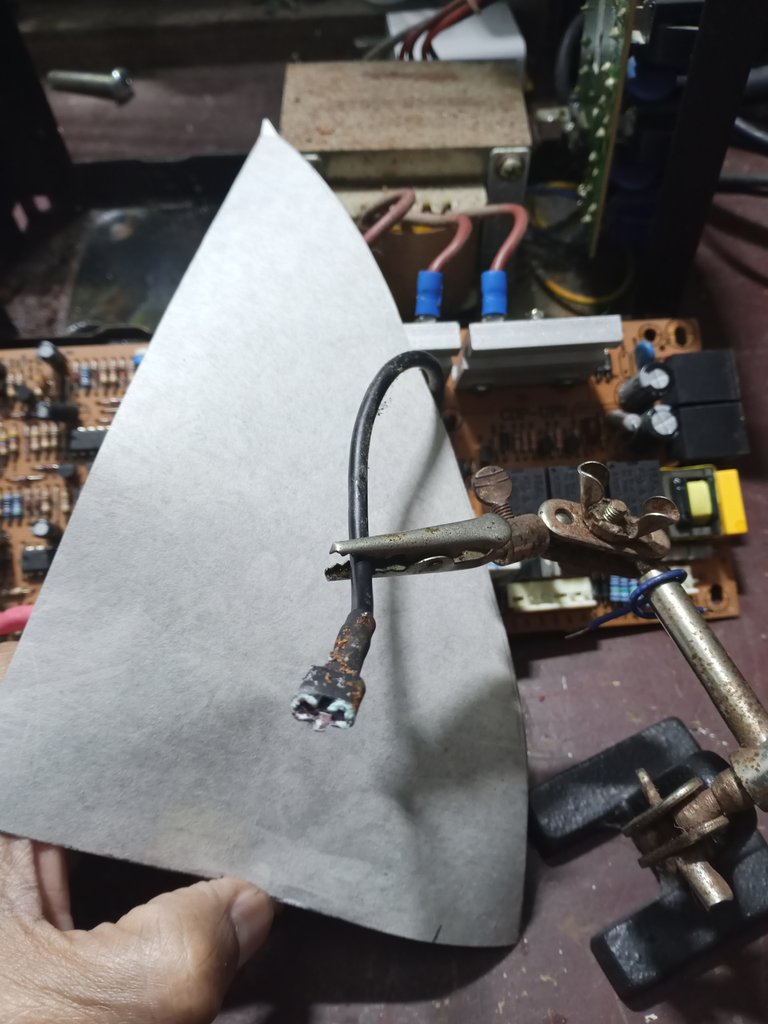
When a sulphated electrical cable terminal is damaged, it prevents the electrical power from flowing smoothly to the battery. When the power fails and the UPS battery is switched on, a sulphated terminal or terminal prevents the electrical current from flowing smoothly.
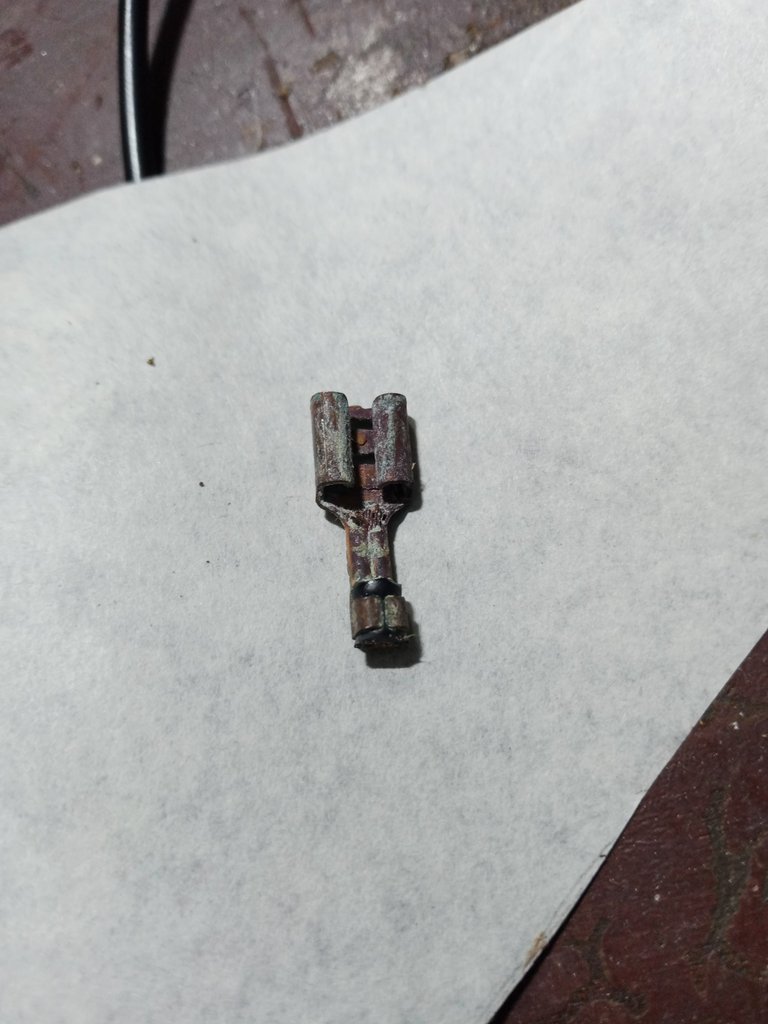
If the electrical terminal or terminal is sulfated, rest assured that the cable to which it is connected is also internally damaged and must be completely replaced without mercy.
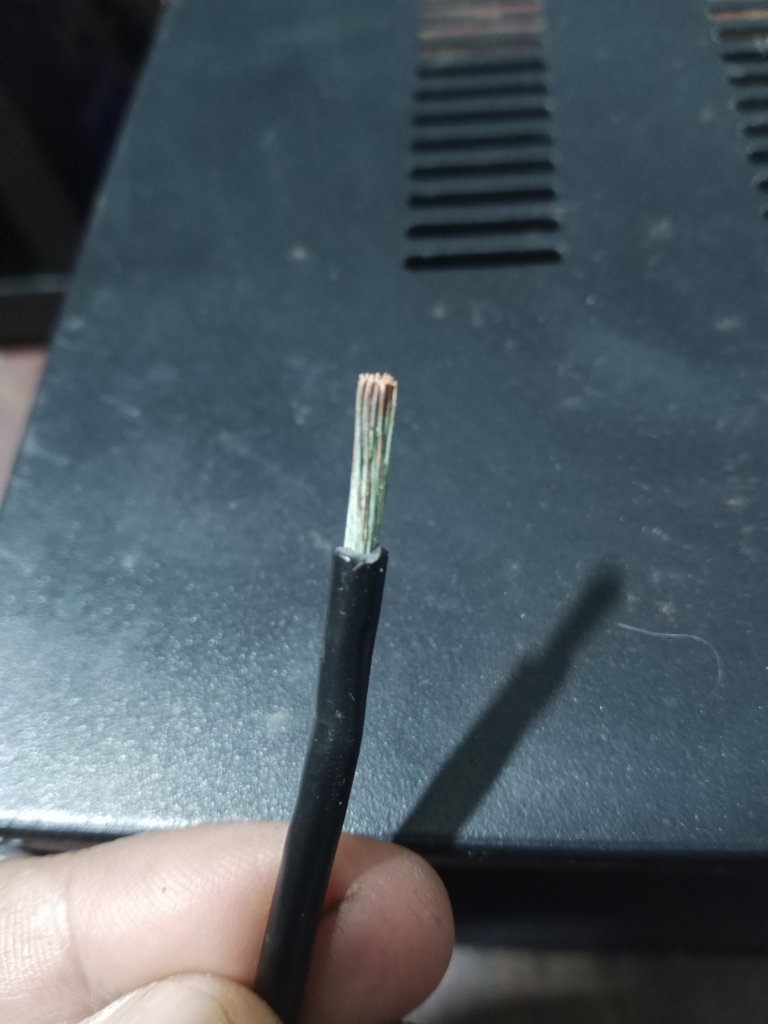
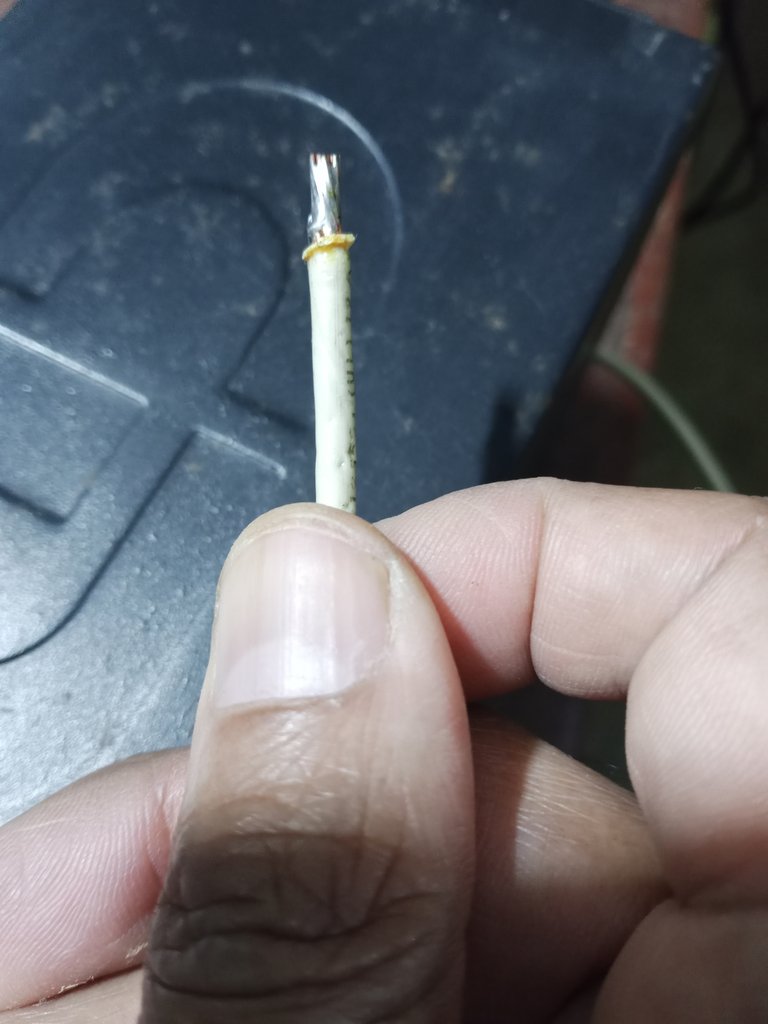
Cut off a portion of the electrical cable's insulation to verify that all the copper in the electrical cable is contaminated.
I'm going to replace both power cords completely. If I leave a contaminated cord, it could cause the UPS to fail again.
But it was a bit complicated. The original power cord was 14 AWG (the wire gauge is determined by the amperage it supports).
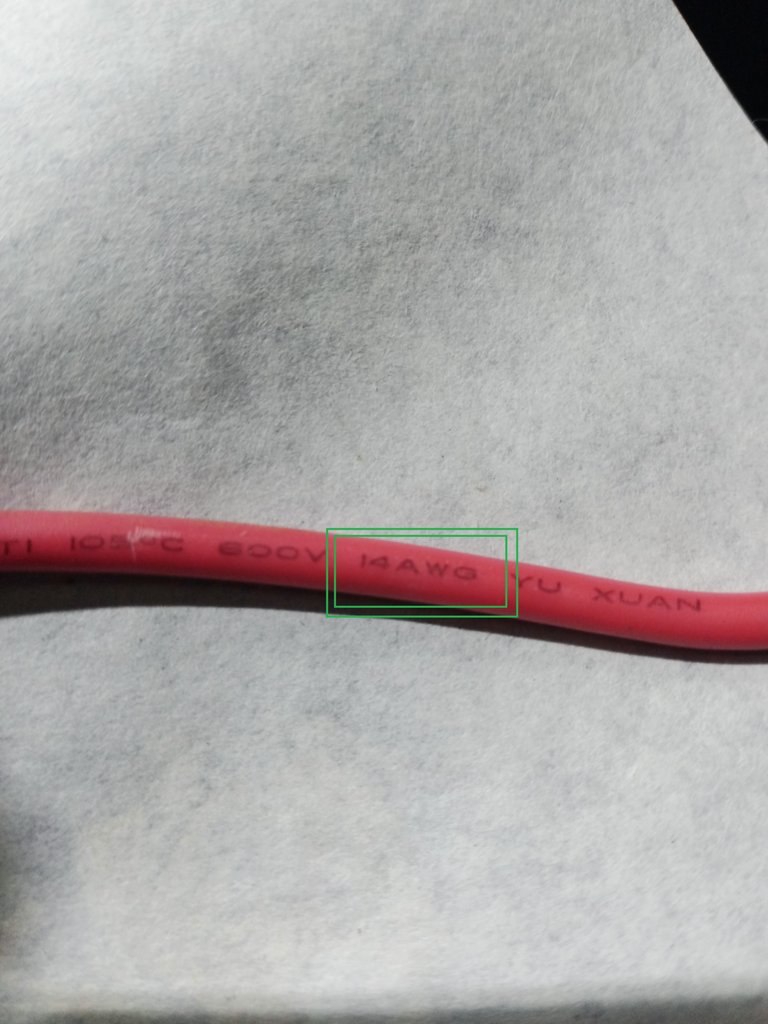
I can't use a smaller AWG cord. I can't use a 16 AWG, much less an 18 AWG (the higher the number, the thinner the cord becomes and the less it can handle). current)

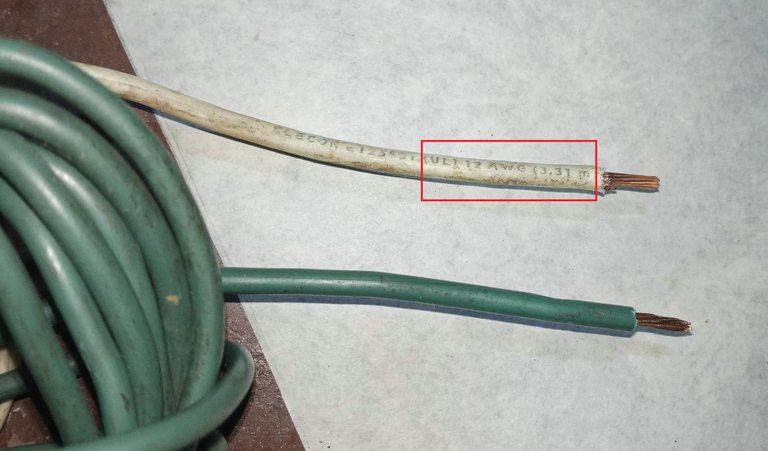
Somehow, all the recycled cables I had stored in the warehouse were 16 AWG or 18 AWG, too small for this use. I finally got a pair of 12 AWG cables, which is a bit larger and is the next size up from 14 AWG. It can handle more amperage than 14 AWG, and that's what I ended up using.
Before soldering a wire to an electronic board, you have to tin it. This is a topic for a future post, but it's necessary to do the job properly.
For the UPS's main power supply, use a cable I recycled a while ago.
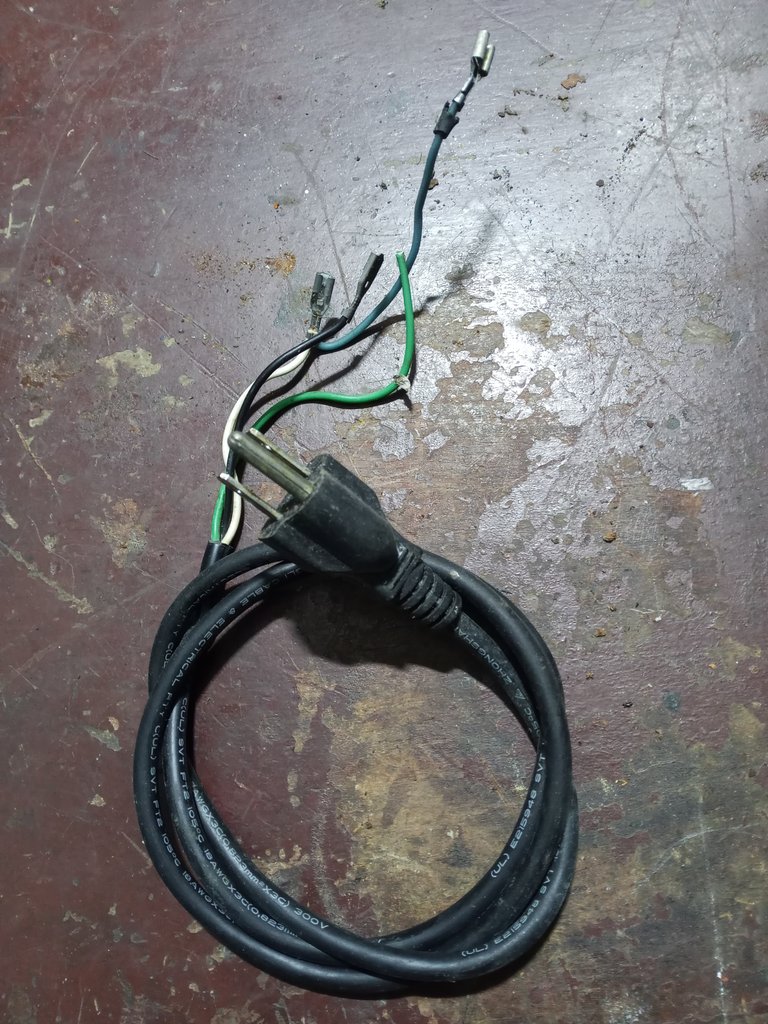
As always, before using recycled material, you must verify that it is in good condition. I checked for damage by placing the tester on a continuity meter with the beep indicator.
In the image, the black wire has no continuity with the pin of the plug on the top side.
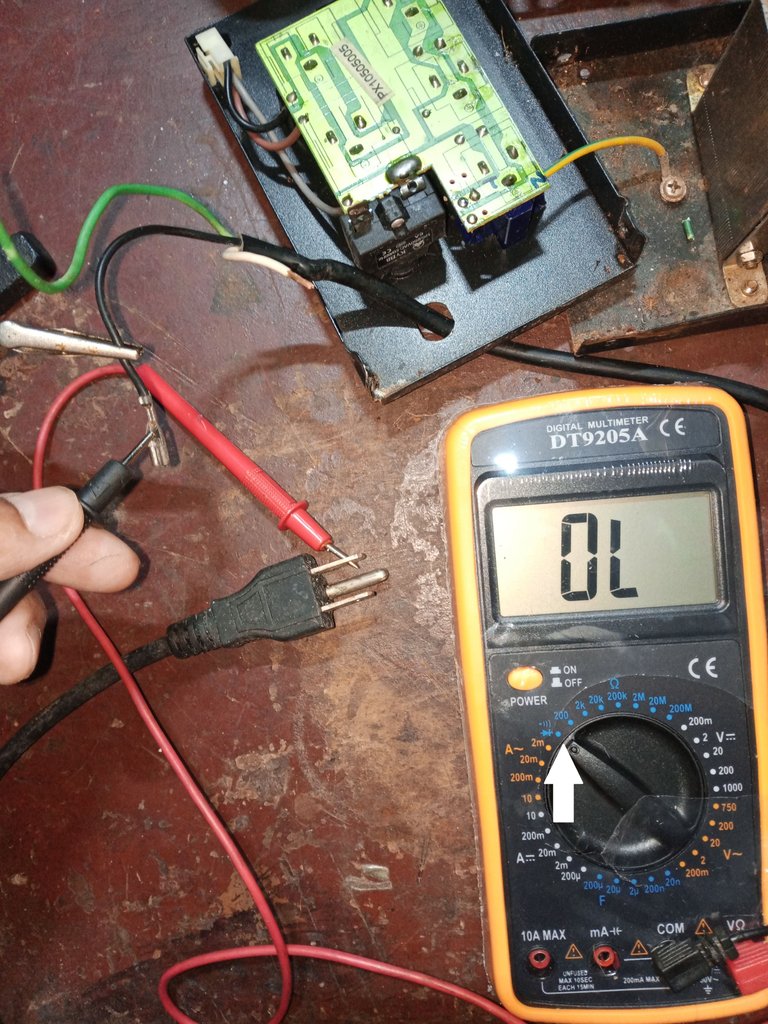
Each of the three wires is measured separately with one of the plug's pins. It should only indicate continuity with one of the plug's pins, just one.
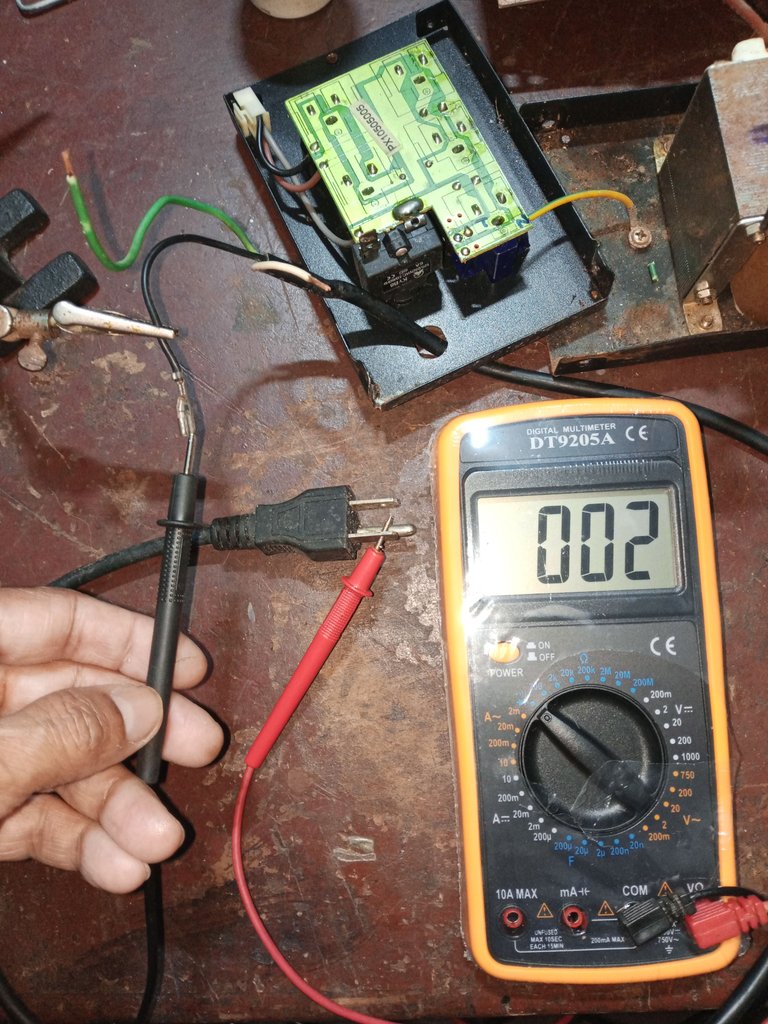
In the following image, we measure the black wire with the pin on the bottom side of the plug and see if it has continuity.
My apologies for clarifying something that you're probably already quite clear about. It's just in case anyone has any questions; it's best to take a couple of minutes.
I built a battery regenerator to test if I can recover the original battery. It's a simple circuit with a diode bridge and a 15 Uf run capacitor.
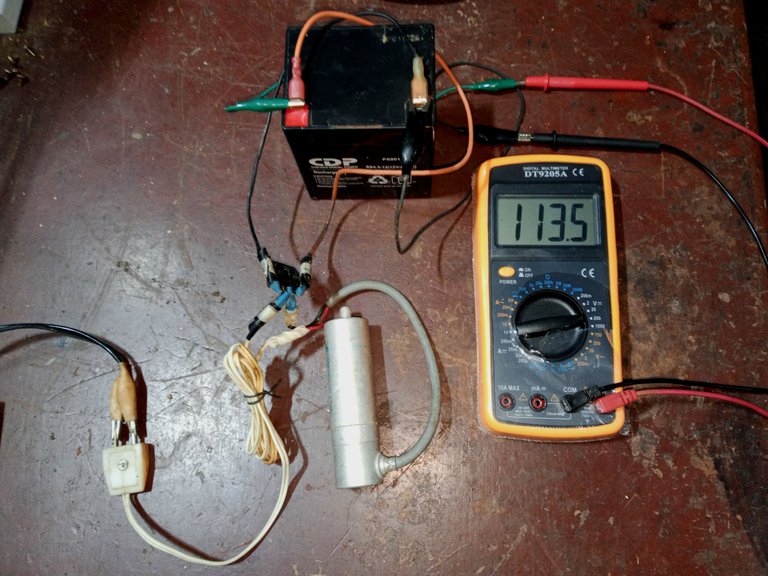
The results look good, but it's actually a slow process that can take a couple of days. The entire battery regenerator procedure and results are for the next post.
This post is already getting very long and might end up being boring, so the additional material will be for another installment.
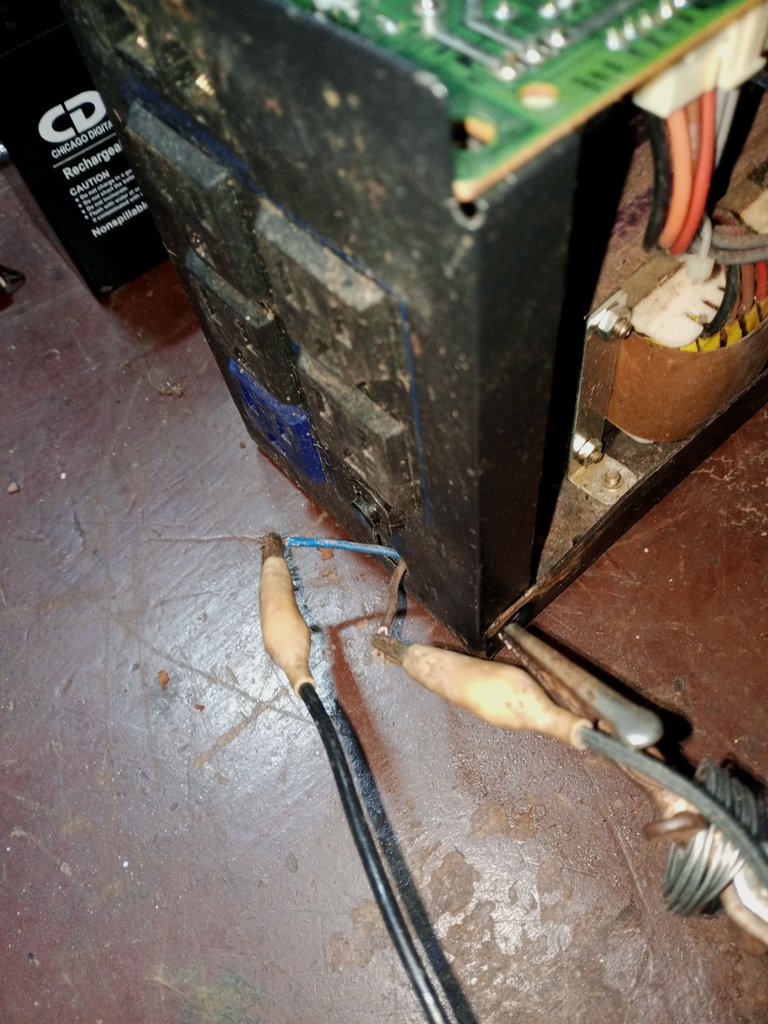
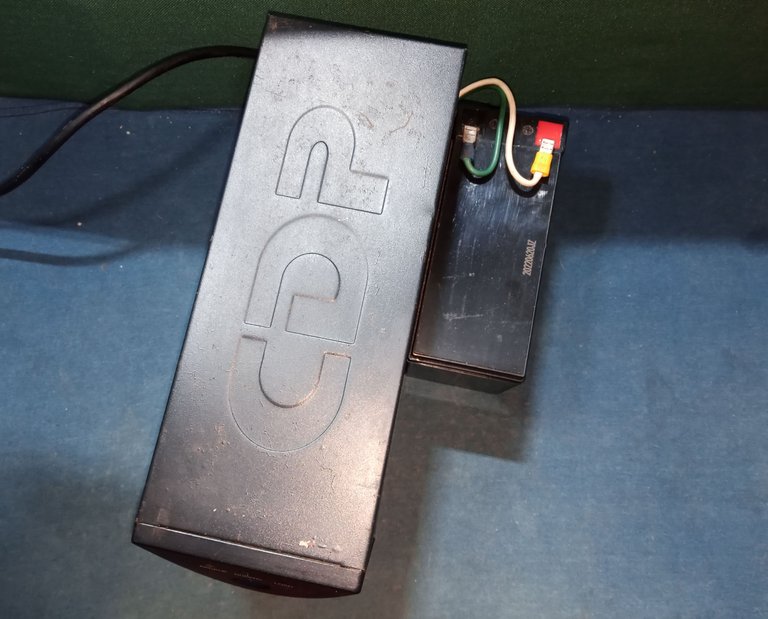
The battery I will be using is 12 volts and 7 amp/hour, it is too big for the size of the UPS chassis, while I fix the original battery I will connect it externally.

I replaced the original power cables and left enough length to insert the other battery on the outside.
After washing the UPS casing, I used my super secret technique to revive the black plastic that looked white. (shoe polish)
The UPS is working and charging the battery. I was only hoping to use it as a spare, but fortunately, I was able to find this common fault with this type of device and put it back into service.

For now, I'm going to leave it plugged in, charging, for 8 hours before starting to use it, which is the standard for starting to use it properly.
This post is a bit long, my sincere apologies for that.
Thank you so much for stopping by and reading.
Have a great week.
Peace.

- I used Google Translate for the English language.
- I used TextStudio for the Spanish header.
- Unless otherwise noted, the images are screenshots of my work in the workshop.

Saludos a la comunidad DIYHub y a la comunidad DIY en general, este inicio de mes espero que estén llenos de ánimo y buenas ideas para sus proyectos.
Soy muy fan del reciclaje y me alegré mucho de leer sobre la iniciativa que presento la comunidad con el tema de reciclar, aprovecho de presentar mi primer trabajo de reciclaje en este mes.
Encontré este viejo UPS en la basura, y pensé en desmontarlo y reciclar los componentes electrónicos, para poder terminar de arreglar el UPS de mi computador, que se dañó por los continuos fallos del servicio de electricidad local.
Estaba bastante hecho polvo, hasta le cortaron el cable de alimentación eléctrica, me extraño que no trataron de abrirlo.
Nota: Despues de apagar el computador, los UPS tienen que apagarse tambien, (en el mercado hay un par de modelos de UPS que no pueden ser apagados) pero si quieres que el UPS te dure por mas tiempo: apaga el UPS despues de apagar el computador.
Este UPS presentaba una falla comun, muy facil de solucionar, pero dificil de diagnosticar. Espero que te resulte util la publicacion.
No tarde mucho en darme cuenta de que los tornillos estaban totalmente pegados con el óxido en las roscas, para poder sacarlos tuve que calentarlos mucho para que se desprendiera el óxido y al enfriarse los tornillos, les aplique WD-40 para lubricarlos y lograr sacarlos.
Al retirar la carcasa pude verificar el estado del UPS, el soporte de la batería y parte del chasis se ve bastante corroído por el óxido, eso es cierto, pero la parte electrónica luce casi nueva.
En la inspección visual, después de desconectar los conectores, y los tornillos que sostienen la tarjeta electrónica, no se ve qué haya capacitores hinchados, no se ven componentes electrónicos quemados o partidos.
Se nota mejor la corrosión de los tornillos, la corrosión del soporte de la batería y el sulfato o la oxidación del borne negativo de la batería (el cable negro).
Este UPS viene de fábrica con esta batería de 12 volt y entrega 4,5 amper/hora.
Cuando una batería tiene esta cantidad de óxido en uno de sus bornes, no hay una buena circulación de electricidad, la batería no se cargara. Lo más seguro es que todo el cable negro del borne negativo también este lleno de corrosión y sea la causa de la falla del UPS.
Por todo lo visto hasta ahora, puede incluso que haya posibilidades de recuperar esta batería, para verificar su estado, coloque el tester para medir hasta 20 volts de corriente continua y verifique la carga remanente.
Fue un poco decepcionante, una batería recargable cuando está en buenas condiciones y está descargada debe presentar la mitad de su voltaje al medirse con el tester.
En buen estado, pero estando descargada, podría medir unos 5 o 6 volts al verificarla con el tester.
Tome la batería de mi UPS que es de mayor capacidad y tamaño, la verifico con el tester.
Esta batería me da unos 12,5 volts, si el UPS que estoy revisando funciona, es posible que pueda usarla de alguna manera.
Tengo que aplicar alimentación eléctrica para saber si reciclo o reparo este UPS, como cortaron el cable de alimentación eléctrica, tengo que retirar el seguro que lo sostiene y aprovechar los recortes de cable sobrantes para hacer las pruebas.
Es un seguro plástico en dos partes asegurado a presión, para sacarlo y poder reusarlo, solo hay que apretarlo suavemente con un alicate por el lado interno y empujarlo con cuidado hacia afuera.
Puedo usarlo para volver a asegurar el cable de reemplazo.
El cable marrón por lo general es la línea y el azul es el neutro, aparto el cable amarillo o verde que por norma es la tierra y no aplicas nunca electricidad por el cable de tierra.
Tal como imagine, el UPS funciona, coloque el tester en 20 volts de corriente DC entre el cable positivo y el negativo que tienen que alimentar a la batería y obtuve 14 volts DC (cuando se coloca la batería que viene siendo la carga de ese circuito ese voltaje da un valor menor)
El UPS va a reparación: reviso el cable negro que es el cable que va al polo negativo sulfatado de la batería.
El terminal del cable eléctrico, cuando está sulfatado, no permite el buen paso de la alimentación eléctrica hacia la batería y cuando falla el servicio eléctrico y entra en servicio la batería del UPS, un terminal o borne sulfatado no permite el buen paso de la corriente eléctrica.
Si el borne o terminal eléctrico está sulfatado, ten por seguro que el cable adonde está conectado, también está internamente dañado, se tiene que cambiar completo sin compasión.
Corte una parte del aislante del cable eléctrico para verificar, todo el cobre del cable eléctrico está contaminado.
Voy a reemplazar de raíz ambos cables de electricidad, si dejo un cable contaminado puede volver a causar la falla del UPS.
Pero fue un poco complicado, el cable eléctrico original era 14 AWG (el calibre del cable está dado por la capacidad de amperios que soporta)
No puedo usar un cable con un calibre AWG menor, no puedo usar un AWG 16, mucho menos un AWG 18 (a mayor número el cable es cada vez más delgado y soporta mucha menos corriente)
De algún modo todos los cables reciclados que tenía guardado en el depósito eran 16 AWG o 18 AWG, muy pequeños para este uso, finalmente conseguí un par de cables 12 AWG, que es un poco más grande, y es la medida que sigue al 14 AWG, soporta más amperaje que el 14 AWG y es el que termine usando.
Antes de soldar un cable en una tarjeta electrónica tienes que estañarlo, eso es un tema para una publicación futura, pero es algo necesario para poder hacer bien el trabajo.
Para la alimentación eléctrica principal del UPS use un cable que recicle hace un tiempo.
Como siempre, antes de usar material reciclado tienes que verificar que esté en buen estado, comprobé que no estuviese dañado, colocando el tester en medidor de continuidad con el indicador de sonido.
En la imagen el cable negro no tiene continuidad con el pin del enchufe del lado de arriba.
Cada uno de los tres cables se mide por separado con uno de los pines del enchufe, solo debe indicar continuidad con solo uno de los pines del el enchufe, solo con uno.
En la siguiente imagen medimos el cable negro con el pin del lado de abajo del enchufe y si tiene continuidad.
Mis disculpas por aclarar algo que de seguro ya deben tener más que claro, solo es por si alguien tiene la duda, es mejor robarme un par de minutos.
Arme un regenerador de baterías para probar si puedo recuperar la batería original, es un circuito simple, tiene un puente de diodos, un capacitor de marcha de 15 Uf.
Los resultados parecen buenos, pero en realidad es un proceso lento que puede tardar un par de días, todo el procedimiento del regenerador de baterías y los resultados son para la siguiente publicación.
La publicación se hace ya muy larga y puede terminar por aburrir, así que el material adicional será para otra entrega.
La batería que usaré es de 12 volts y 7 amper/hora, es demasiado grande para el tamaño del chasis del UPS, mientras arreglo la batería original voy a conectarla de forma externa.
Cambie los cables de electricidad originales y les deje suficiente longitud para colocar la otra batería por el lado de afuera.
Después de lavar la carcasa del UPS, use mi supertécnica secreta para revivir el plástico negro que luce blanco. (crema para pulir zapatos)
El UPS funciona y carga la bateria, yo solo esperaba usarlo como repuesto , pero gratamente pude hallar esta falla tan comun en este tipo de aparato y ponerlo en servicio nuevamente.
De momento voy a dejarlo 8 horas conectado cargando, antes de empezar a usarlo, que es la norma para empezar a usarlo bien.
La publicacion me ha quedado larga, mis sinceras disculpas por eso.
Muchas gracias por pasar y leerme.
Que tengan una excelente semana.
Paz.
- He usado el traductor de Google para el idioma inglés.
- Use el programa de TextStudio para el encabezado en español.
- Las imágenes a menos que lo indique son capturas de mi trabajo en el taller.