Greetings to the Hive DIY community. I wish you a great month, and hope you have plenty of ideas. I'm just looking forward to seeing the many clever posts you'll share with us soon.
This time, I'm sharing a simple and useful upcycling project I made for my house.
I'm catching up as best I can. Since I've been bedridden for several weeks, everything is in disarray. One problem in the area where I live, which is somewhat isolated and heavily vegetated, is that if you're not careful, everything gets covered in leaves.
I needed a rake, or what we call a sweeping palm, to be able to clear a good carpet of leaves. You can make a rake with a two-inch angle, or you can also make it with a piece of half-inch PVC pipe with screws. You can even make it with a piece of two-inch PVC pipe. There is a version of a rake that uses screws and wood.
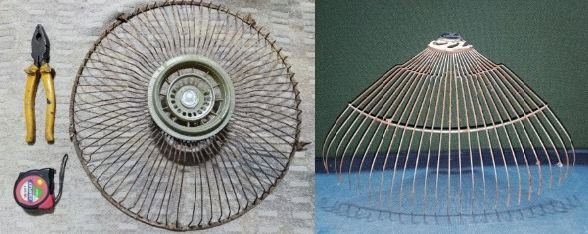
In my case, I took the opportunity to recycle parts from the chassis of an old electric fan, which makes the build quick, as its shape requires very few modifications.
At first, I had chosen a fan cover that wouldn't work for the rake.
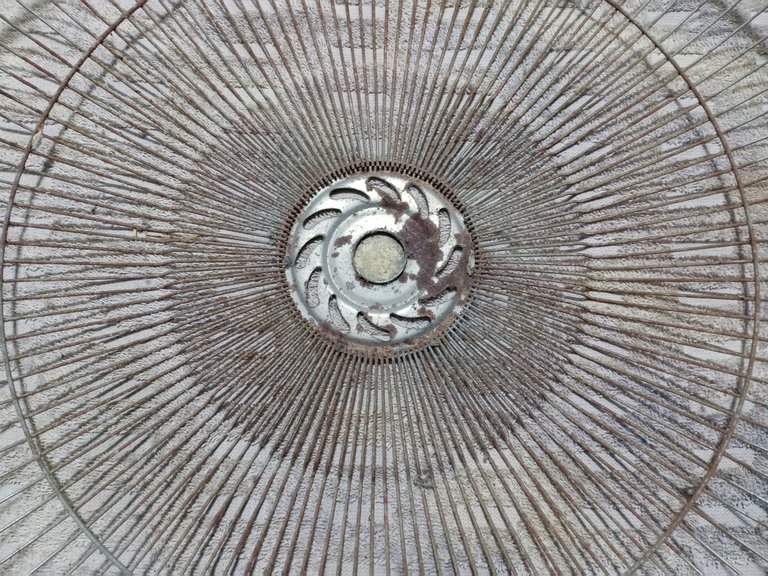
To make the rake, I needed the grille to have one or more reinforcing rings, which the cover I initially chose didn't have.
The thing is, I could have also made a reinforcement, but since I had several different grilles from other fans, it would have been a waste of time.

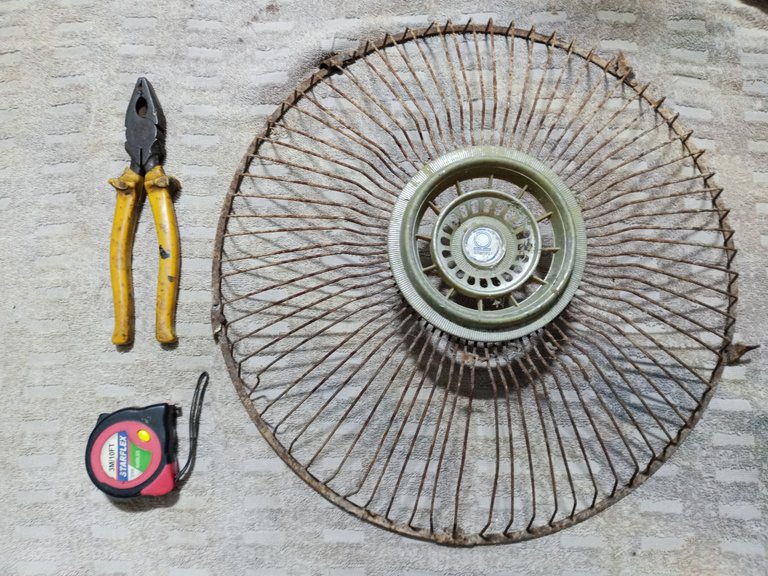
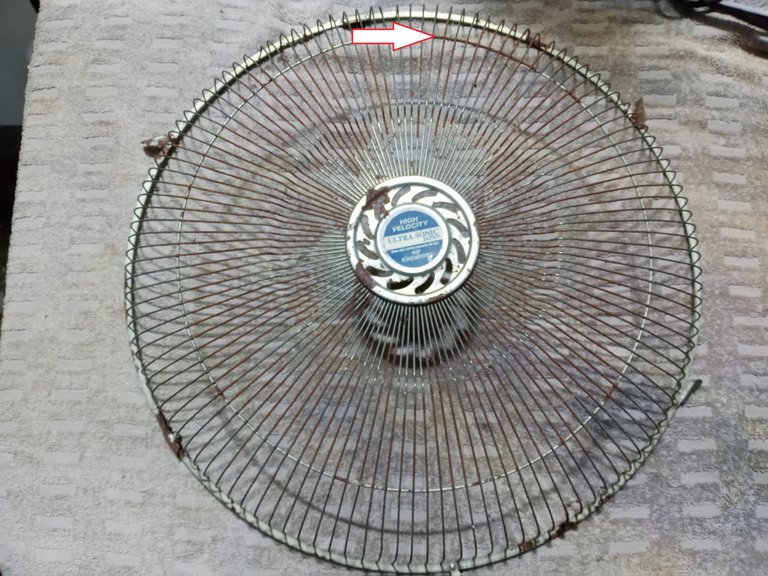
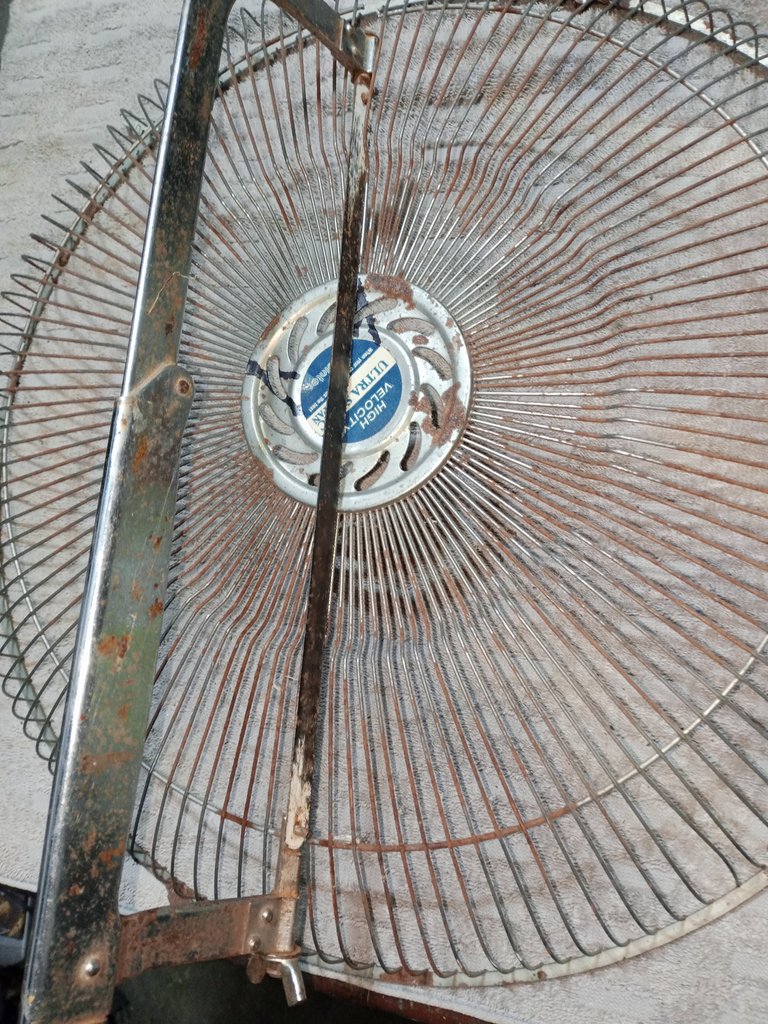
In the end, I chose a more suitable grate for the job. It's a sturdy grate with at least one reinforcing ring.
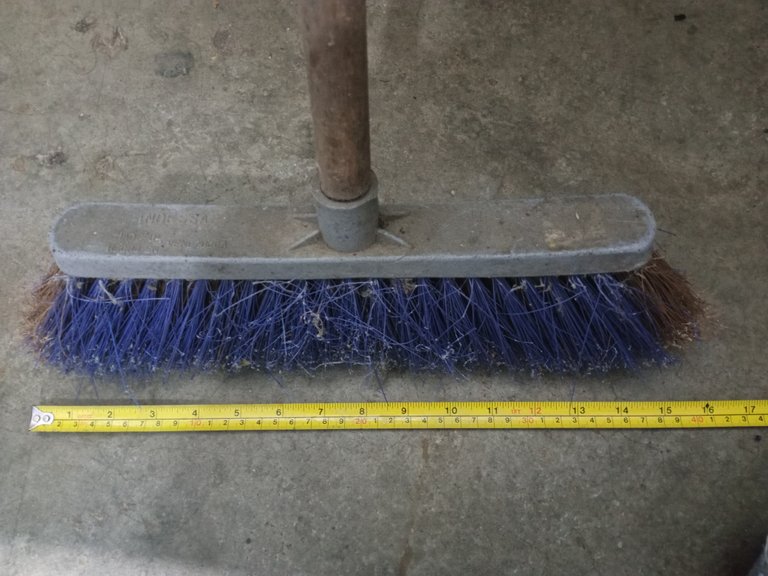
The commercially available rake, which I saw for reference, had about 22 strands of wire, and as another reference for construction, I measured a conventional sweeping brush, which is about 40 centimeters.
I decided that about 26 strands of wire would be enough for me.
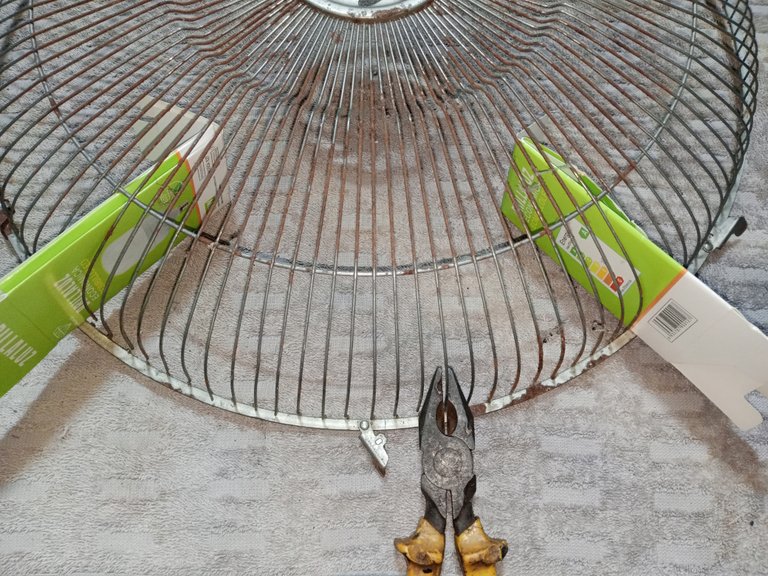
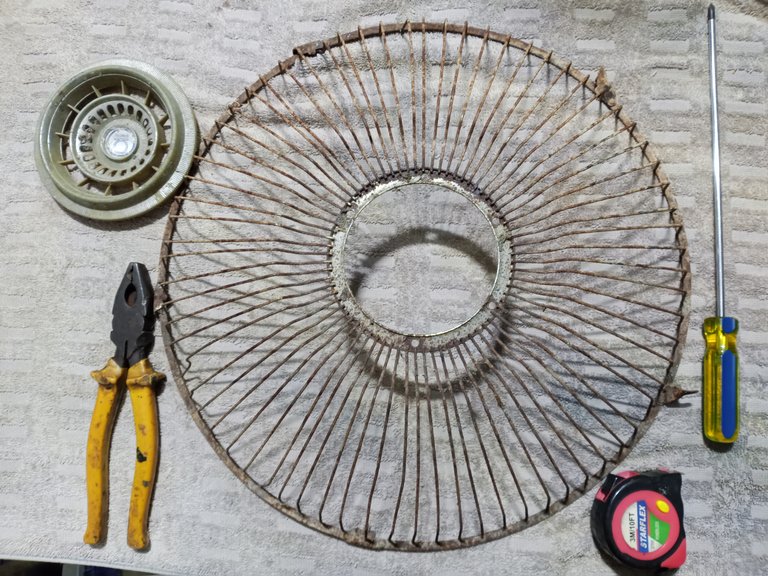
Use wire cutters to cut the wire junction with the outer ring of the grille.
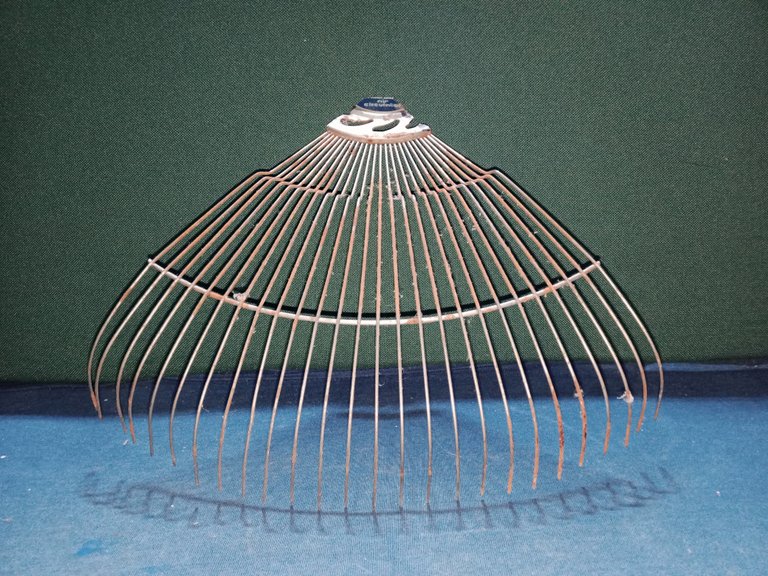
Cut off the rest of the grille with a hacksaw. The job would be a little easier with a grinder, but I still can't hold it.
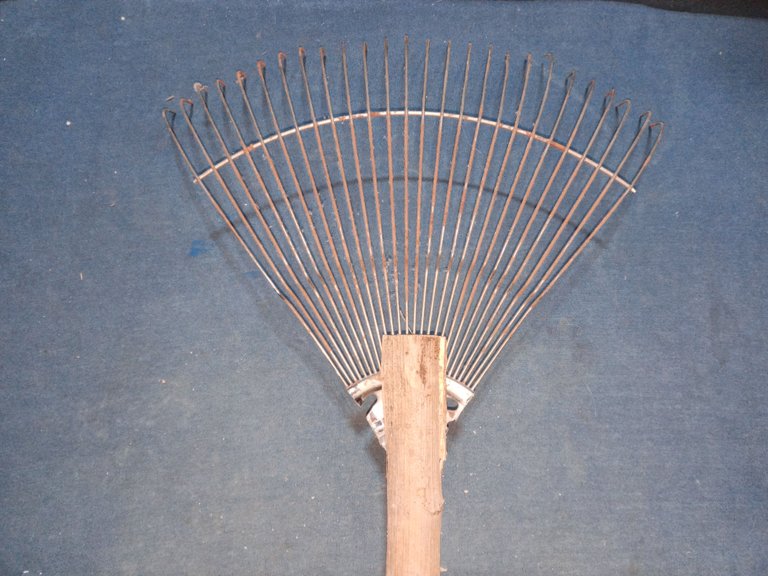
I like how the rake is looking.
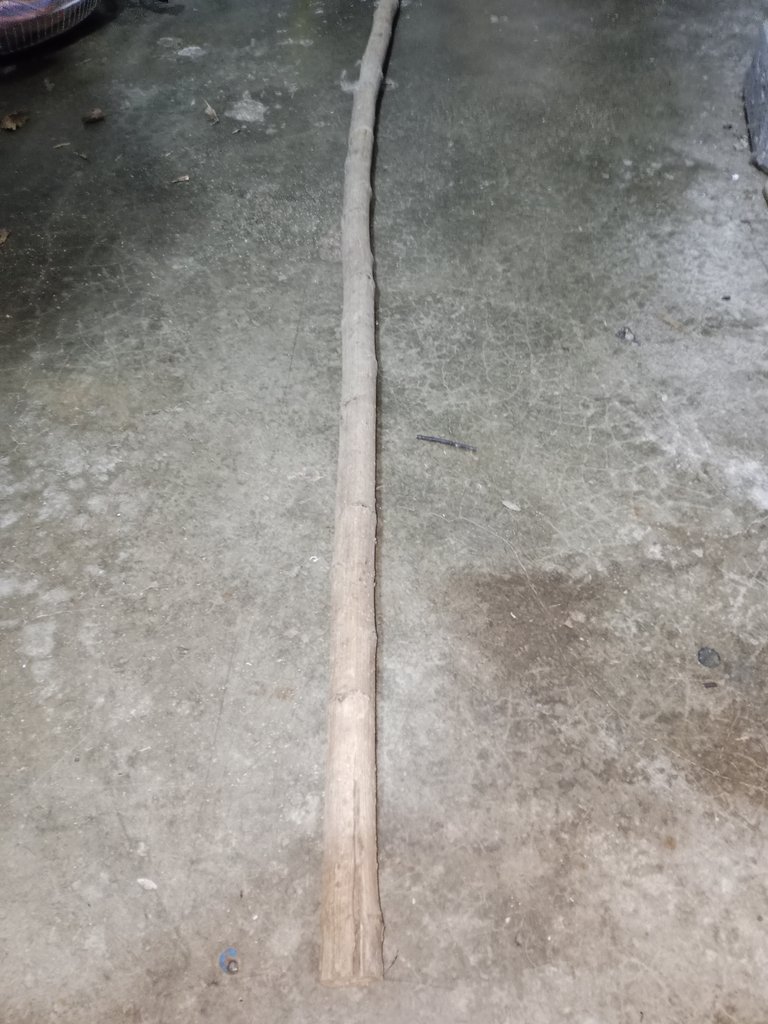
I found a sturdy branch long enough to make the stick; that's all I needed.
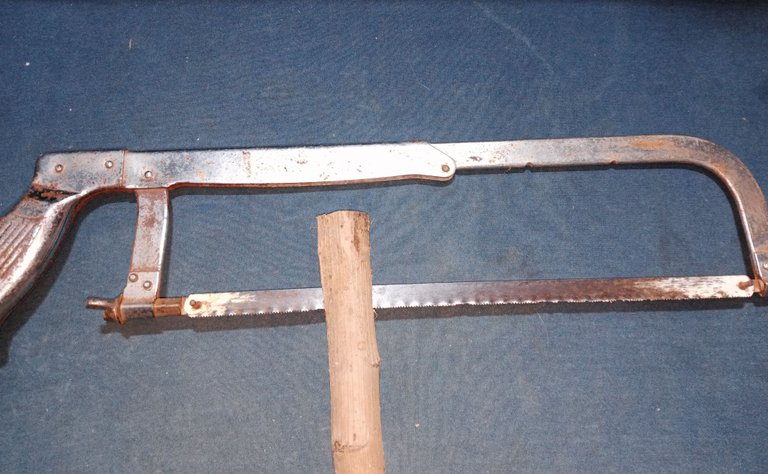
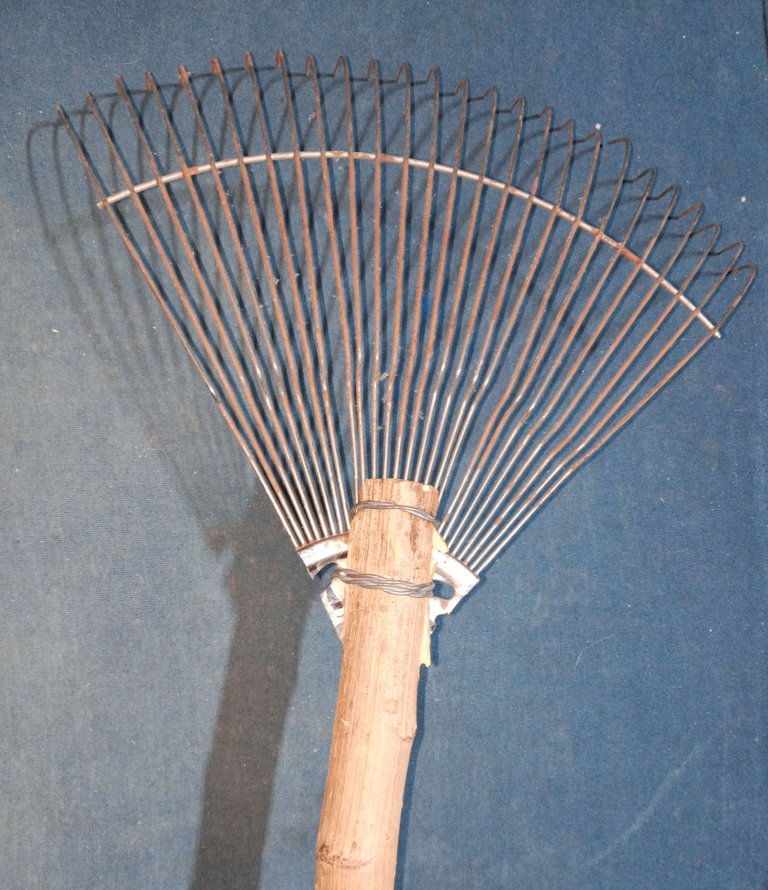
With the hacksaw, I made a crosswise cut at one end of the branch and inserted my rake.
I used wire to secure the rake, but I reinforced it to make it more resistant. You can do this with a drill, but if you're not in a hurry, a screwdriver and a vice are more than enough.

Well, this is a very useful and fairly simple recycling project. The best of all is that I still have more parts of the fan to make another invention for a future publication.
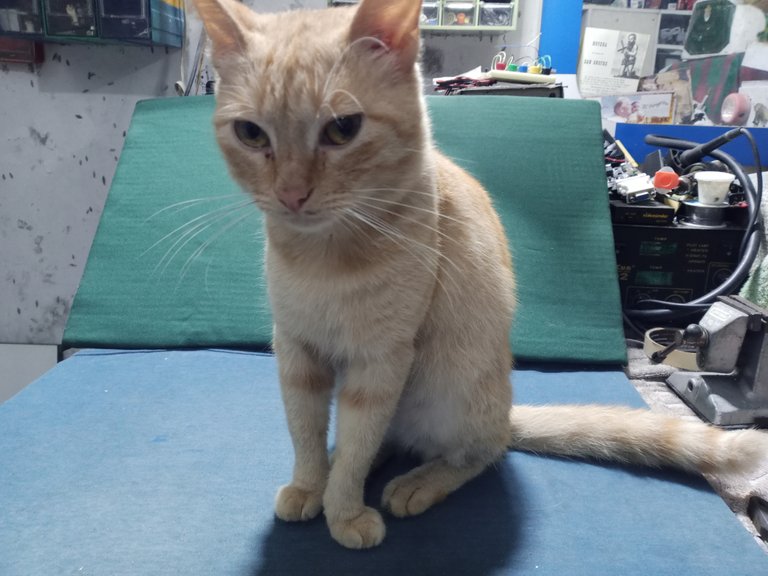
Finish on time, the inspector's here. (He's a tyrant, don't let his tender gaze fool you.)
Thank you so much for stopping by and reading.
Have a great week.
Peace.
- I used Google Translate for the English language.
- I used TextStudio for the Spanish header.
- Unless otherwise noted, the images are screenshots of my workshop work.

Saludos a la comunidad de Hive Diy, les deseo un excelente mes, que tengan abundancia de ideas, solo espero a ver la cantidad de publicaciones ingeniosas que nos compartirán próximamente.
En esta ocasión les comparto un sencillo y útil proyecto de reciclaje que hice para mi casa.
Estoy poniéndome al día, lo mejor que puedo, como estuve en cama varias semanas, todo esta patas arriba. Un problema en una zona donde vivo, que es una zona un poco aislada y con mucha vegetación, es que si te descuidas todo se inunda de hojas.
Necesitaba un rastrillo o como llamamos una palmera de barrer, para poder separar una buena alfombra de hojas. Se puede fabricar un rastrillo con un ángulo de dos pulgadas o se puede hacer también con un trozo de tubo de PVC de media pulgada con tornillos, incluso con un trozo de tubo de PVC de dos pulgadas, hay una versión de rastrillo con el uso de tornillos y madera.
En mi caso aproveché para reciclar partes del chasis de un viejo ventilador eléctrico, lo que hace que la construcción sea rápida, ya que por su forma se requieren muy pocas modificaciones.
Al principio yo había escogido una cubierta de ventilador que no me serviría para hacer el rastrillo.
Para hacer el rastrillo, necesitaba que la rejilla tuviese uno o más aros de refuerzo, que la cubierta que escogí al inicio no tenía.
Pasa que también podía haber hecho un refuerzo, pero como tenía varias cubiertas diferentes de otros ventiladores sería un desperdicio del tiempo.
Al final tomé una rejilla más apropiada para hacer el trabajo, es una rejilla de construcción robusta y tiene por lo menos un aro de refuerzo.
El rastrillo de uso comercial, que pude ver a modo de referencia, tenía unas 22 tiras de alambre, y como otra referencia para la construcción, tome la medida de un cepillo de barrer convencional que son unos 40 centímetros.
Decidí que con unas 26 tiras de alambre me quedaría conforme.
Use un alicate para electricidad, para cortar la unión de los alambres con el aro externo de la rejilla.
Corte el resto de la rejilla con la ayuda de una segueta, el trabajo sería un poco más fácil con la ayuda de un esmeril, pero todavía no puedo sostenerlo.
Me gusta como va quedando el rastrillo.
Busque una rama robusta y con el largo suficiente, para hacer el palo, es todo lo que faltaba.
Con la segueta hice un corte de forma transversal en un extremo de la rama y así inserté mi rastrillo.
Use alambre para fijar el rastrillo, pero lo reforce para hacerlo más resistente, se puede hacer esta maniobra con un taladro, pero si no se tiene demasiada prisa, un destornillador y una prensa es más que suficiente.
Bueno, este es un trabajo de reciclaje muy útil, y bastante sencillo. Lo mejor de todo es que aún me quedan rejillas para fabricar algún otro invento para alguna próxima publicación.
Termine a tiempo, que llego el inspector. (es un tirano, que no los engañe la mirada tierna)
Muchas gracias por pasar y leerme.
Que tengan una excelente semana.
Paz.
- He usado el traductor de Google para el idioma inglés.
- Use el programa de TextStudio para el encabezado en español.
- Las imágenes a menos que lo indique son capturas de mi trabajo en el taller.