Hello everyone, I hope you’re all doing well. I’m delighted to show you one of my new aids for my sewing workshop: a ‘burrito’ or ironing stand for bustier cups. To make this, I used recycled materials to create this new little helper.
Materials
- Fabric
- Thread and needle
- Filling
- Plastic margarine tub lid
1
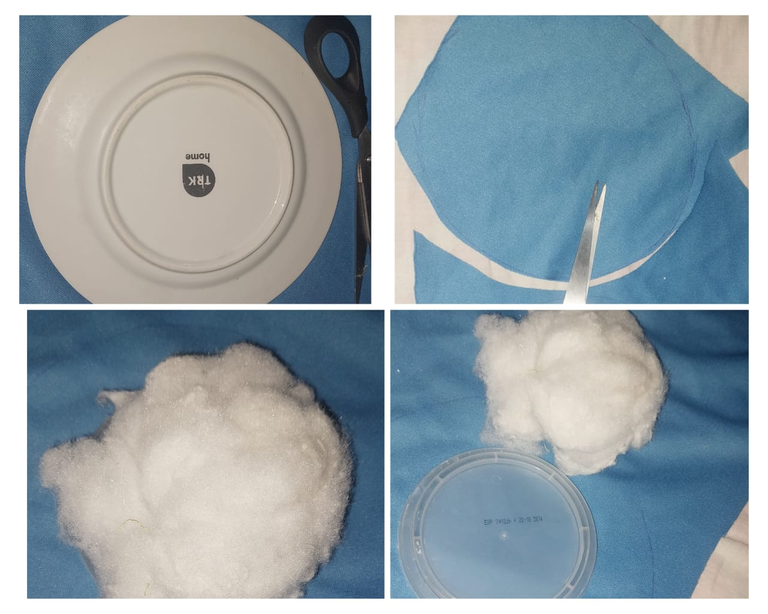
I started by using some fabric scraps that I’d been keeping. I then used a round plate to create the circular pattern and cut it out.
I also needed some filling and a plastic margarine tub lid that I’d been keeping to recycle.
2
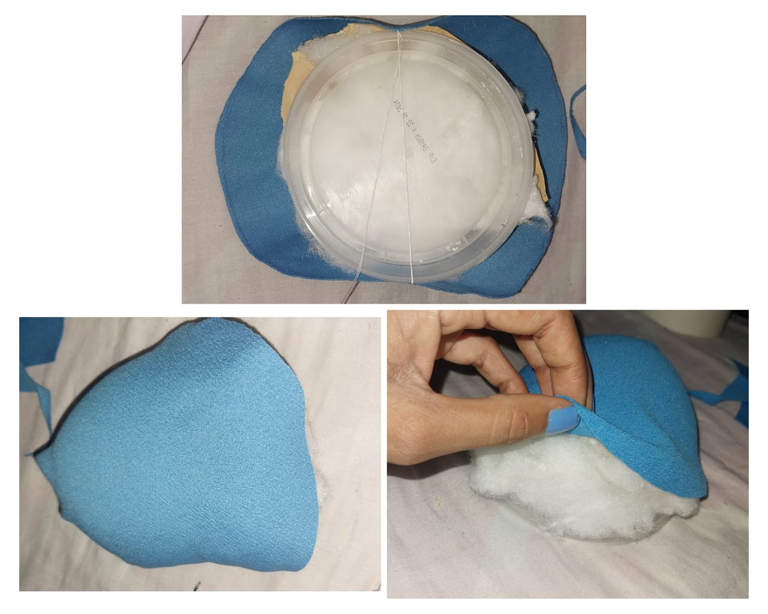
What I did was place the filling on top of the circular piece of fabric and then position the lid on top to sew a few stitches with a needle and thread. In this way, I sewed all the way round the stuffed base, gradually shaping it.
3

Then I placed the other base on top to cover the base of the plastic lid.
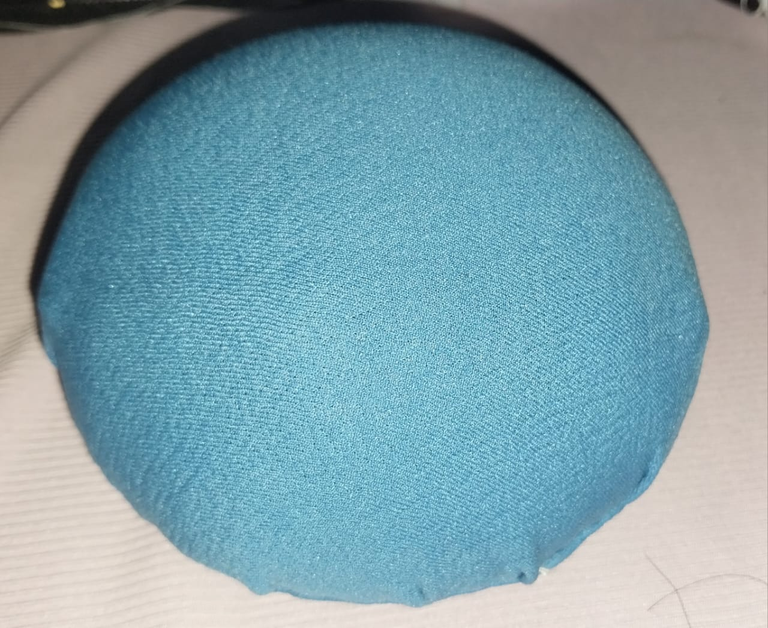
Here’s the lovely result. I hope you’ve enjoyed this simple way of making these ‘burritos’. This method works really well for ironing the cups, helping to create the rounded shape of the bustier cups.
Thank you so much for the result – I hope you like it! Thank you for your support and have a great start to the week.
Hola amigos, espero que se encuentren muy bien. Estoy feliz de poder mostrarles uno de mis nuevos ayudantes para mi taller de costura, se trata de un burrito o soporte para planchado de copas de bustier. Para realizar esta utilice materiales de uso de provecho para poder obtener a este nuevo ayudante.
Materiales
- Tela
- Hilo y aguja
- Relleno
- Tapa de plástico de margarina
1
Inicié utilizando material de tela que tenia guardada de retazos que siempre guardo. Luego me ayude de un plato redondo para crear el patrón circular y luego recortar este.
También necesité utilizar material de relleno y una tapa de plastico de margarina que ya tenia guardada para reciclar.
2
Lo que hice fue colocar el relleno sobre la tela circular y luego colocar la tapa para hacer algunas puntadas con hilo y aguja. De eta manera fui cosiendo toda la base rellena e ir dandole la forma.
3
Luego coloque la otra base para tapar la base de la tapa de plastico.
Este es el lindo resultado. Espero que les haya gustado esta forma de poder hacer estos burritos de una forma sencilla. Es así, que el resultado es de buen provecho para planchar las copas y de esta manera hacer la forma redonda de las copas de los bustier.
Muchas gracias por el resultado espero que les guste! Gracias por el apoyo y feliz inicio de semana.