English
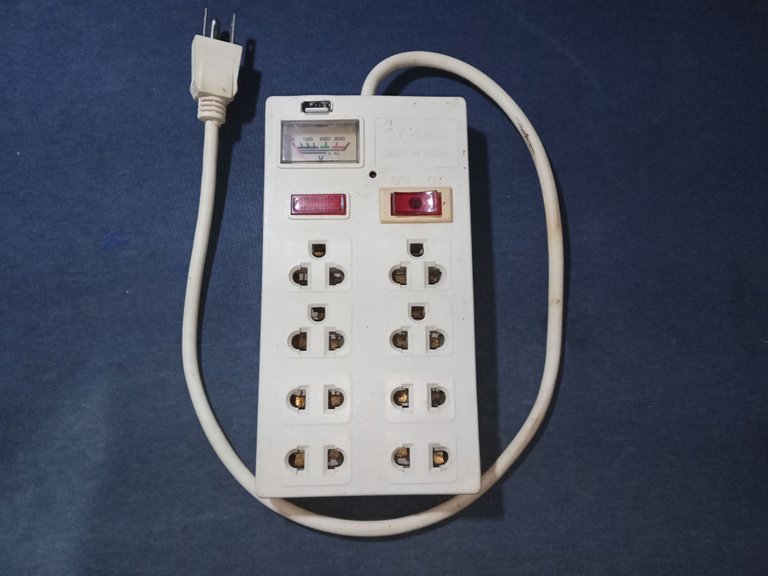
With my best wishes, greetings to the Hive DIY community, I wish you lots of encouragement and plenty of inspiration to make new projects.
I take this opportunity to steal a moment, to share that just last week it was my birthday. Even though I haven't celebrated holidays in a while, someone always does me the favor of reminding me of the date.
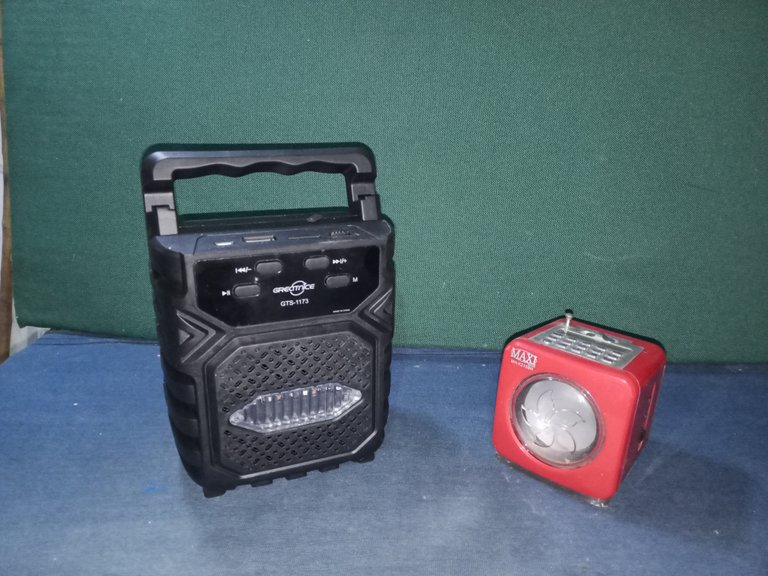
It was a day of pleasant surprises, my father, who a few years ago had given me a small red radio with a USB connection for the phone, came to visit and gave me a radio with a Bluetooth connection for the phone.
The game Honkai Star gave me a gift for the day and a review, but the surprise was Punishing gray raven, which gave me a whole mission within the game, in commemoration of my birthday. (first time I've seen something like this, but it's a great detail, I thought it was a secret mission or something like that)

Well, getting into the topic of the publication, my recycling project this time in the workshop consists of making a 110 volt electricity outlet, with a USB output to connect a phone or some other device that charges with a USB output, such as the radios I have, which charge via USB.
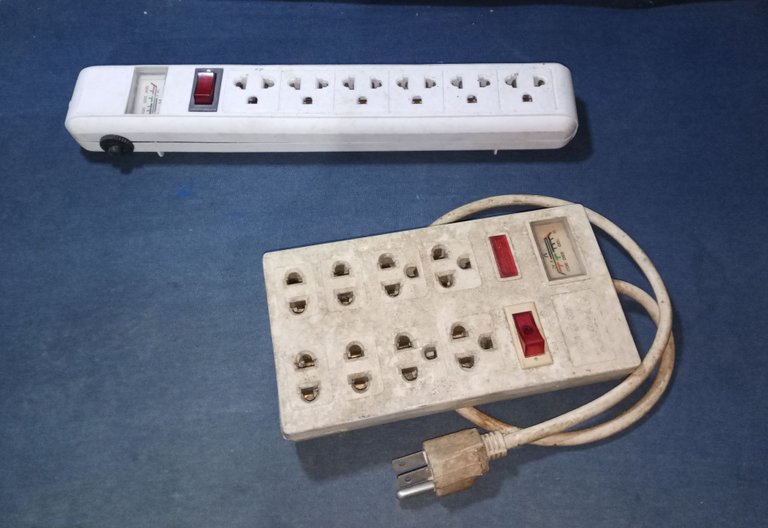
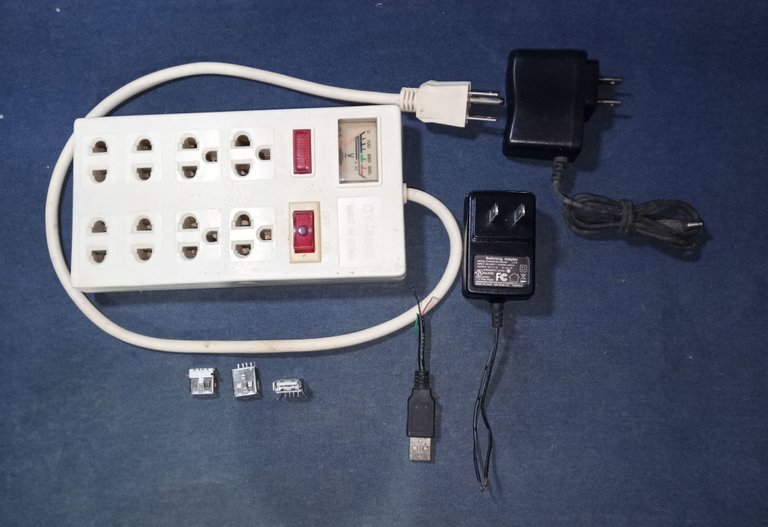
I looked for recycled material that I had rescued at some point and had in the warehouse, I chose two electrical outlets, discarded.
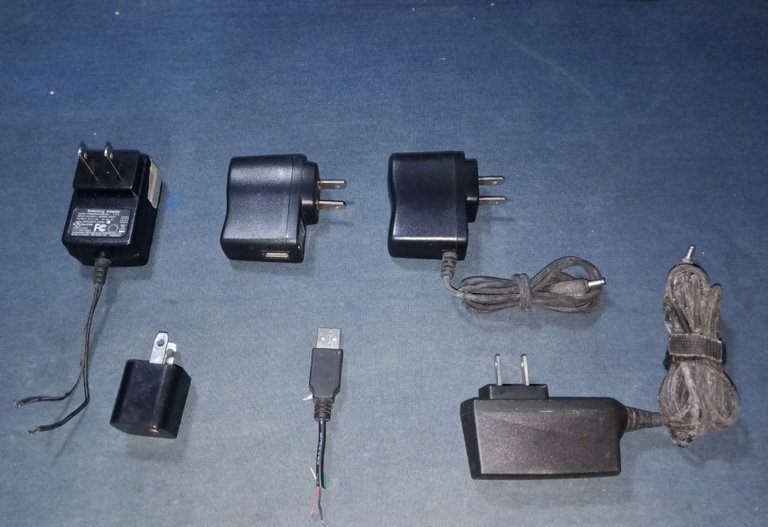
From the box of recycled chargers, I look for the ones that are in the best condition. I have to clarify that I need a 5 volt supply with an amperage of at least 1 ampere (1000 ma), to be able to use it as a connection to be able to use it, with a good variety of devices.
If a charger has a very low amperage, when connecting a device with a high consumption, it will most likely be damaged or take too long or will not be able to charge the device connected to it.
Connections for USB cables.

It was a shame, but the first electrical multiple socket I reviewed did not have enough space, it was very tight, so it is ruled out for this project.
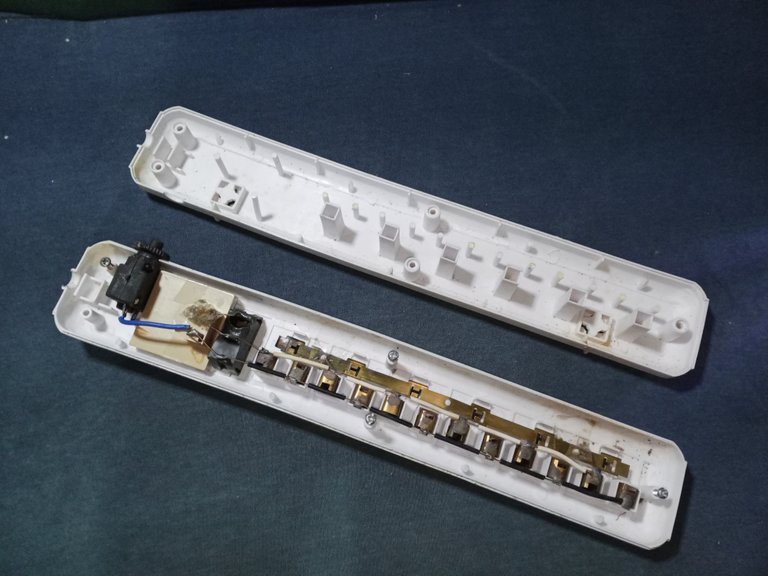
In the end I chose connections and left aside the two chargers that were closer than what I was looking for. And this electrical outlet, if it has enough space to work, you just need to give the plastic cover caps a good brushing with soap and water.
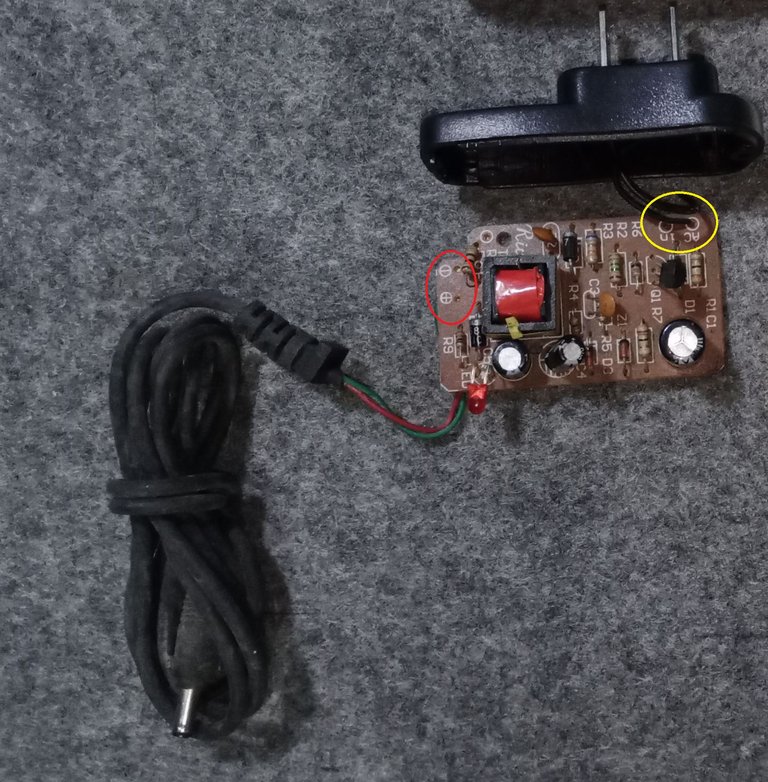
The old Nokia chargers are of very good quality, they are quite good for any project, and this one has almost the exact space, I only had to sand the edges of the electronic board a few millimeters.

It is easy to locate the connections inside the charger, the 110 volts (marked AC, in the yellow circle) and the 5 volt direct current output (marked + and -, in the red circle)
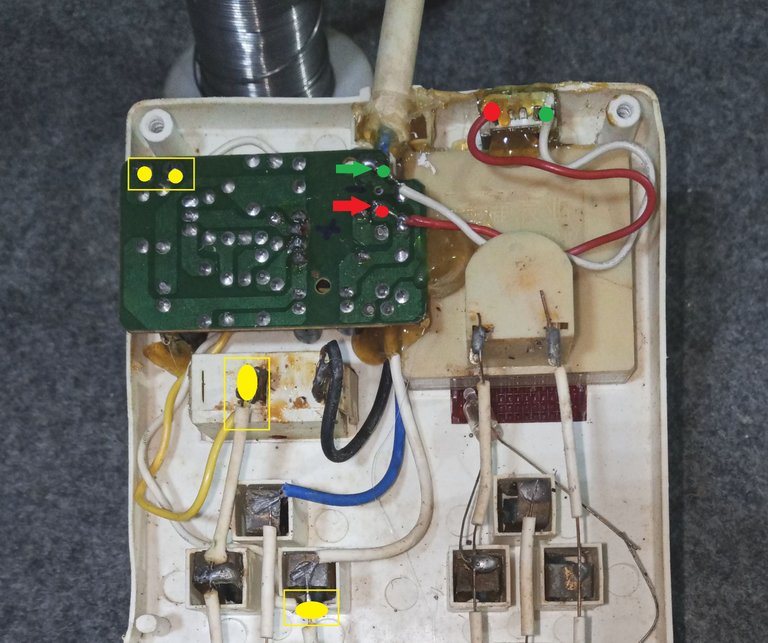
I make the slot for the red LED of the 5 volt charger and for the USB socket, the cover is a soft plastic so a drill was not needed, just a cutter and a metal bit.


I made the connections with recycled cables from an old computer. Highlighted in yellow, for the 110 volt connection, and highlighted in red and green for the 5 volt DC output.
Secure the card inside the plastic case with the help of silicone, also the power cable and the USB connector.
The finished job: the power switch, the red LED on the 5 volt charger, the voltage meter working, the neon indicator on the multiple outlet work well.
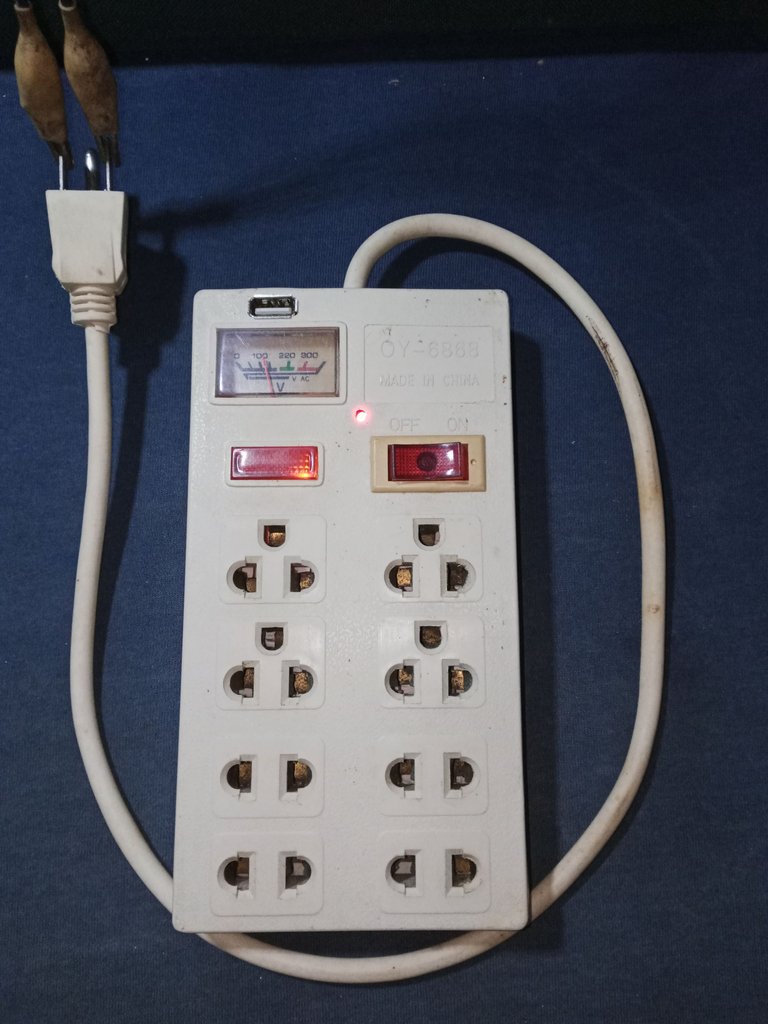
It is a simple recycling job, which I find useful at home and in the workshop. Now I have an electrical outlet with a USB output, I don't have to worry about looking for a charger for the phone or radio and we avoid polluting the environment.
As always, despite being a simple job: before doing electrical or electronic work, you should try to take a basic training course.
To avoid accidents or damage to devices.
Thank you very much for stopping by and reading me.
Have an excellent week.
Peace.

Images unless noted are screenshots of my work in the workshop.
I have used Google translator for the English language.
Español

Con mis mejores deseos, saludos a la comunidad de Hive DIY, les deseo mucho ánimo y bastante inspiración para hacer nuevos proyectos.
Aprovecho para robar un momento, para compartir que recién en la semana pasada fue el día de mi cumpleaños. A pesar de que hace tiempo no celebro festividades, alguna persona siempre me hace el favor de recordarme la fecha.
Fue un día de gratas sorpresas, mi padre que hace unos años, me había regalado un pequeño radio rojo con conexión USB para el teléfono, vino de visitas y me obsequio con un radio con conexión Bluetooth para el teléfono.

El juego Honkai Star me hizo un regalo por el día y una reseña, pero la sorpresa fue el Punising grey raven, que me hizo toda una misión dentro del juego, en conmemoración por mi cumpleaños. (primera vez que veo algo así, pero es un gran detalle, creí que era una misión secreta o algo de eso)

Bueno, entrando en el tema de la publicación, mi proyecto de reciclaje de esta vez en el taller, consiste en hacer una extensión de electricidad 110 volts, con salida USB para conectar un teléfono o algún otro dispositivo que se cargue con una toma USB, como las radios que tengo, que se cargan por USB.
Busque material reciclado que rescate en algún momento y tenía guardado en el depósito, escogí dos tomas múltiples desechadas y una extensión dañada.

De la caja de cargadores reciclados, busco los que estén en mejores condiciones, tengo que aclarar que necesito un suministro de 5 volts con un amperaje de por lo menos 1 amperio (1000 ma), para poder usarlo como conexión para poder usarlo, con una buena variedad de dispositivos.
Si un cargador tiene un amperaje muy bajo, al conectar un dispositivo con un consumo alto, lo más seguro es que se dañe o tarde demasiado o no pueda cargar el dispositivo que se le conecte.

Conexiones para los cables de USB.

Fue una pena, pero la primera toma múltiple de electricidad que revise, no tenía espacio suficiente, estaba muy justa, así que está descartada para este proyecto.

Al final escogí conexiones y aparte los dos cargadores que estaban más cerca de lo que buscaba, y esta toma múltiple, si tenía espacio suficiente para trabajar, solo necesito aplicarle una buena cepillada a las cubiertas con agua y jabón.

Los viejos cargadores Nokia son de muy buena calidad, son bastante buenos para cualquier proyecto, y este tiene el espacio casi exacto, solo tuve que lijar unos milímetros los bordes de la placa electrónica.

Es fácil ubicar las conexiones dentro del cargador, las de 110 volts (marcadas con AC, en el círculo amarillo) y la salida de corriente directa de 5 volts (marcado + y -, en el círculo rojo)

Hago la ranura para el led rojo del cargador de 5 volts y para la toma del USB, la cubierta es un plástico suave así que no hizo falta un taladro, solo un cutter y una broca de metal.


Las conexiones las hice con cables reciclados de un viejo computador. Resaltado en amarillo, para la conexión de 110 volts, y resaltado en rojo y verde para la salida de 5 volts de corriente directa.
Asegure la tarjeta con silicona, también el cable y el conector del USB.

El trabajo terminado: funcionan bien el interruptor de encendido, el led rojo del cargador de 5 volts, el medidor de voltaje funciona, el indicador de neón de la toma múltiple.

Es un trabajo sencillo de reciclaje, que me resulta útil en la casa y el taller. Ahora tengo una extensión con salida para USB, no tengo que preocuparme por buscar un cargador para el teléfono o la radio y evitamos contaminar el medio ambiente.
Como siempre, a pesar de ser un trabajo sencillo: antes de hacer un trabajo de electricidad o electrónica se debe procurar hacer un curso básico de capacitación.
Para evitar accidentes o dañar los artefactos.
Muchas gracias por pasar y leerme.
Que tengan una excelente semana.
Paz.

Las imágenes a menos que se indique son capturas de mi trabajo en el taller.
He usado el traductor del Google para el idioma Inglés.


