Hello Needlework lovers ✨
I'm here to share a masterpiece I recently recreated for a client.
This particular crochet design has been going around the internet ever since the owner of the original design showcased her final result. I thought it looked really beautiful and that was just it.
Soon enough, a client came into dm, requesting to recreate the dress. I thought he was joking because how would a male client order a bubu dress with crochet petal motifs?
We got talking and he mentioned that his mother's birthday was coming up soon and knowing his mom very well, she would love something like the design he sent to me. I studied the design, did a few calculations and gave him the final budget after speaking with my fashion designer.
As you must have guessed, this project required both a fashion designer and a crochet artist. After this project, I considered taking up a fashion design course but things didn't go as planned. So, I've put a halt to that aspect for the time being.

Materials Needed
- Yarn
- 4.0mm crochet hook
- Darning needle
- Sewing needle
- Chalk
- Cardboard
- A pair of scissors
- Pencil
- Pins
- A ruler
- Measuring Tape
Procedure
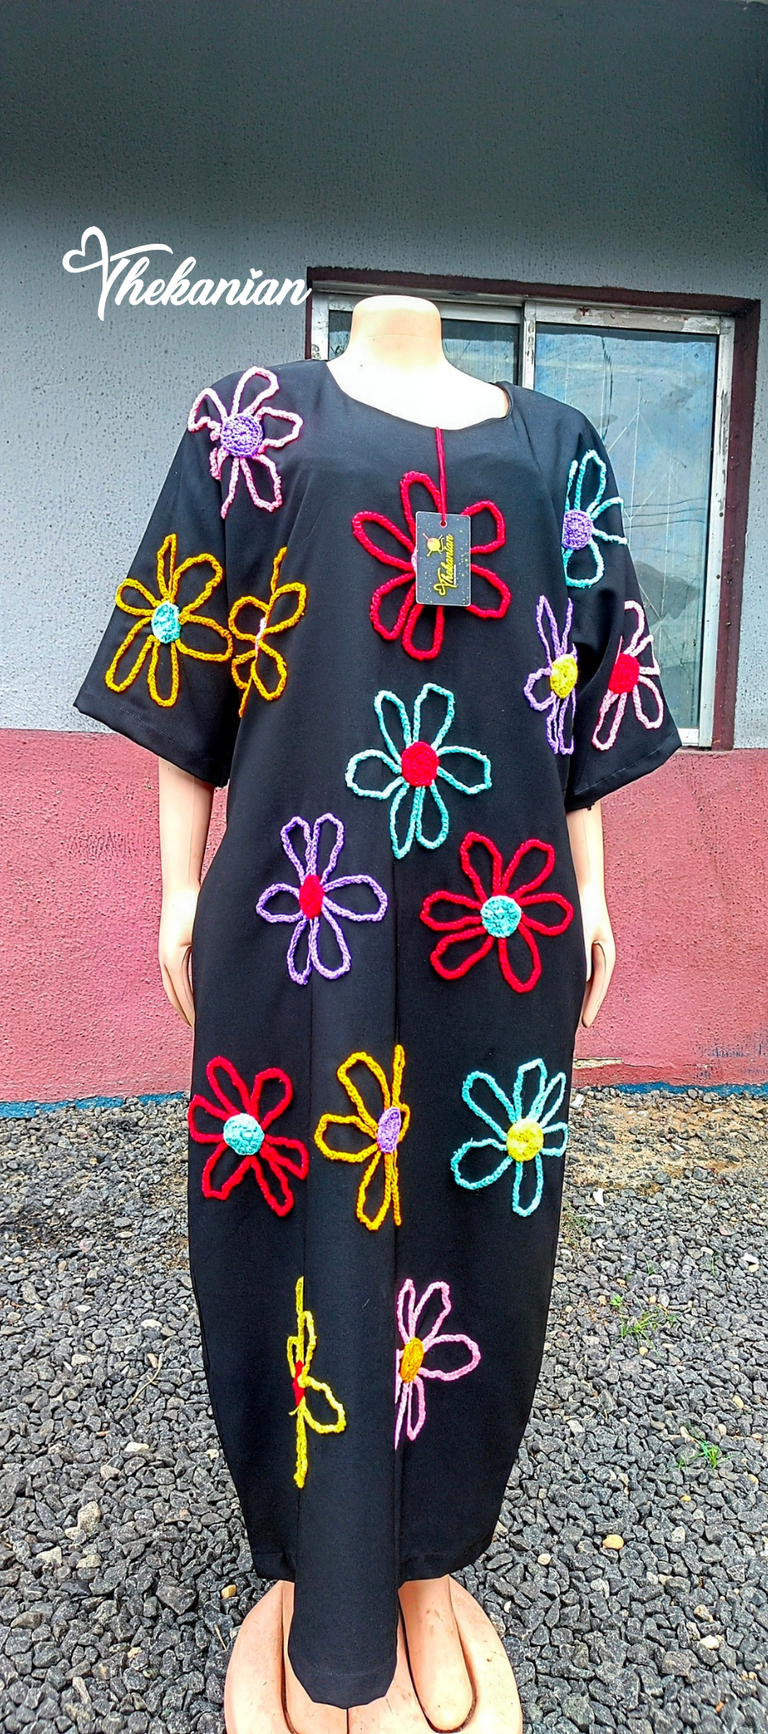
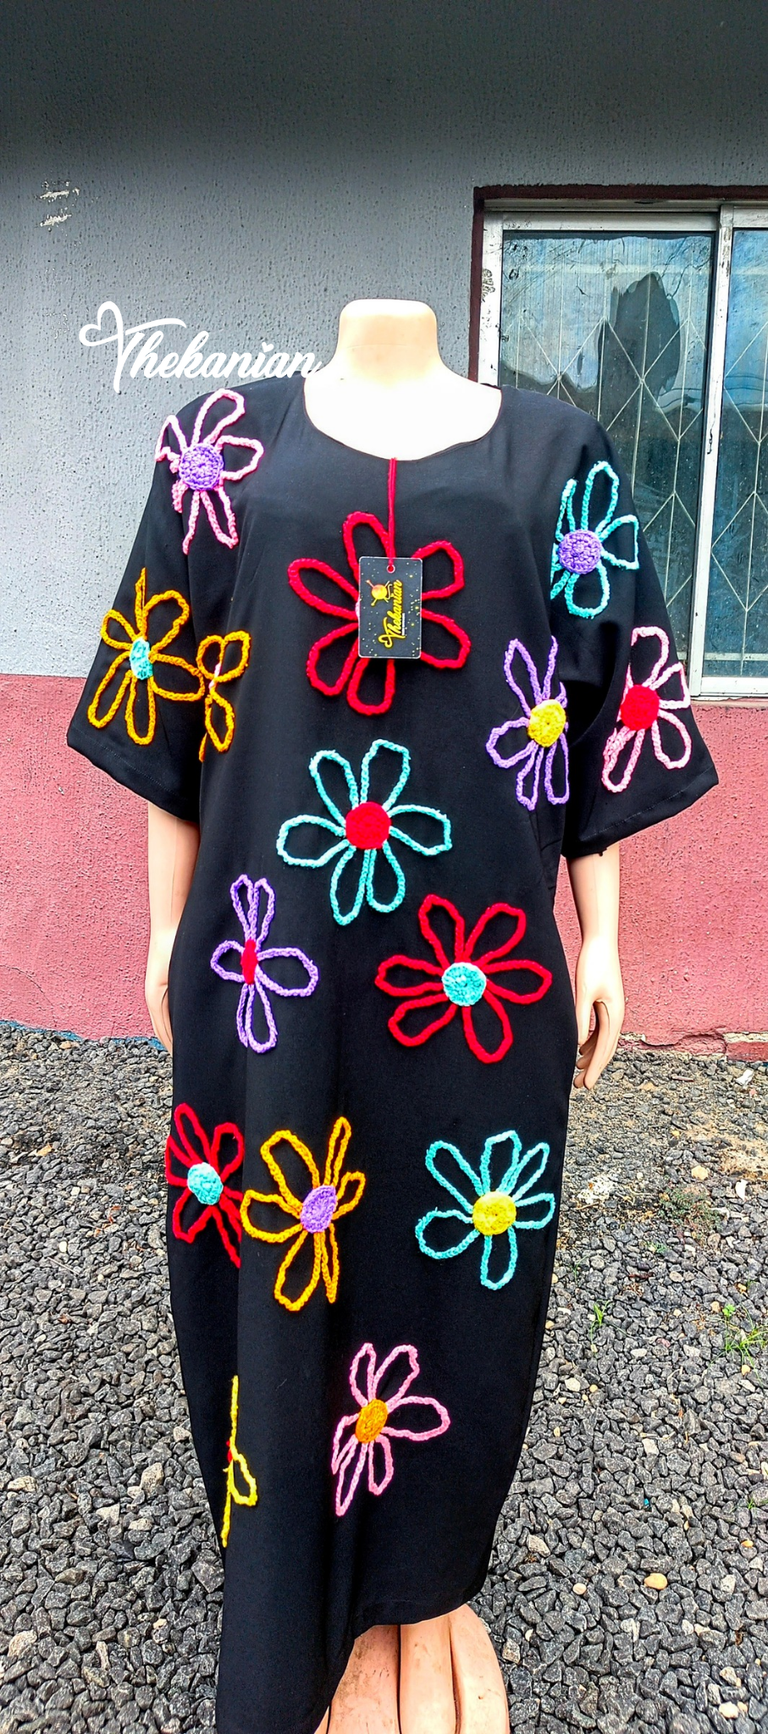
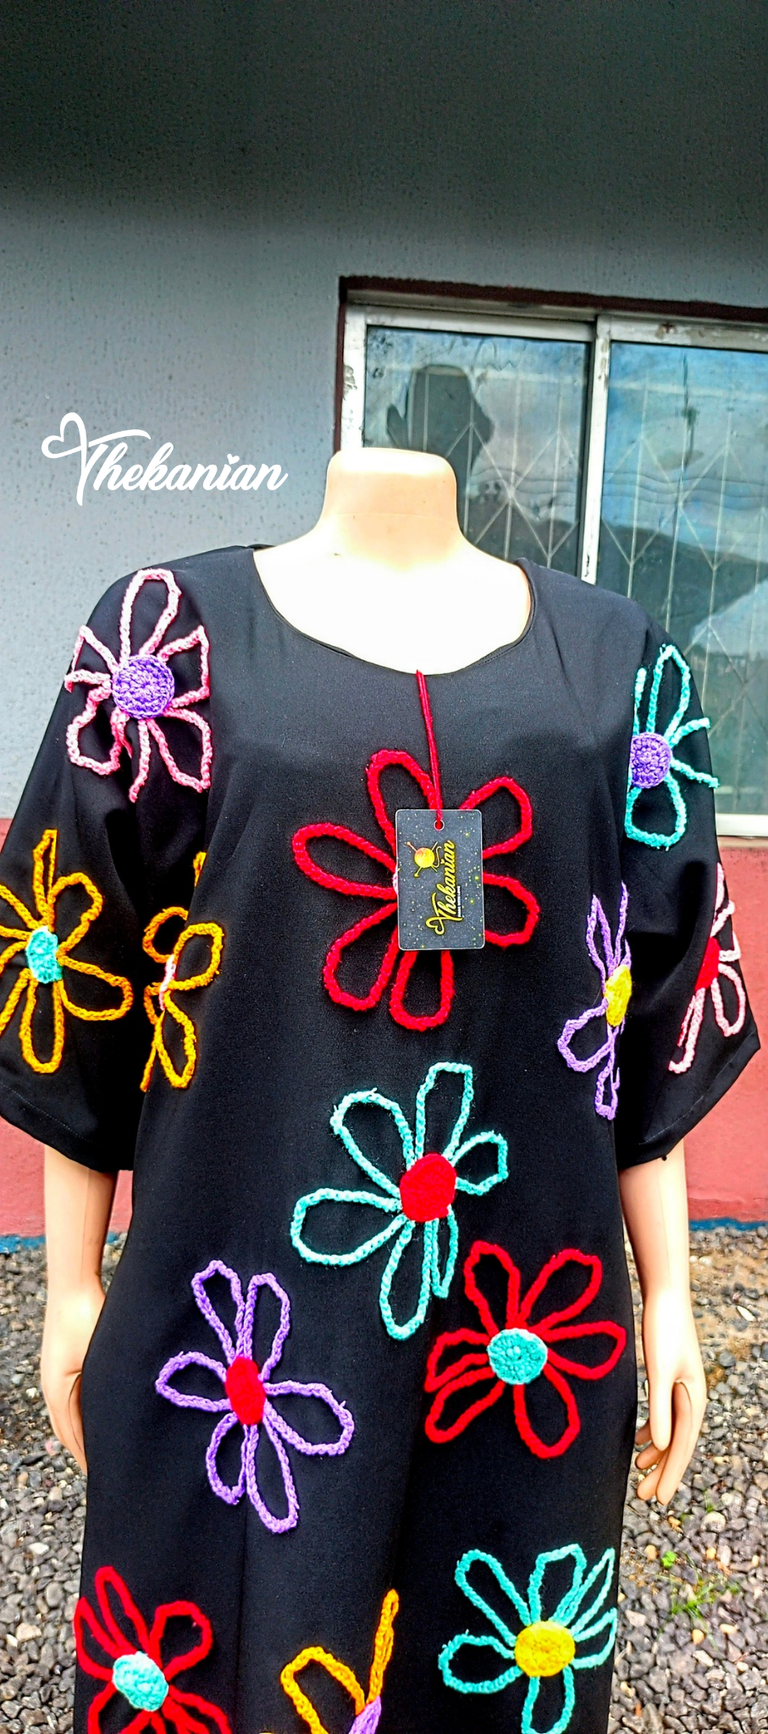
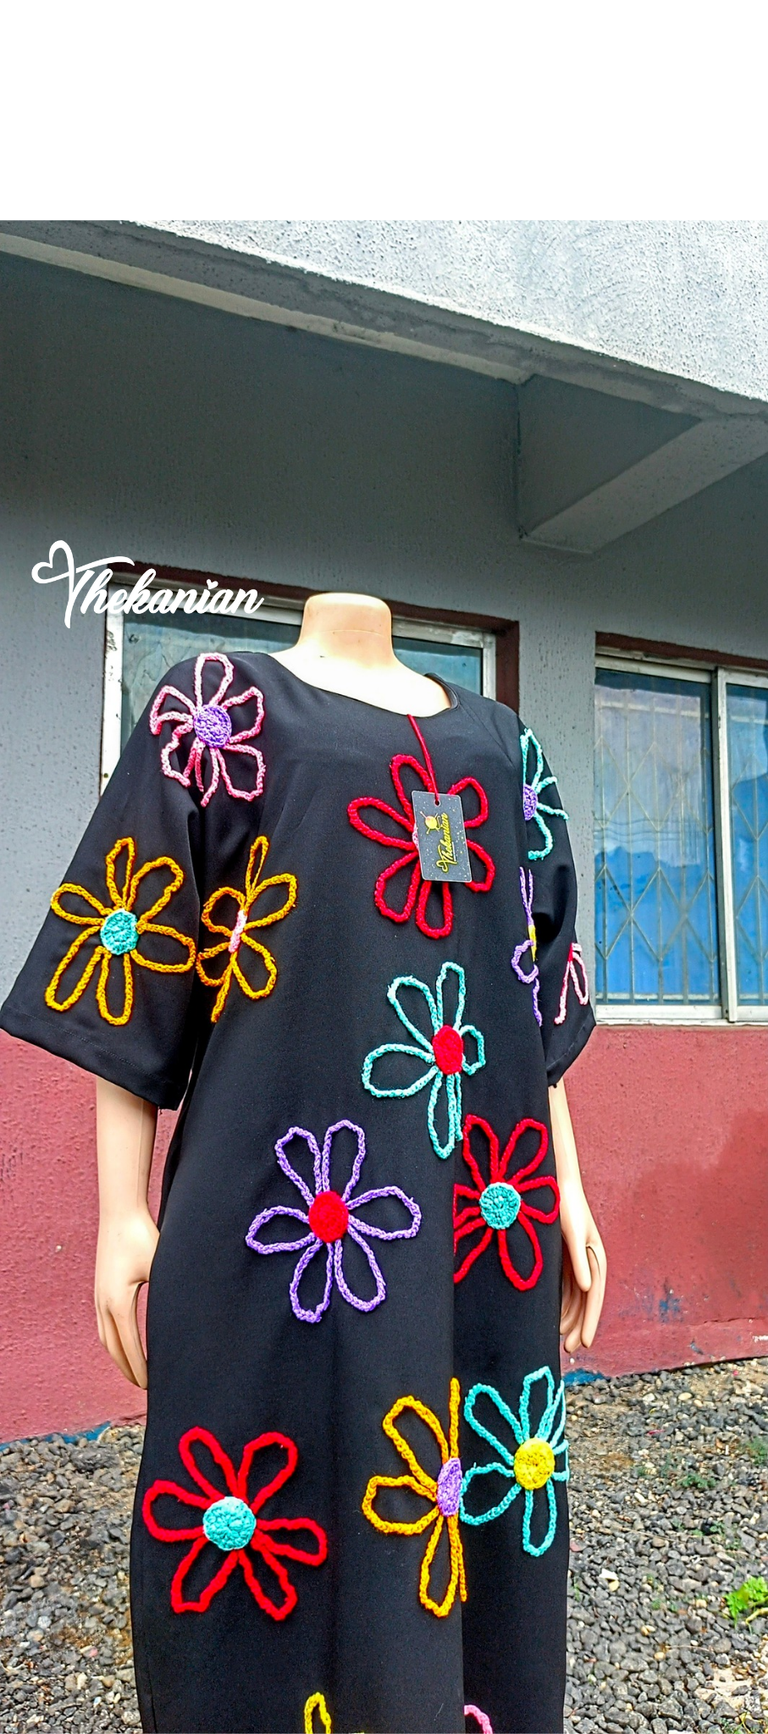
First, I measured the front panel of the dress in a bid to calculate how many petals would fit comfortably into the front panel.
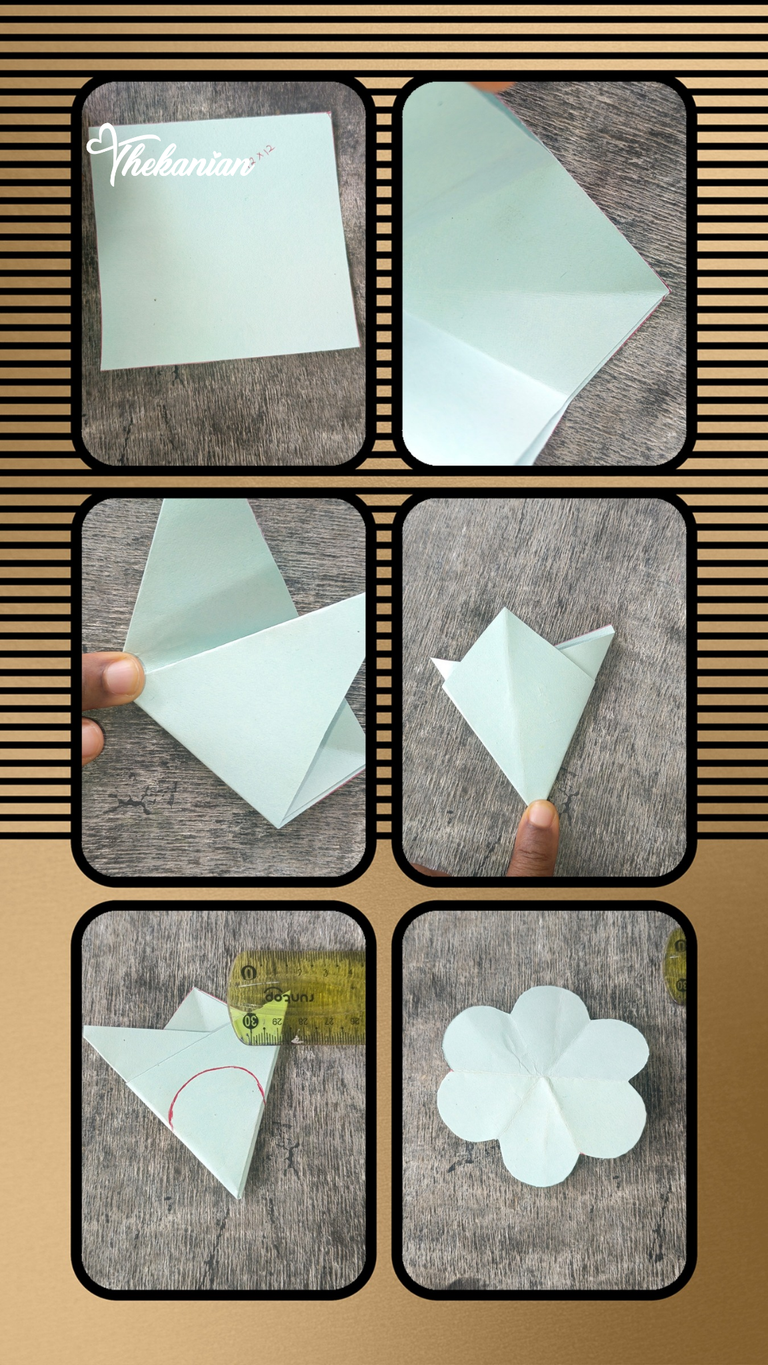
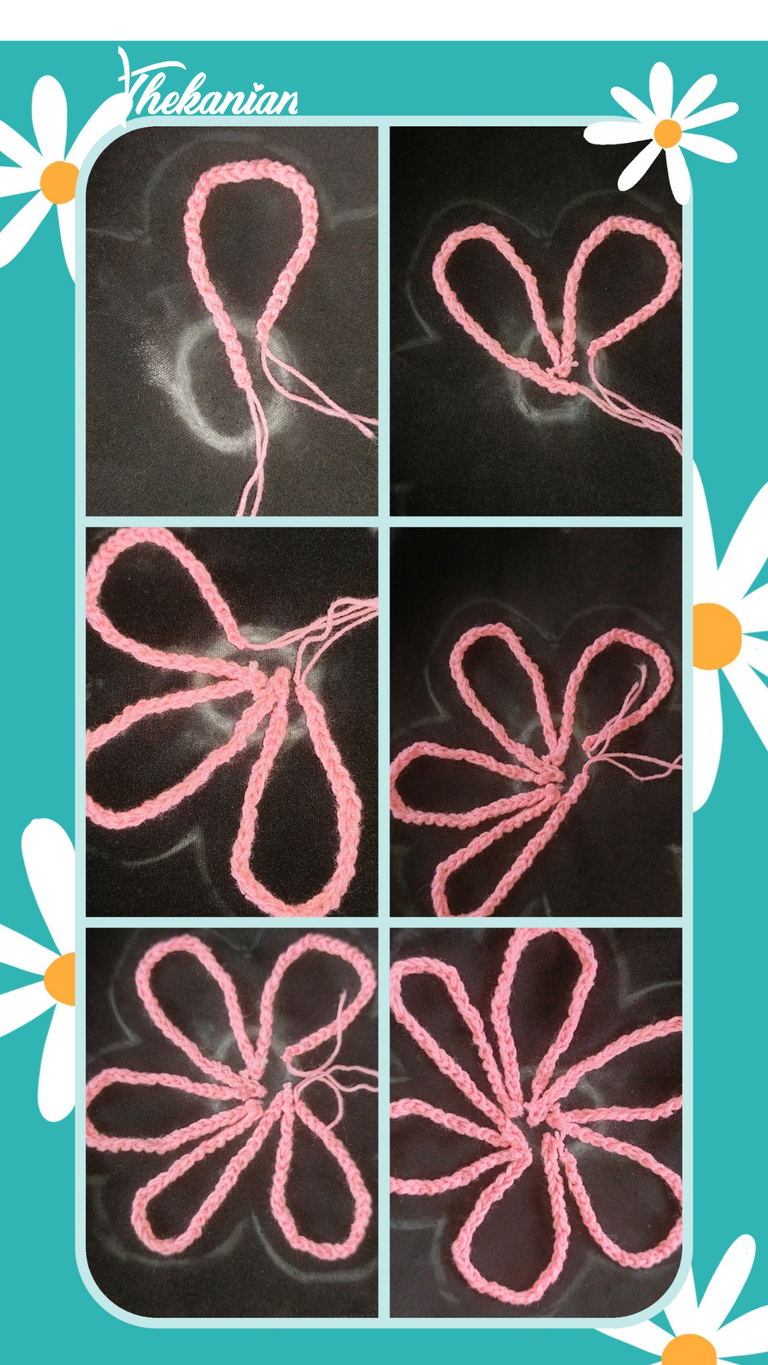
Next, I made a paper petal to serve as a guide on the material. I did this to prevent making any mistakes when sewing in the petals.
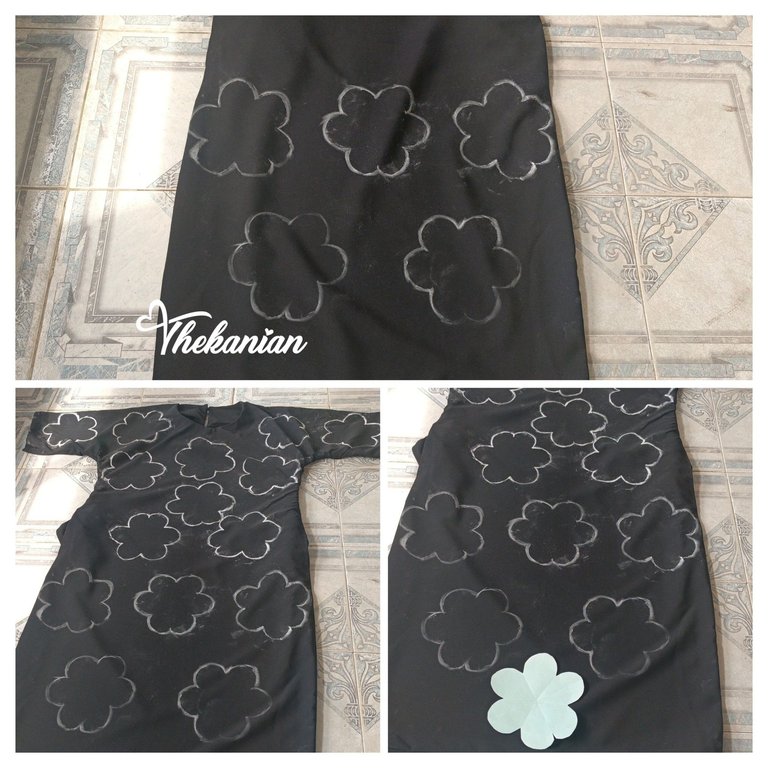
Once I got the paper petal, I traced the petals on the material using a white chalk. I chose white so that I could see the traces properly.
Once I was done drawing all the traces on the garment, I went ahead to start sewing. Least I forget, I was working with an already made black bubu dress and this was made by my fashion designer using the client's exact measurement.
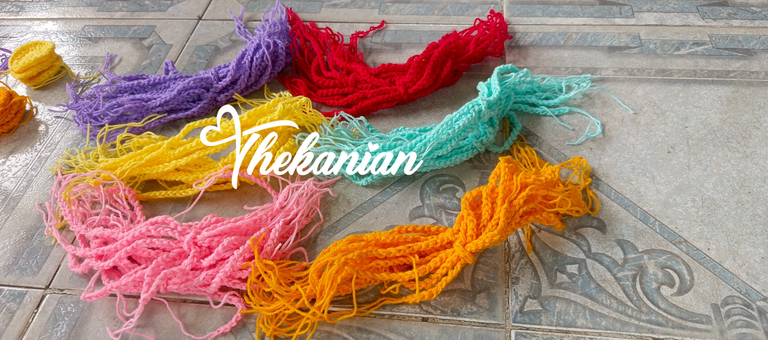
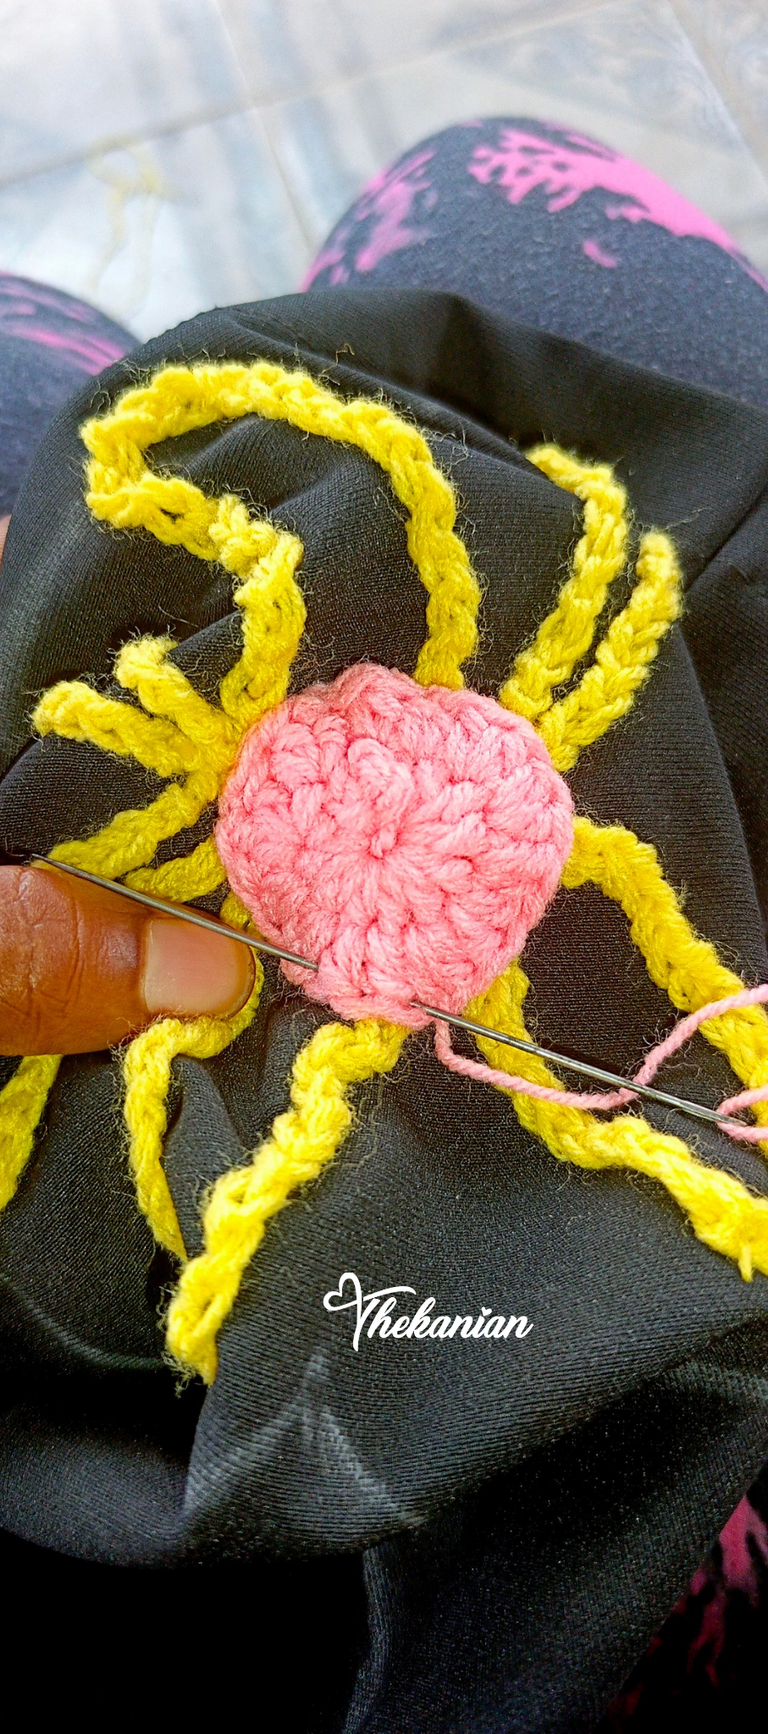
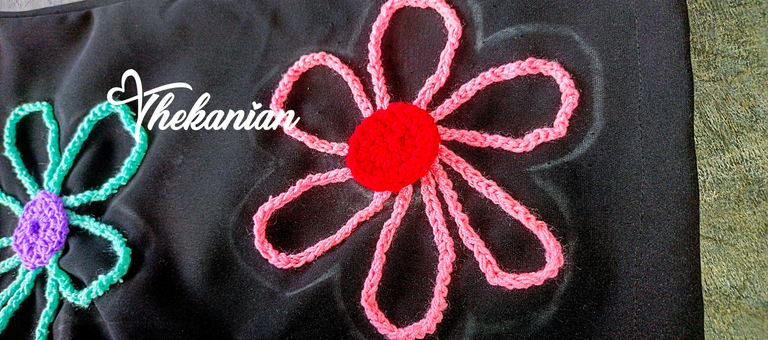
Next, it was time to make the crochet chains and circles. For the chains, I made chains of 36 and for the crochet circles, I did two rows of half double crochet stitches with a starting row of ten and an ending row of twenty( I made an increase into every stitch on the second round).
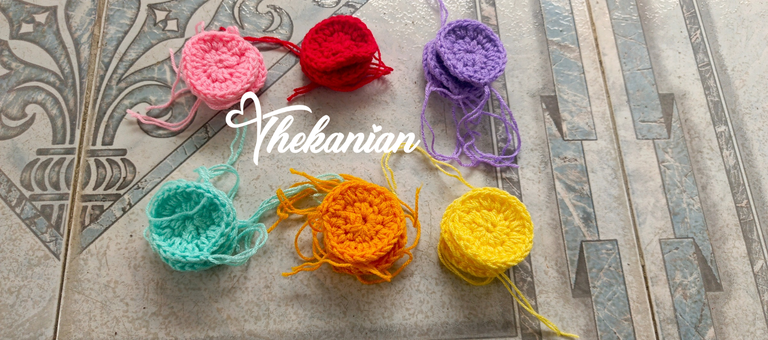
Once I got my chains (in groups of six) and circles ready, it was time to start sewing them onto the garment. To do this, I threaded a needle in the same colour and went ahead to sew. Having to sew with just the right amount of tension, while still striving to follow the petal outline was not an easy feat but the more I did it, the easier it got.
I remember spending over two hours just sewing one petal with the circle and still got it all messed up plus, I got a serious backache and headache. I was really frustrated because how was I supposed to continue this way? Eventually, I sat back, restrategized and figured out an easier way to go about it. This new method involved lots of office pins, a cardboard and lots of body movement but I got the petals right this time.
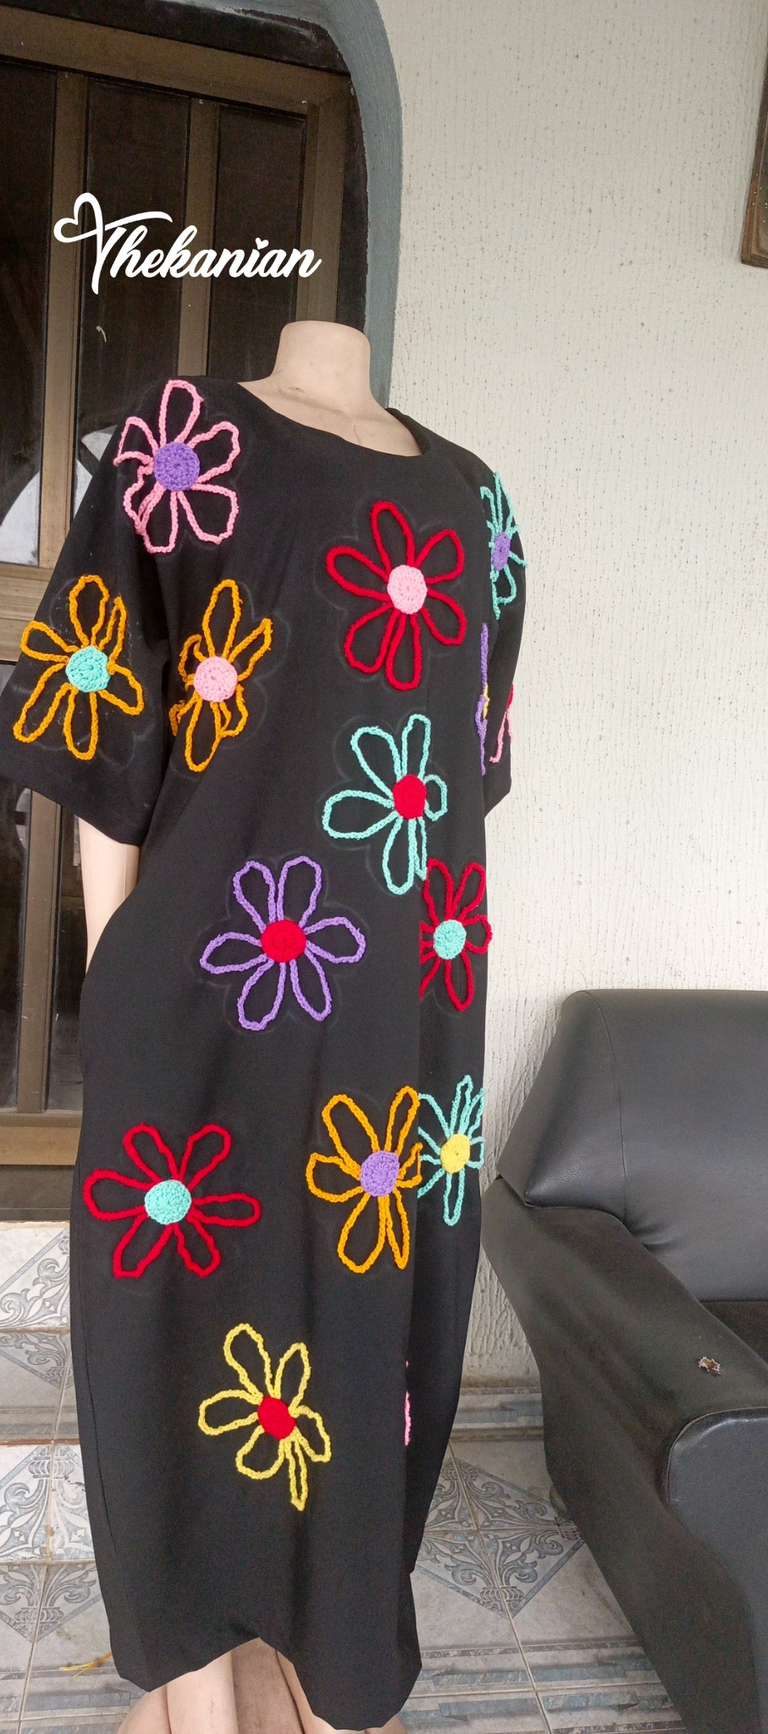
Eventually, it took about 45 mins to an hour to fully insert a petal and I had about fifteen petals to insert. So, one could say I spent about 15 hours on this project.
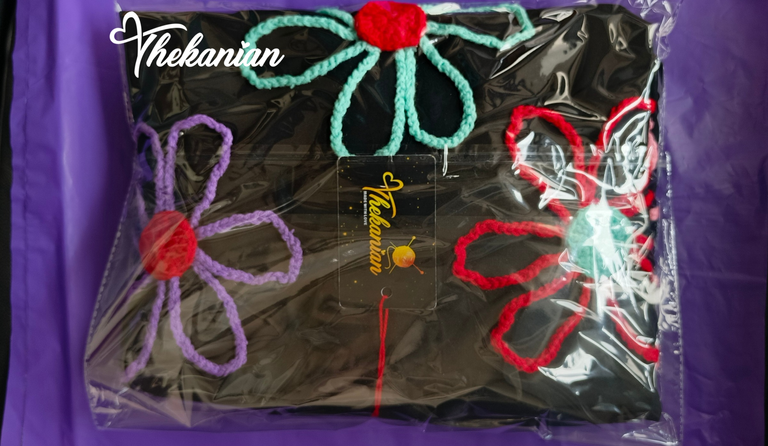
Once I was done with the petals, I washed the cloth to take off the white chalk I generously spread all over the cloth, smoothened the lent's with a source of fire and it was time to package the cloth.

First off, I attached my brand's clothes tag “Thekanian”, neatly folded the cloth into a package bag and then placed it into a bigger handy bag.
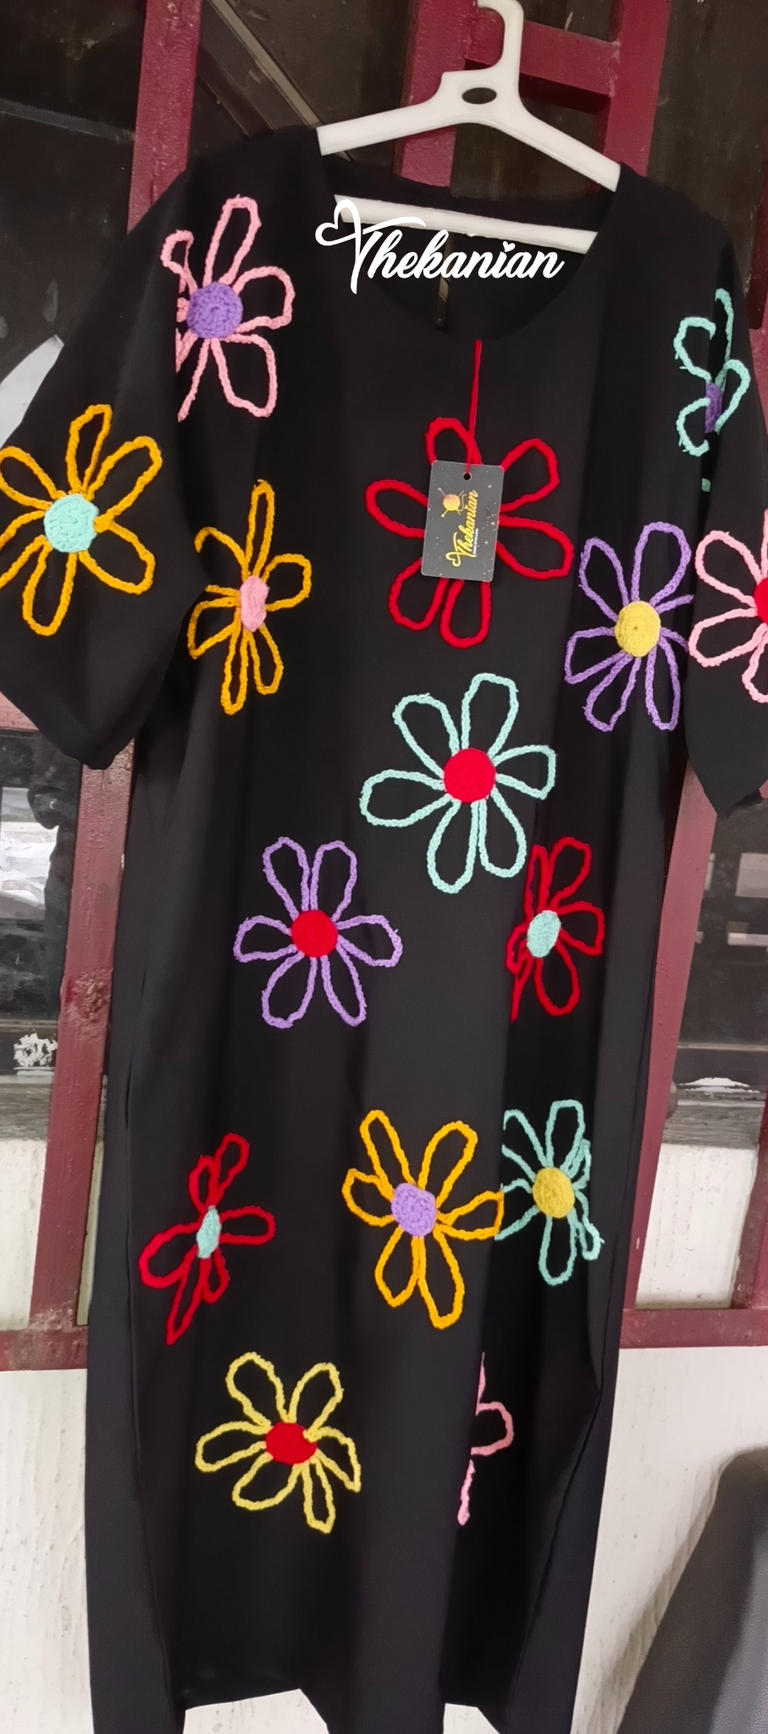
I delivered this cloth to the client and he was really pleased with the final result. About two days later, he invited me over to his mom's place to get a first hand look at the masterpiece I created and I was extremely impressed with what I saw. It fit her like a hand would a glove and the colours really complimented her dark skin tone. It took a lot of hard work but I'm glad I was able to pull this colourful beauty off at the end of the day.
All images belong to me and were taken with my mobile device except stated otherwise.


