I've always been fascinated by amigurumi art. The dexterity, the precision and the time put into making each piece "must be top notch" and subconsciously, I thought that making anything amigurumi would be “hard”. Because, it has to be hard to come out that beautiful, or so I thought.
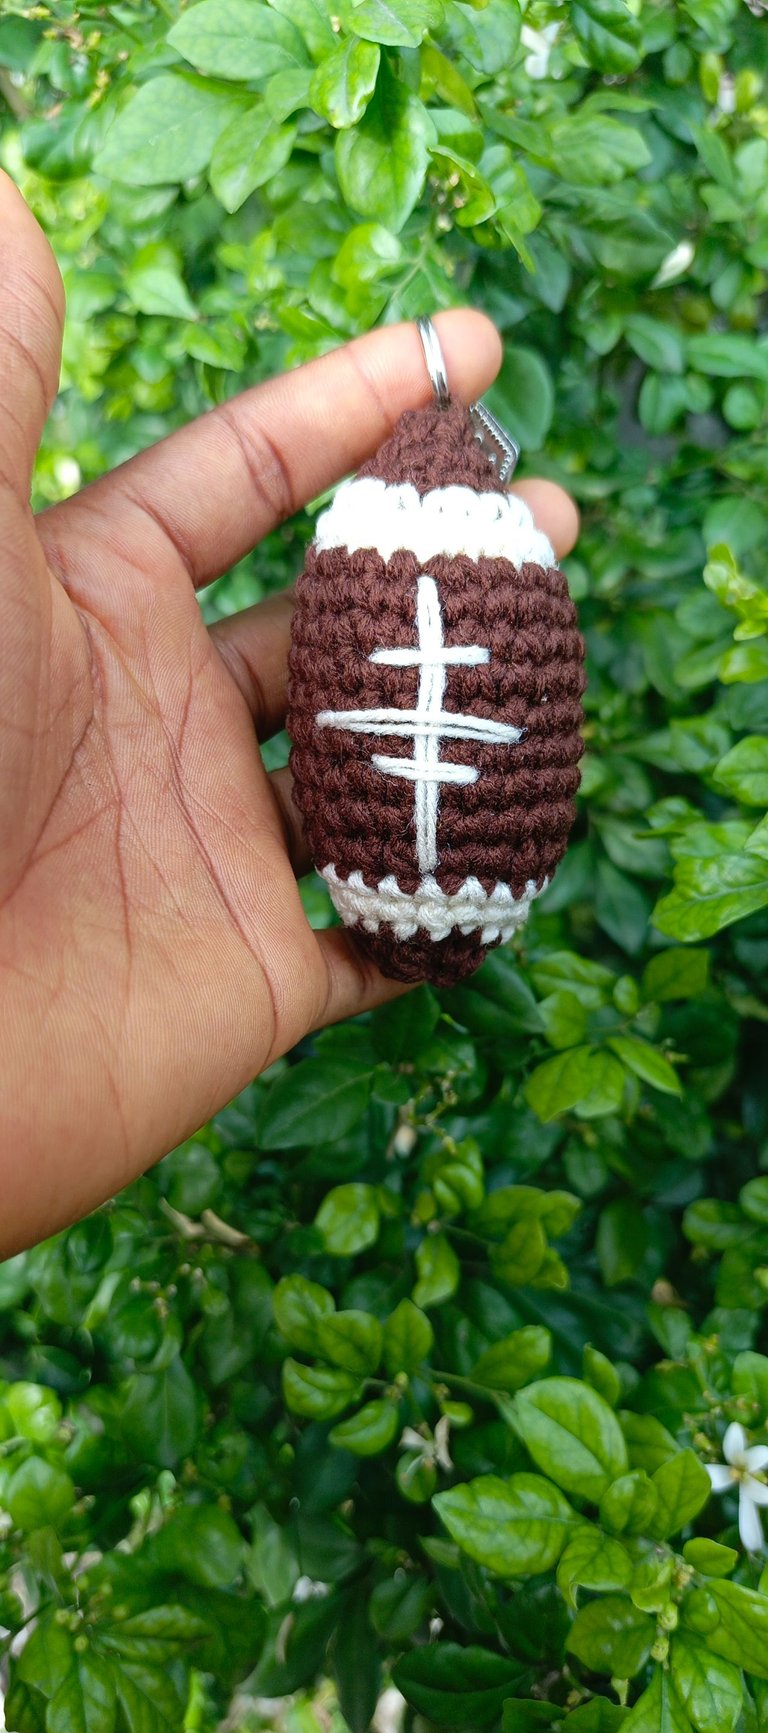
Yesterday, I saw a picture of an amigurumi American football and I thought to myself “I could make this”. The twist however, is that I didn't know I was going to be making an amigurumi until I actually finished with the project. For those who are not familiar with the term, amigurumi is a Japanese art of crocheting or knitting small, stuffed yarn objects, emphasis on small. Today, I'll be taking you through my first ever amigurumi journey.

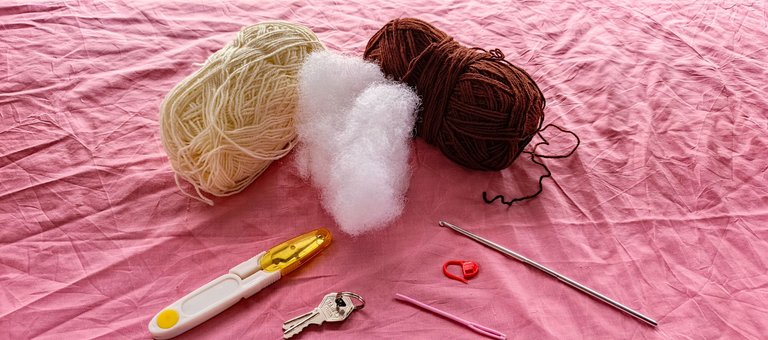
Materials Used
- Yarn (brown and cream colours)
- 3.0mm Crochet Hook
- Yarn Needle
- A pair of Scissors
- Fiber Filling
- Stitch Marker
Procedure
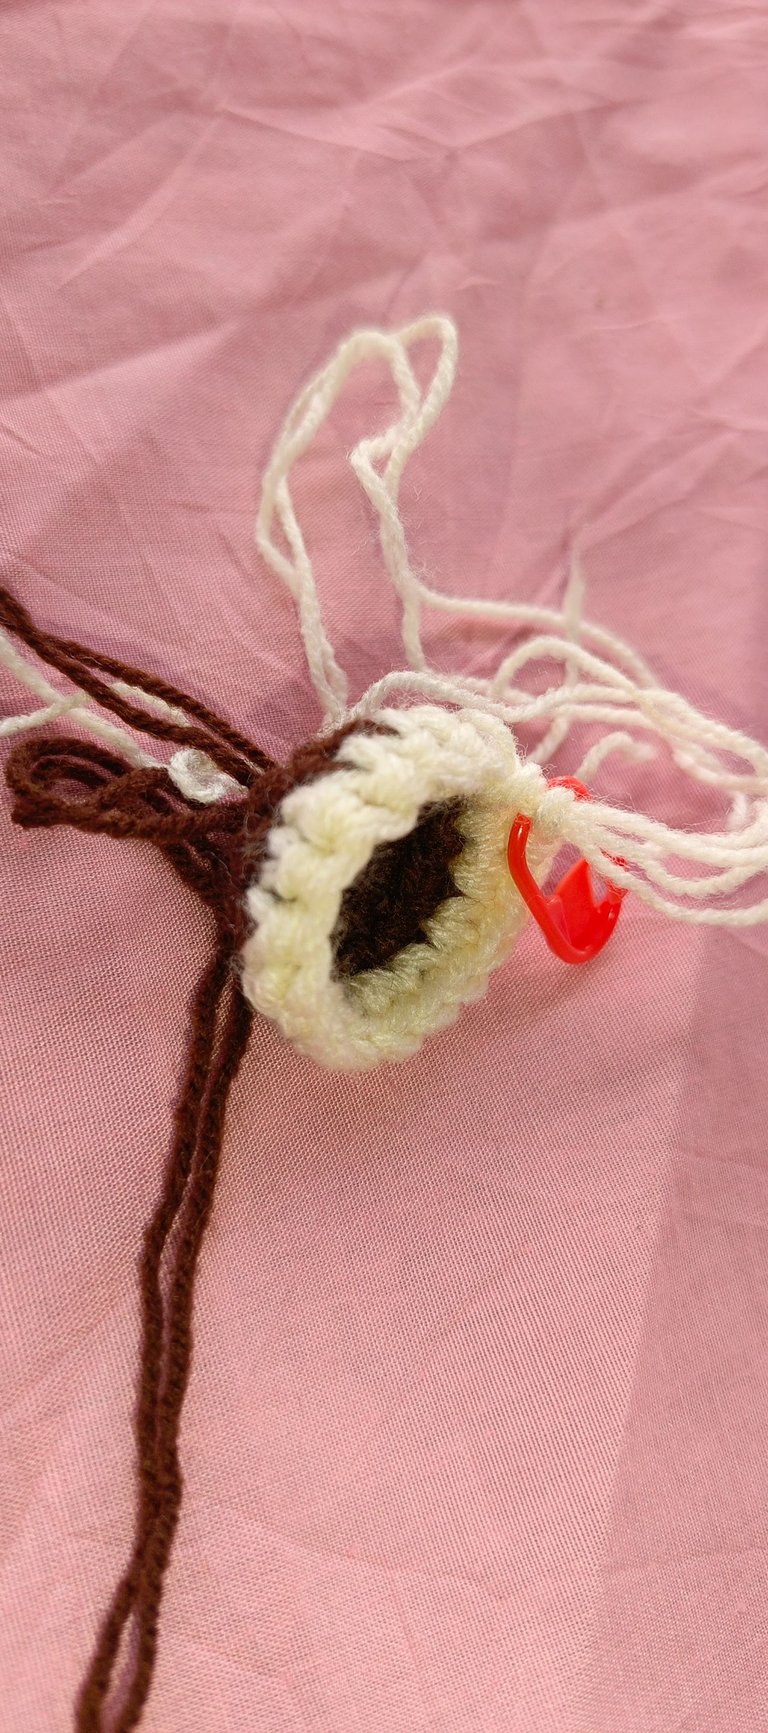
I started by making a magic circle which is very similar to a magic knot but with a little variation–a chain one to secure.
After the magic ring, I went ahead to make six single crochet stitches into the magic ring and then pulled it to close. This is the point where a person knows if they indeed made a proper magic ring or not because a proper magic ring closes up with a simple tug but a make believe magic ring doesn't close or closes haphazardly.
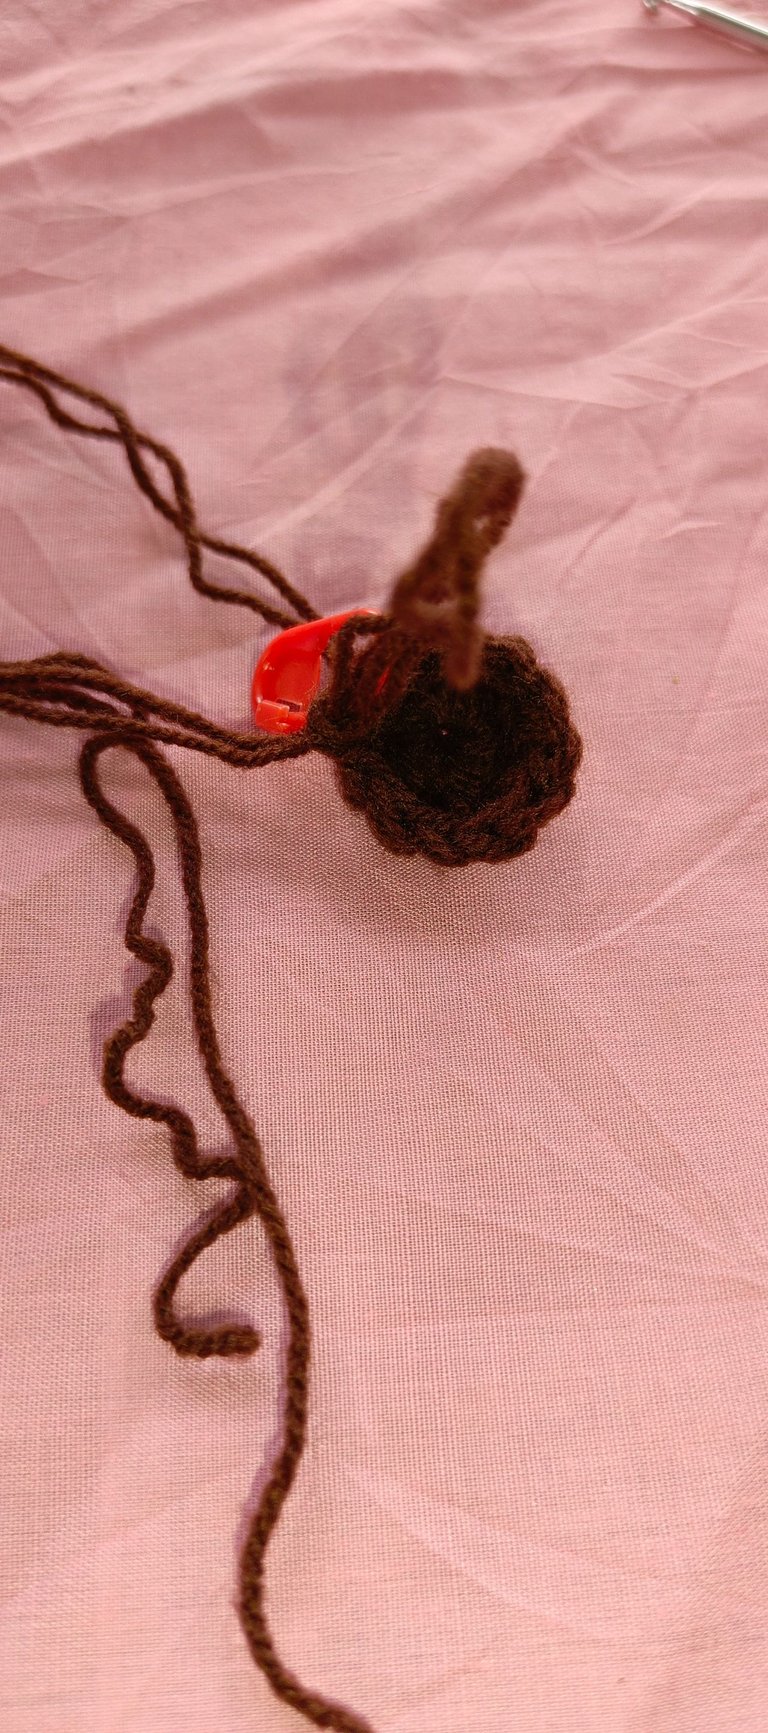
Next, I attached a stitch marker to the very first stitch in order to keep track of where my next row begins from. For row two, I made an increase into every stitch, so, instead of putting one single crochet stitch into every stitch, I put in two. Hence, the increase. This brought my total number of stitches to twelve by the end of the second row.
For row three, I swapped my yarn colour from brown to cream colour. Using the cream coloured yarn, I made an increase into every third stitch. This means, I put in one single crochet stitch into the first two stitches and in the third stitch, I put in two instead of one. I repeated this pattern till the end of the third row.
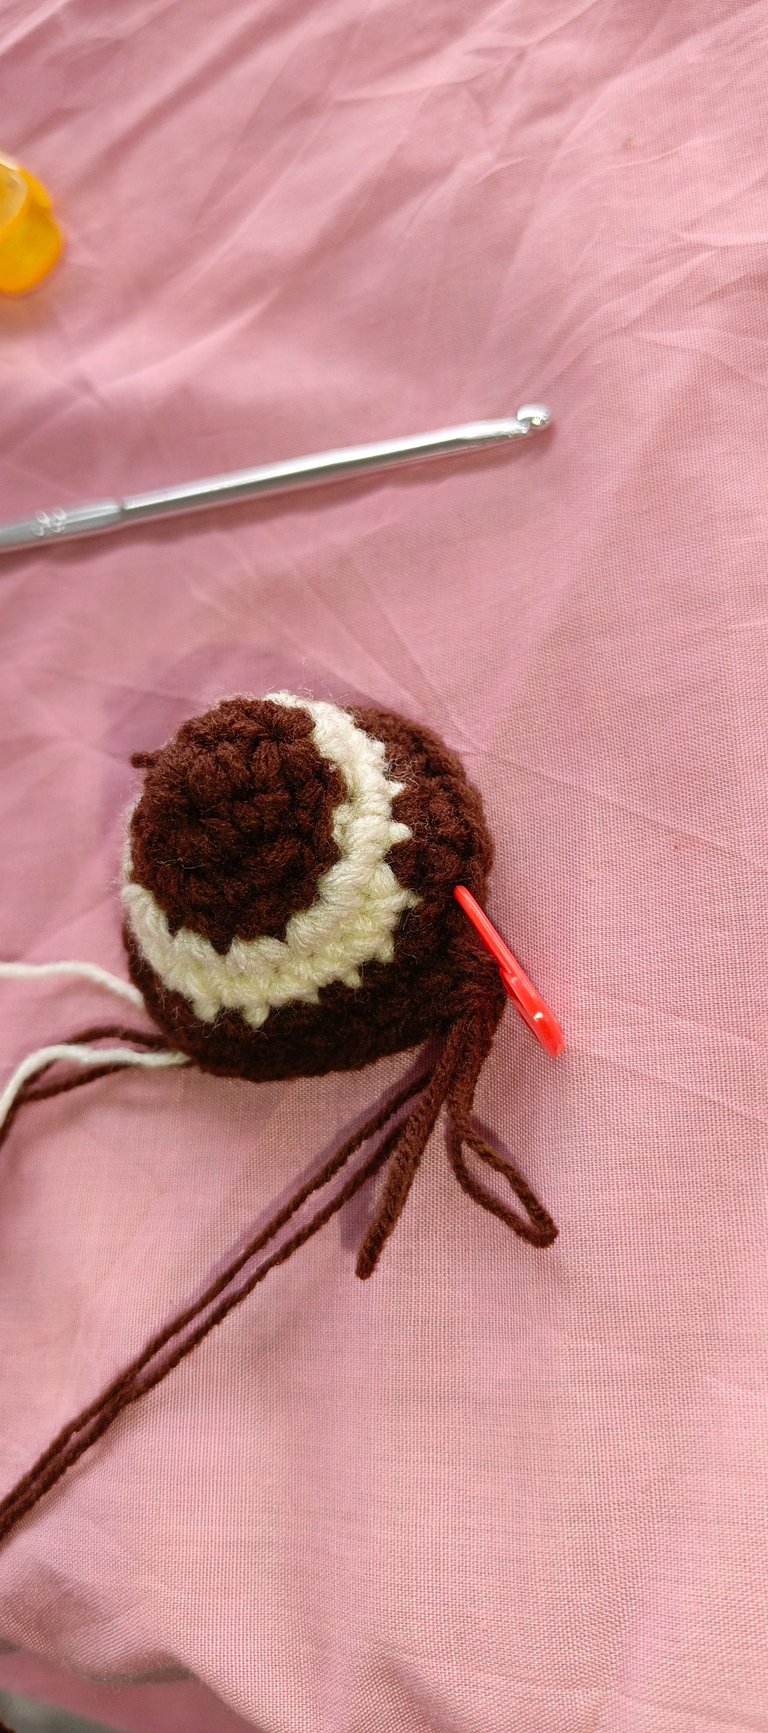
For row four, I went round the third row with one single crochet stitch into every stitch. By the end of row four, I reattached my brown yarn and used this to continue the fifth row. The reattachment wasn't hard because I didn't cut off the brown yarn when I changed colours. All I had to do was pick up the brown yarn from where I left it and continued the project.
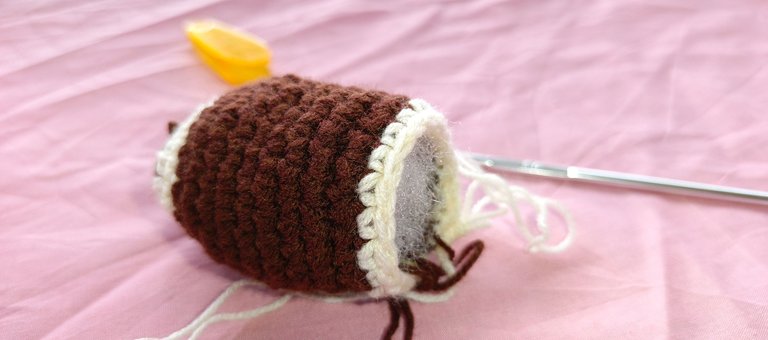
For the fifth row, I made an increase in every third stitch and repeated this till the end. For rows six to thirteen, I went round the rows with a single crochet stitch in each space. After the thirteenth row, I stuffed in some fiber filling and the football began to take shape.
Row fourteen was a decreasing row. The same way I put two stitches into one space on the third row, I made a decrease for two rows using the cream coloured used. Row fifteen was made using the same colour but with no decreases.
Row seventeen was a decreasing row and by the end of row seventeen, I had twelve stitches. Row eighteen was yet another decreasing row and by the end, I had just six stitches left. I put in the final fiber fillings here; just enough to make it squishy but not too squishy.
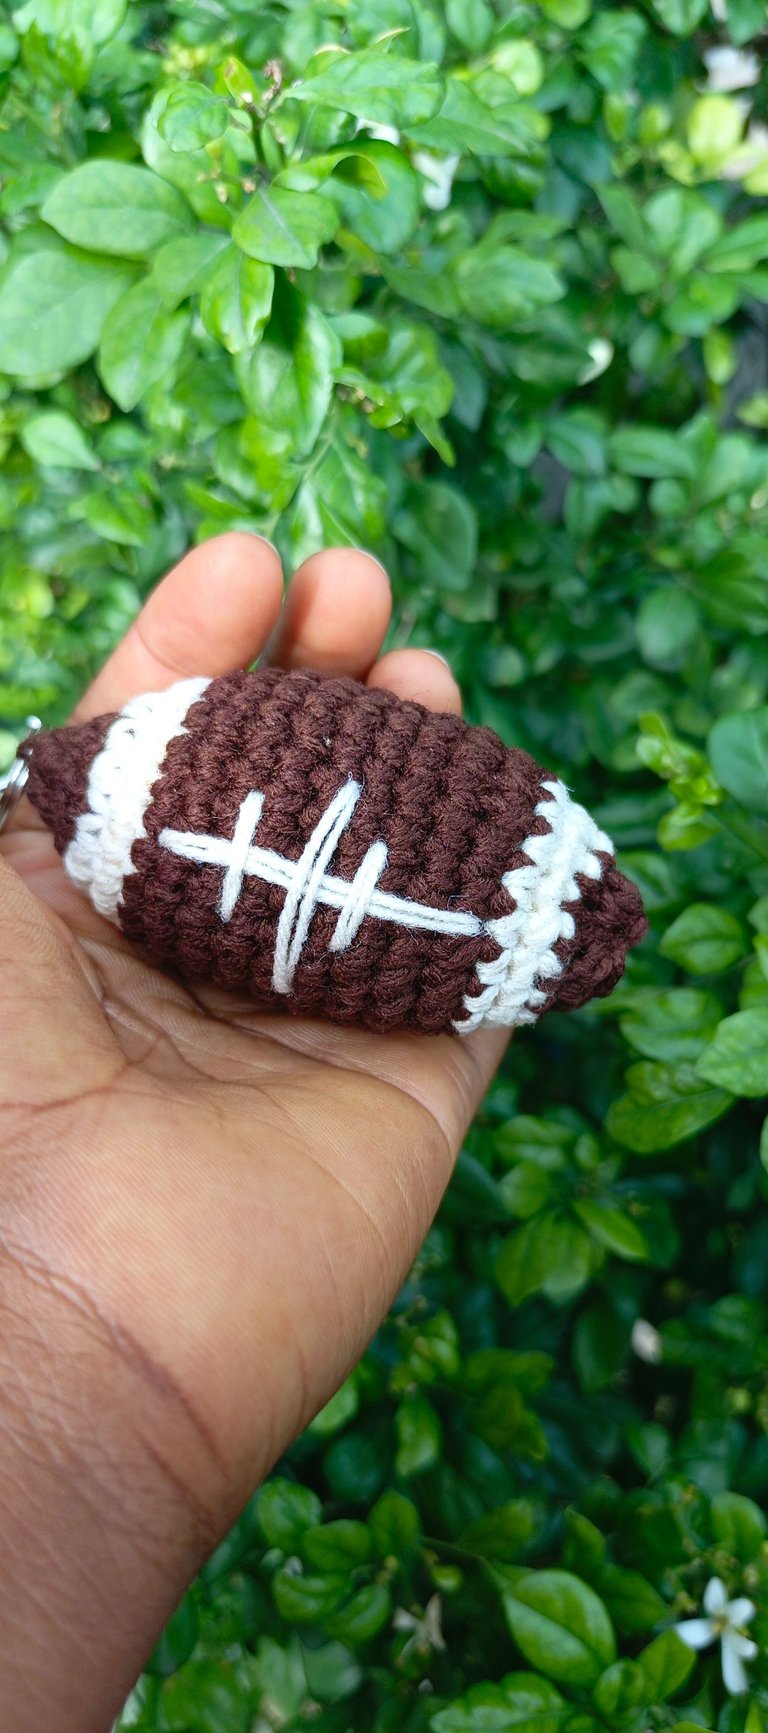
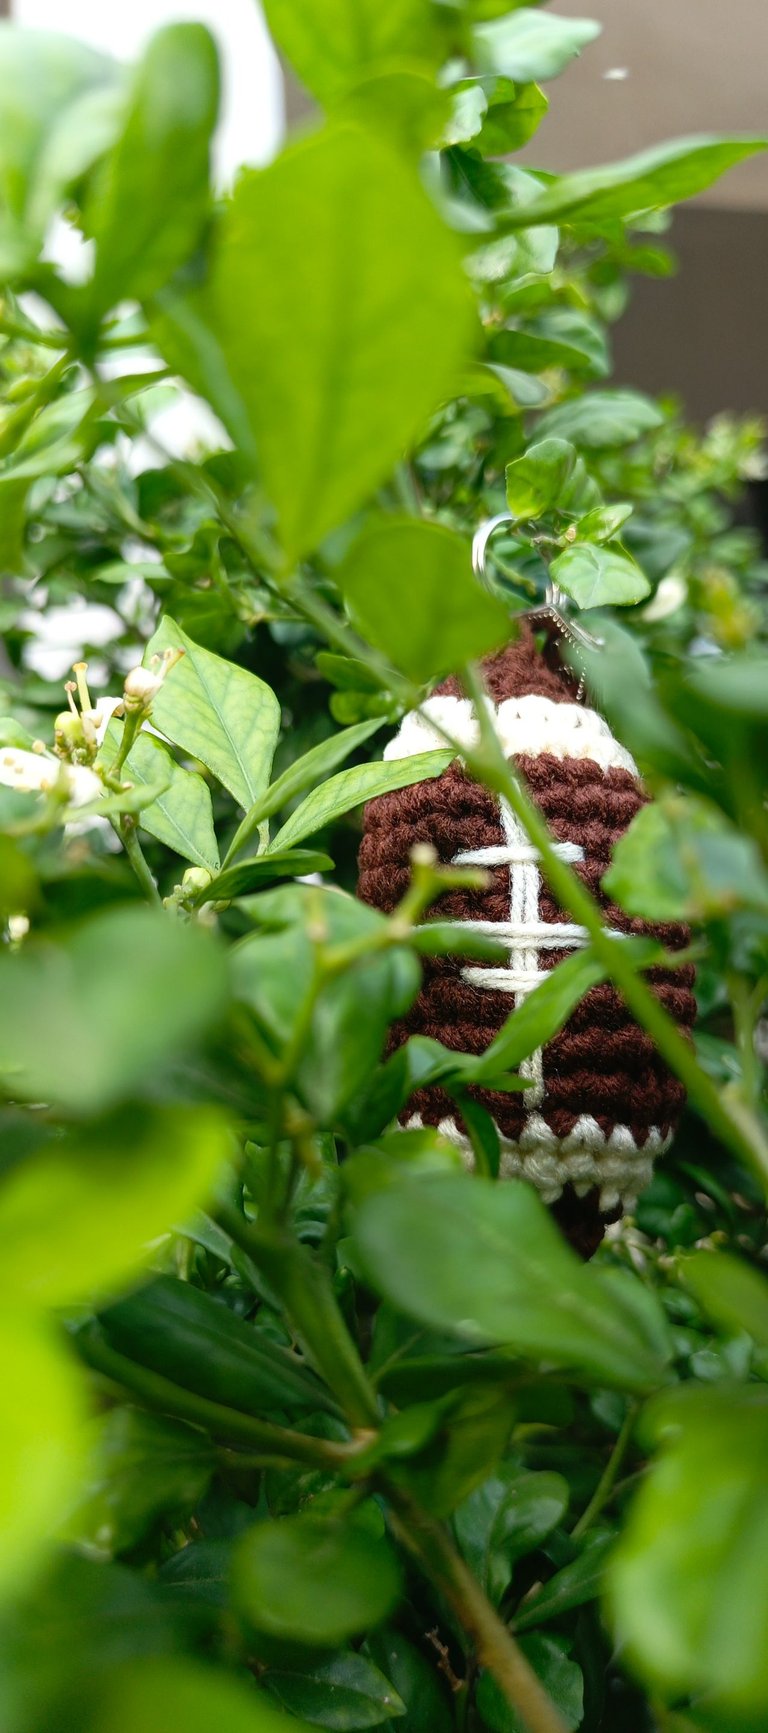
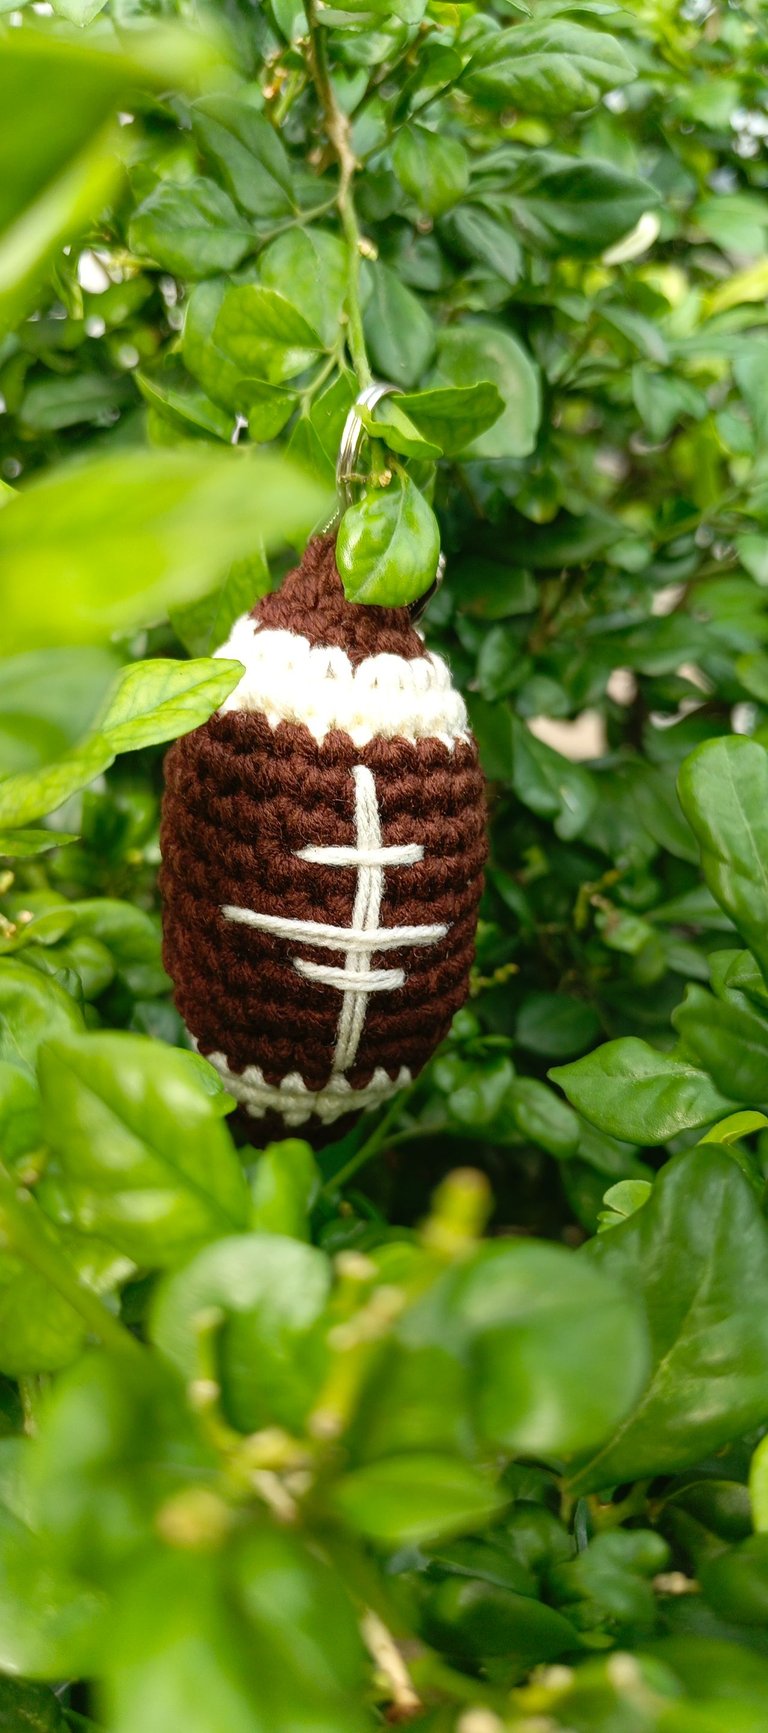
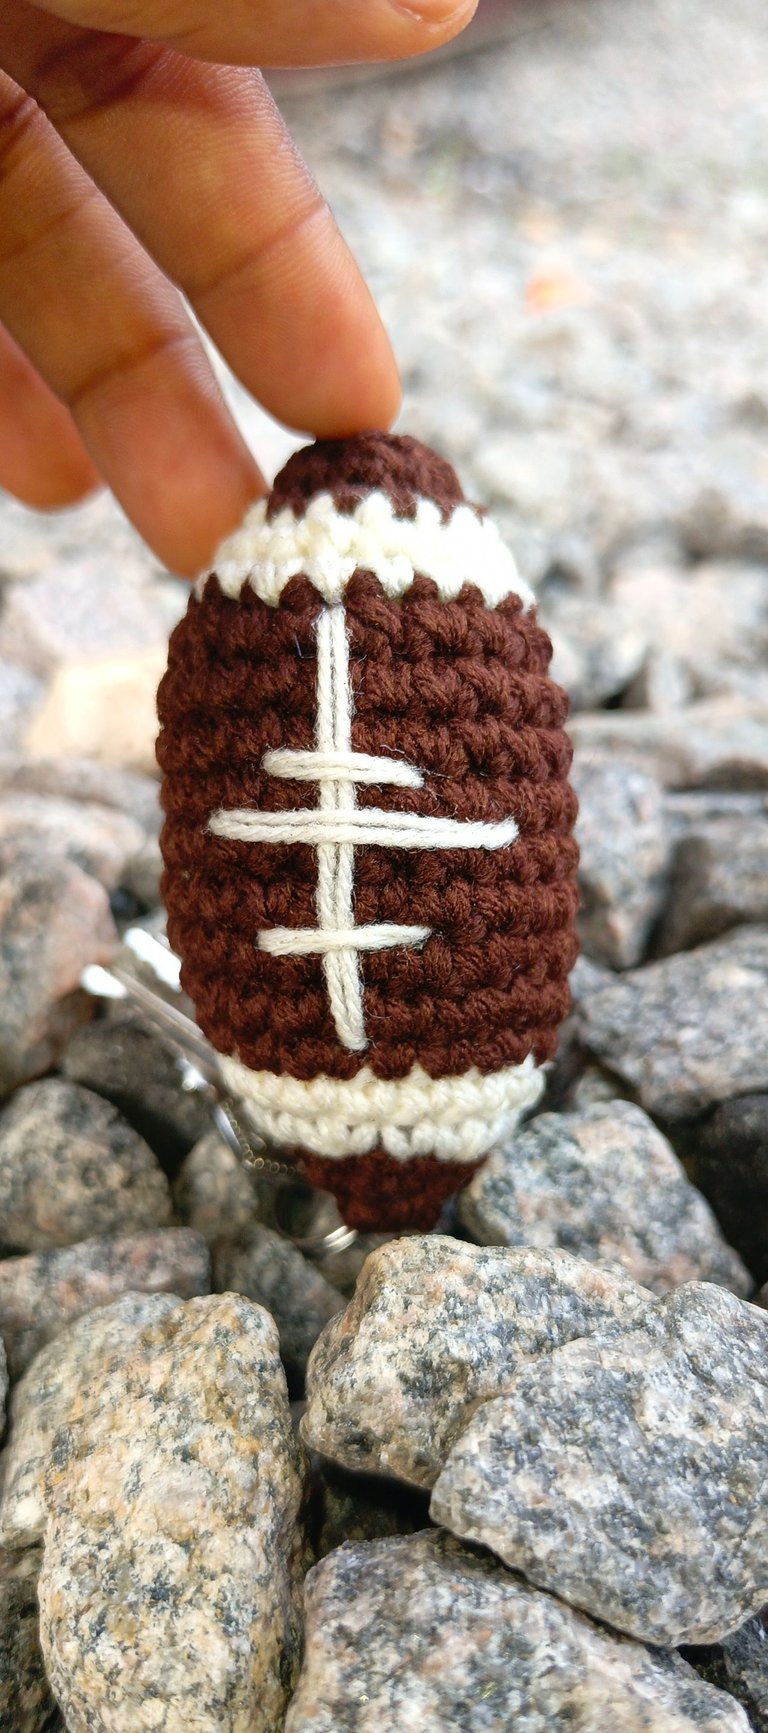
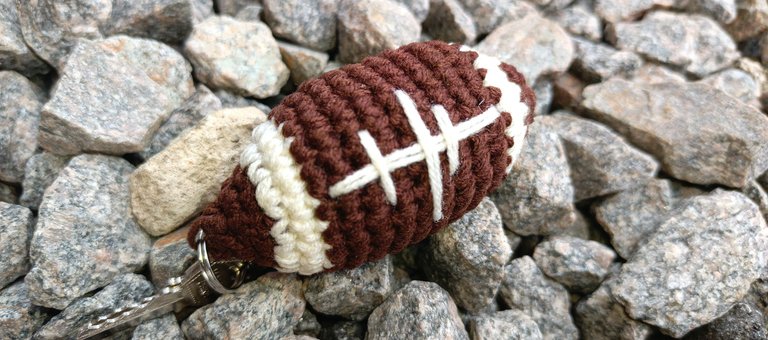
Next, I threaded my yarn through a needle and closed up the space using the front loops only. With this, I finished with the body of the project and it was time to put the final ‘line detail’.

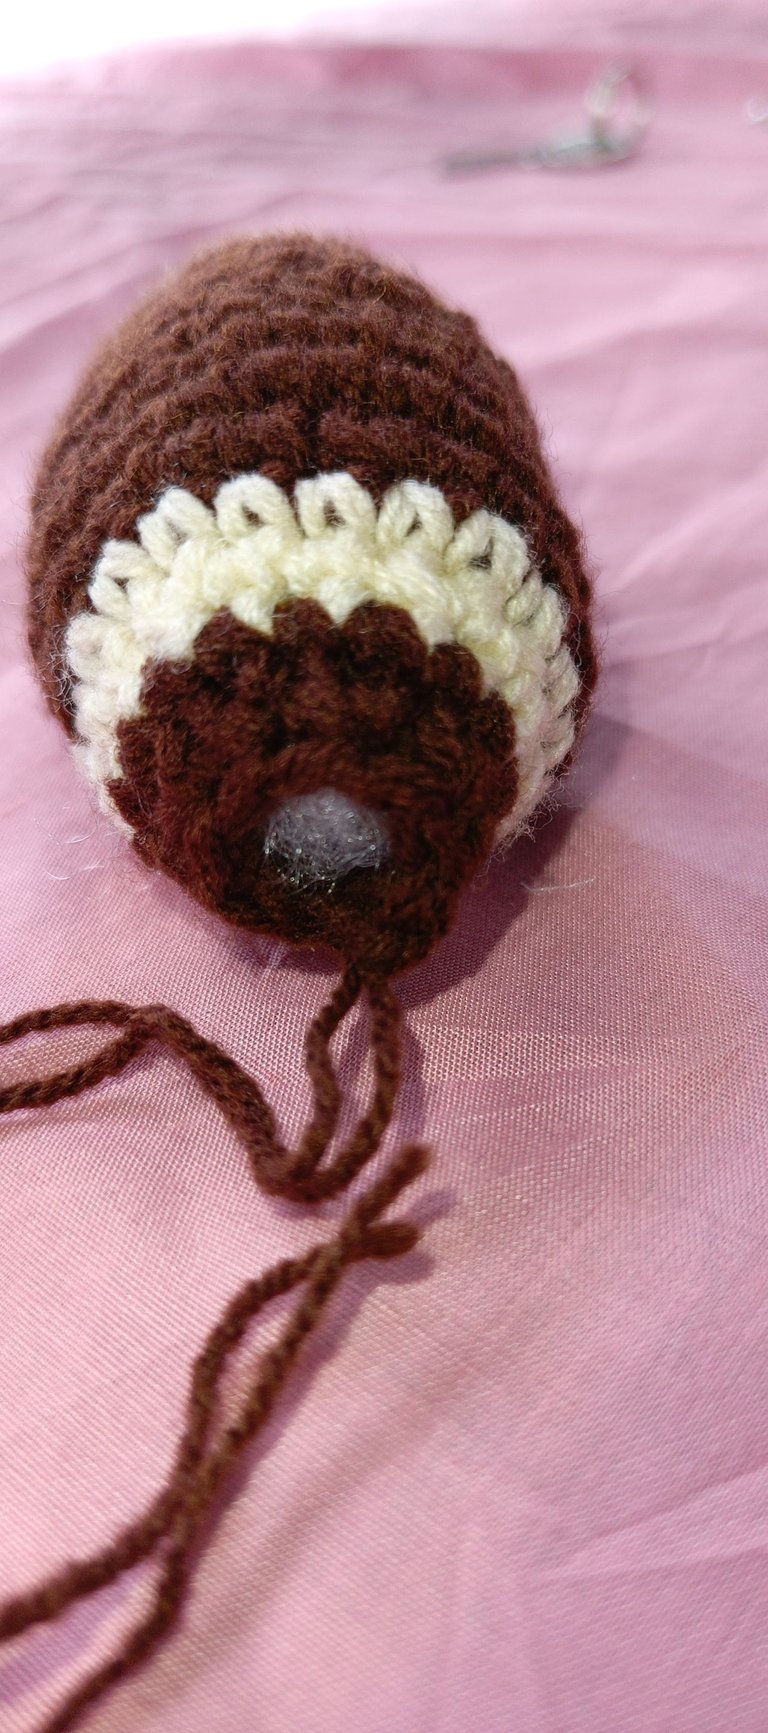
To do this, I threaded a needle with the cream coloured yarn and drew the lines across the ball. To fasten off, I tied my yarn, passed it through the back and cut it off. If this is done right, the yarn shouldn't show.
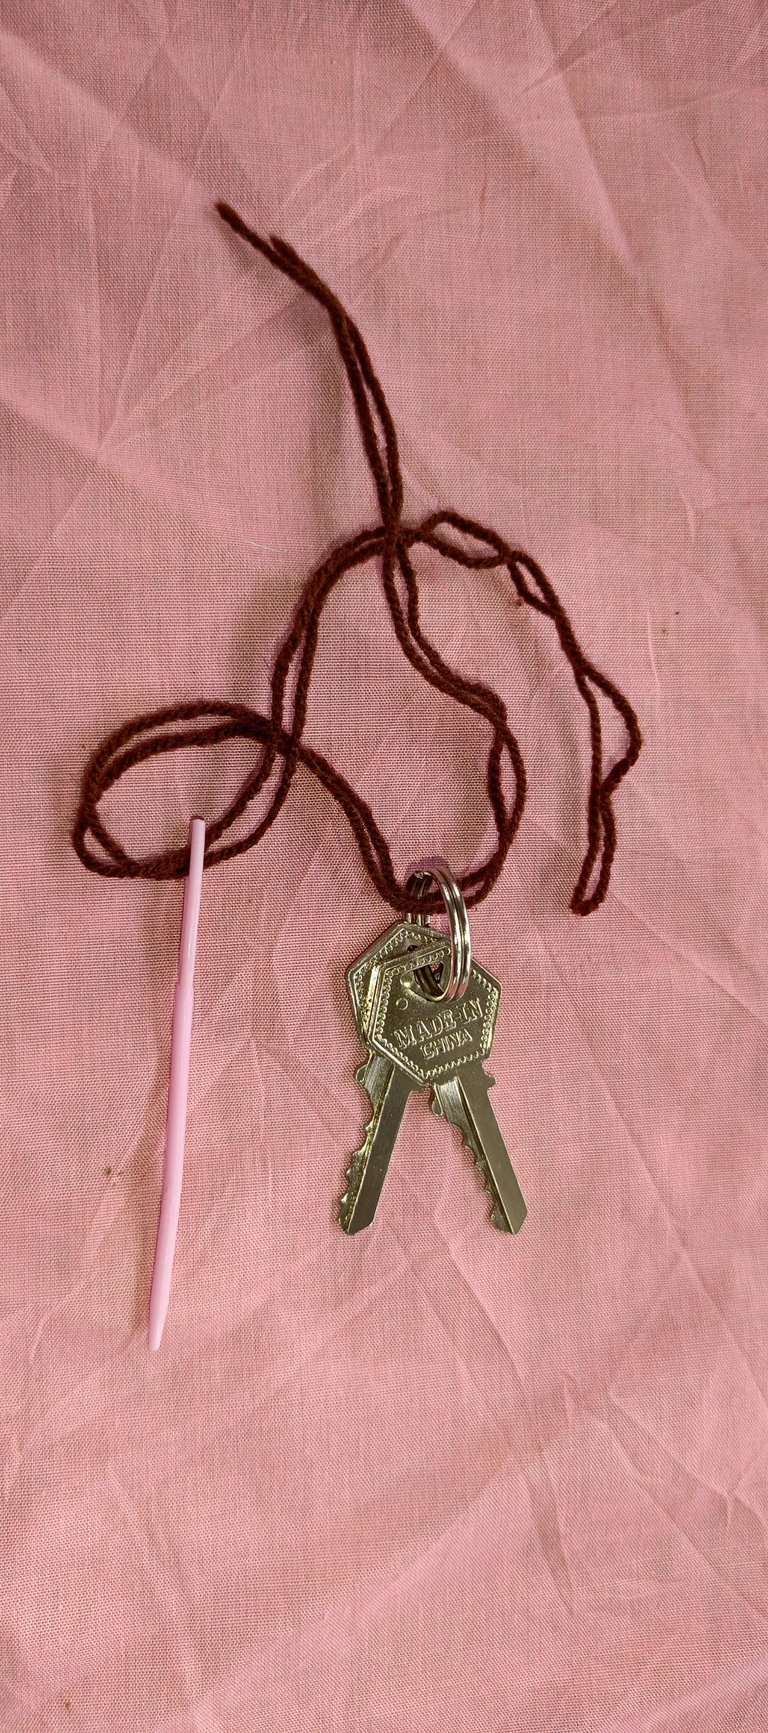
The final thing I did was create a loop for the key to be attached. I did this using a strand of brown yarn. This brought the project to an end.
The very first person who set her eyes on it, my sister, asked me to make one for her. A friend who saw a picture of it minutes later asked for one in the exact colour. I took the key holder for a lecture today and one of my colleagues instantly took out my keys and said she was keeping the key holder. I had to beg for it back😄. This simply means, I will be making a few more amigurumi American football keyholders soon.
I absolutely love how this turned out. And the feel is just right. It doesn't feel too stuffy or too squishy. The colours look well put together and overall, I'm glad I was able to pull this off on my first try.
Gallery


Images belong to me except stated otherwise.