🎀🎀🎀🎀🎀🎀🎀🎀🎀🎀🎀🎀🎀
BIENVENIDOS A MI BLOG 🎀WELCOME TO MY BLOG
ESPAÑOL🎀ENGLISH
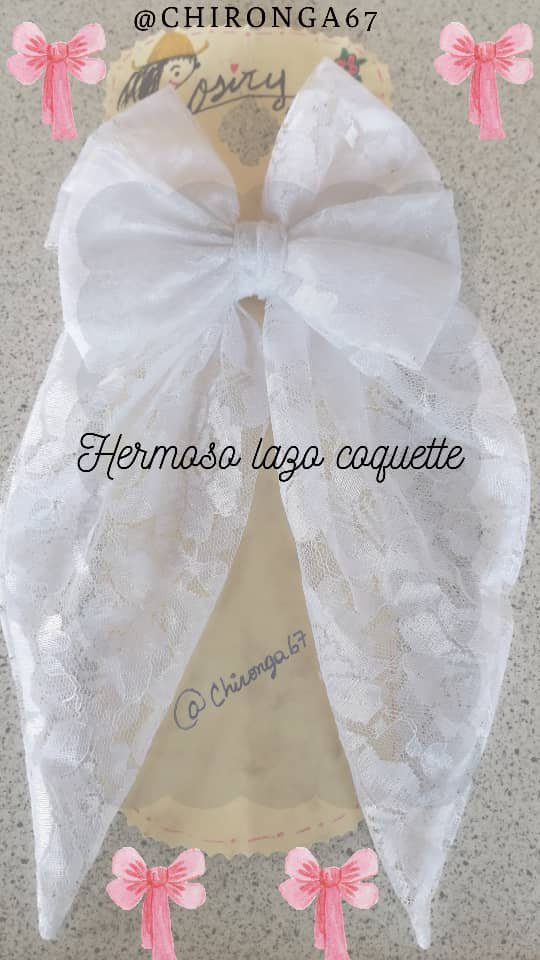
Feliz noche amigos de esta hermosa comunidad de Hive Diy hoy me anime a hacer este lindo lazo coquette🎀, es un lazo que esta de moda, no solo en el cabello sino que hay salcillos, pulsera y collar y yo no me quise quedar atrás en la elaboración de este hermoso lazo así que me puse a registrar entre mis telas y conseguí esta linda blonda, se me ocurrio hacerlo para la primera comunión que ya esta cerca, a manera de idea para los que visiten mi post. Así que sin pensarlo 2 veces me dedique a la elaboración de este hermoso lazo.
Happy evening friends of this beautiful community of Hive Diy today I was encouraged to make this cute bow coquette🎀, it is a bow that is fashionable, not only in the hair but there are hair bows, bracelet and necklace and I did not want to be left behind in the development of this beautiful bow so I started to search among my fabrics and I got this cute lace, I thought to do it for the first communion that is near, as an idea for those who visit my post. So without thinking twice I dedicated myself to the elaboration of this beautiful bow.
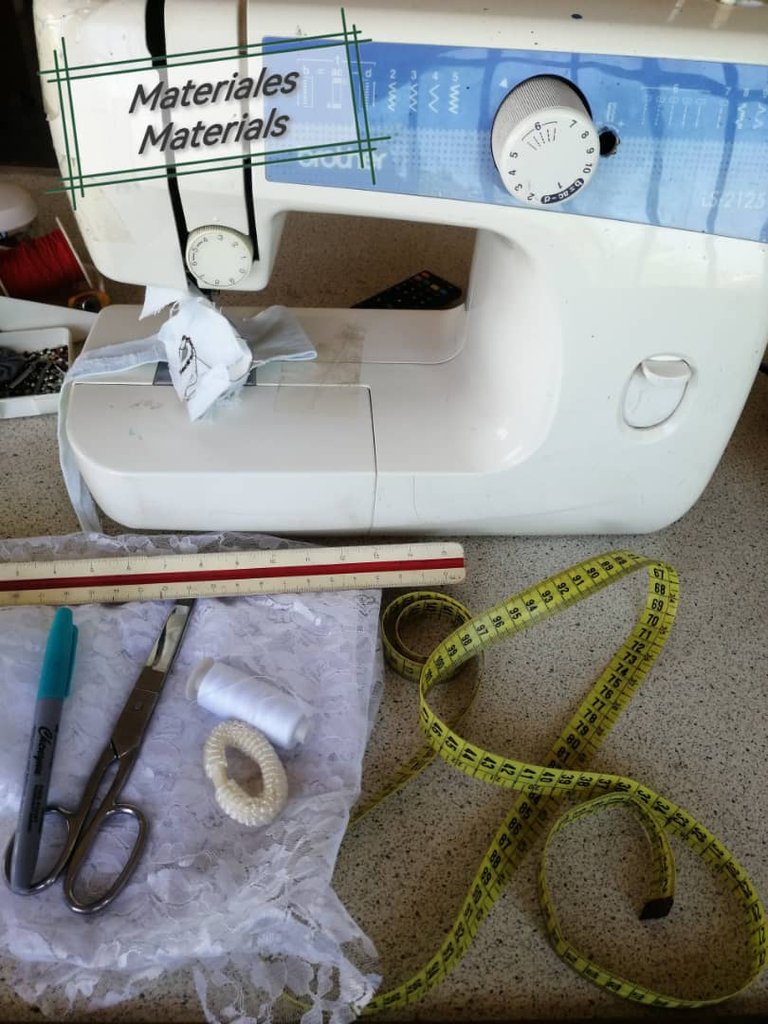
Materiales🎀Materials
🎀 30 cms de blonda blanca
🎀 Aguja
🎀 Hilo blanco
🎀 Maquina de coser
🎀 Regla
🎀 Cinta metrica
🎀Marcador
🎀 Tijera
🎀 Cola
🎀 30 cms of white lace
🎀 Needle
🎀 White thread
🎀 Sewing machine
🎀 Ruler
🎀 Measuring tape
🎀 Marker
🎀 Scissors
🎀 Glue
Paso a paso🎀Step by step
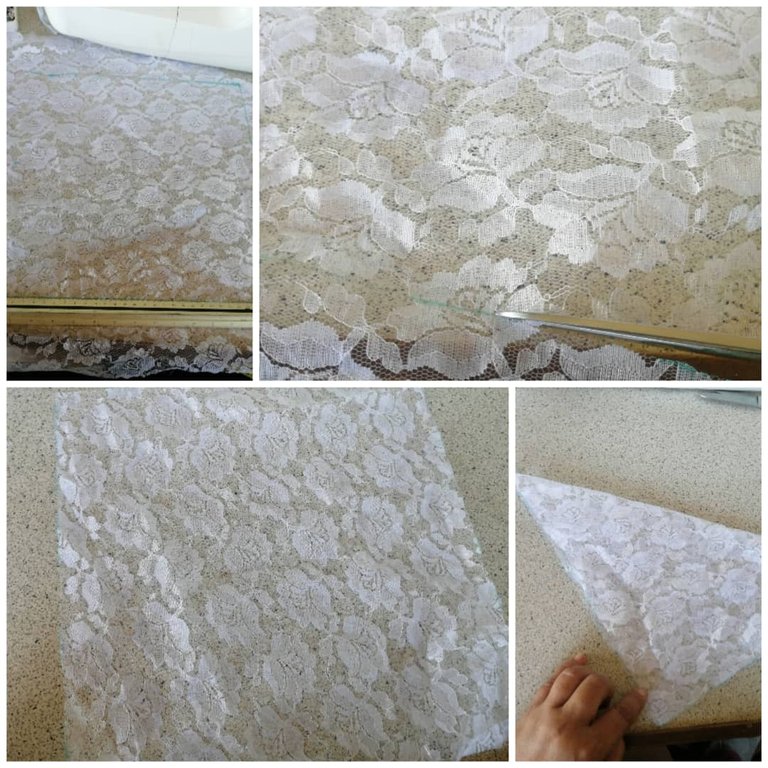
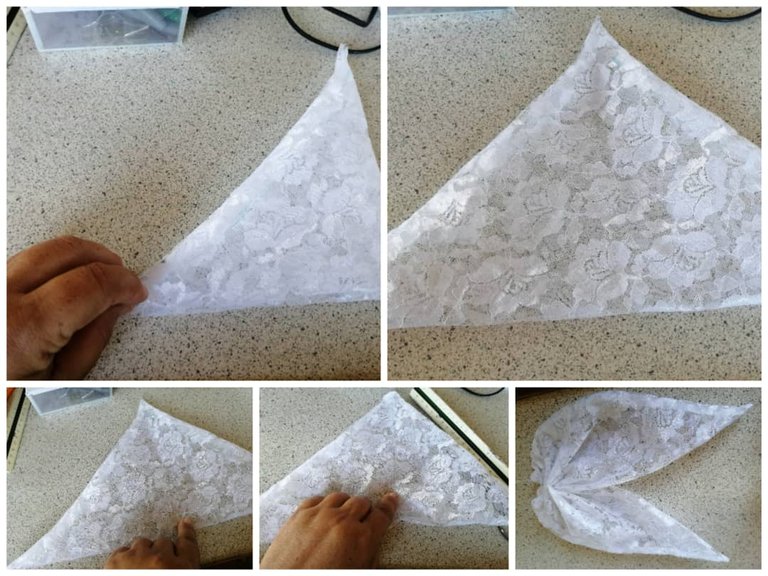
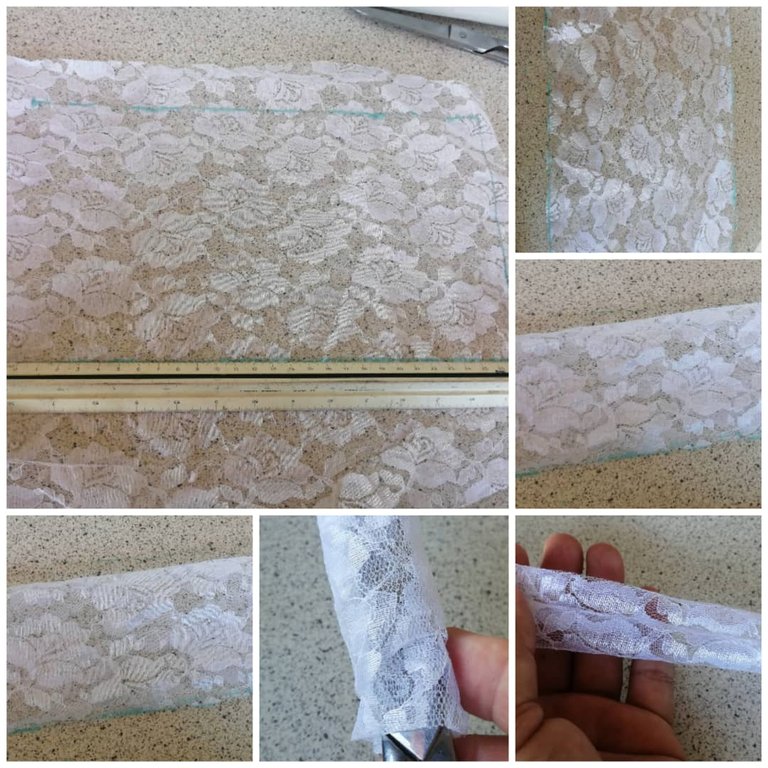
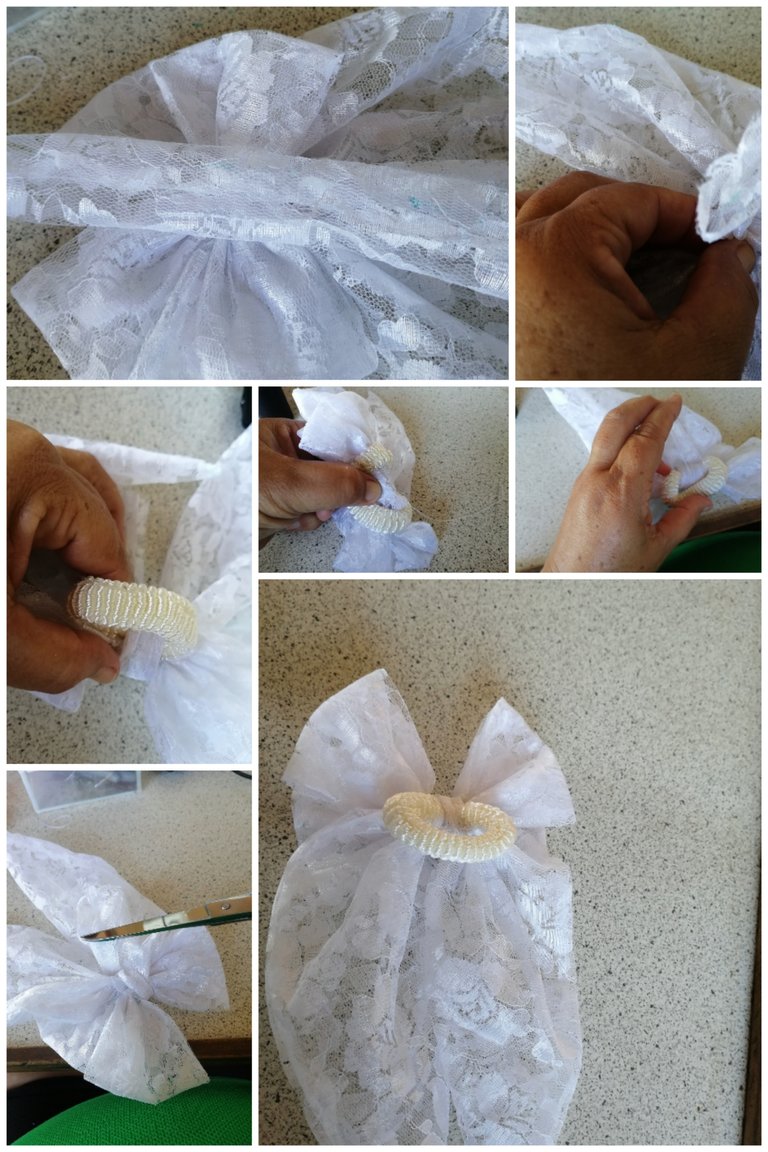
🎀Medi en la blonda un cuadrado de 30cms por 30cms, y con la ayuda de una regla y un marcador trace las líneas para hacer el cuadrado y lo recorte,lo doble a la mitad formando un triangulo esto lo hice por el lado revés de la tela, cosí por los 2 lados sin llegar a la punta para luego voltearlo, antes de voltear corte el sobrante de ambas puntas para que al vortearlo se vea bien, con la ayude de un lápiz voltee el triangulo sacando la tela por la punta que deje sin coser, cuidando sacar bien las puntas sin romper la blonda para esto me ayude con la tijera, luego lo doble a la mitad, marque bien y por esa línea bastee y luego frunci la tela, enrolle el hilo al medio para asegurar bien, anude y corte el sobrante, echo esto seguí con el siguiente paso.
🎀 I measured in the lace a square of 30cms by 30cms, and with the help of a ruler and a marker draw the lines to make the square and cut it out, fold it in half forming a triangle this I did it on the reverse side of the fabric, I sewed on both sides without reaching the tip and then flip it, before flipping cut the excess of both ends so that when I cut it out it looks good, with the help of a pencil flip the triangle taking out the fabric by the tip that I left unsewn, taking care to remove the ends without breaking the lace for this I helped me with the scissors, then fold it in half, mark well and along that line bastee and then gather the fabric, roll the thread in the middle to secure it well, knot and cut the excess, done this I continued with the next step.
🎀 Corte un rectángulo de 28cms de largo por 16 cms de ancho lo doble a la mitad por el revés y cosí por el borde, lo voltee con las manos y puse la costura en el medio, doble el rectángulo a la mitad y marque abrí y doble el lado izquierdo hacia el centro y el lado derecho hasta el centro haciendo coincidir los dos bordes, agarre una aguja con hilo y bastee cada borde con 8 puntadas en cada borde, hale el hilo frunci y asegure dando vueltas al hilo en el centro anude el hilo y corte el sobrante y ya quedo listo un lazo.
Cut a rectangle 28cms long by 16cms wide, fold it in half on the back side and sew along the edge, turn it over with my hands and put the seam in the middle, fold the rectangle in half and mark, open and fold the left side to the center and the right side to the center, making the two edges coincide, grab a needle with thread and baste each edge with 8 stitches on each edge, pull the thread frunci and secure by turning the thread in the center, knot the thread and cut the excess and a bow is ready.
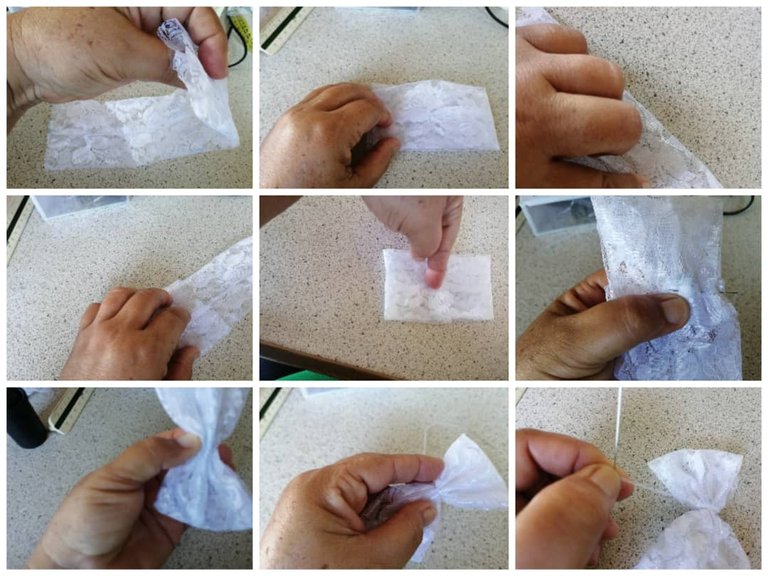
🎀 Hice el mismo procedimiento con el rectángulo de 25cms de largo por 16 cms de ancho, para armar el segundo lazo, lista las tres piezas me dedique a armar el lazo.
🎀 I did the same procedure with the rectangle of 25cms long by 16 cms wide, to assemble the second loop, ready the three pieces I dedicated myself to assemble the loop.
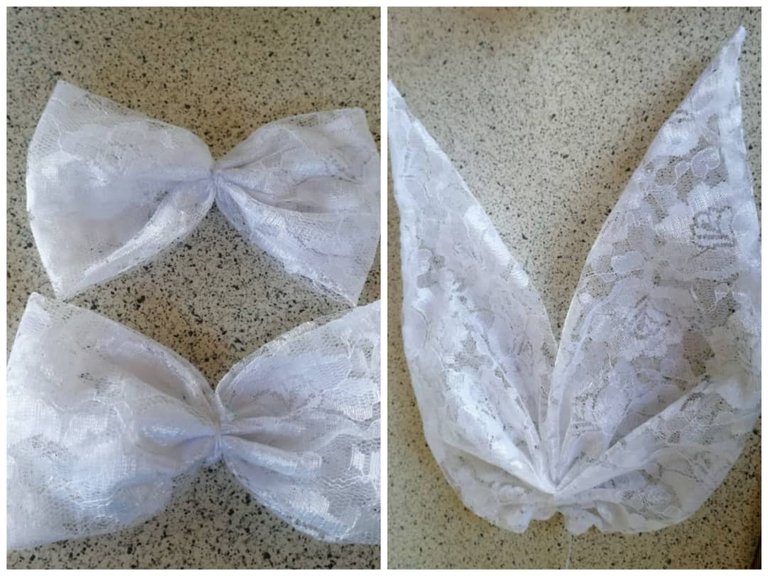
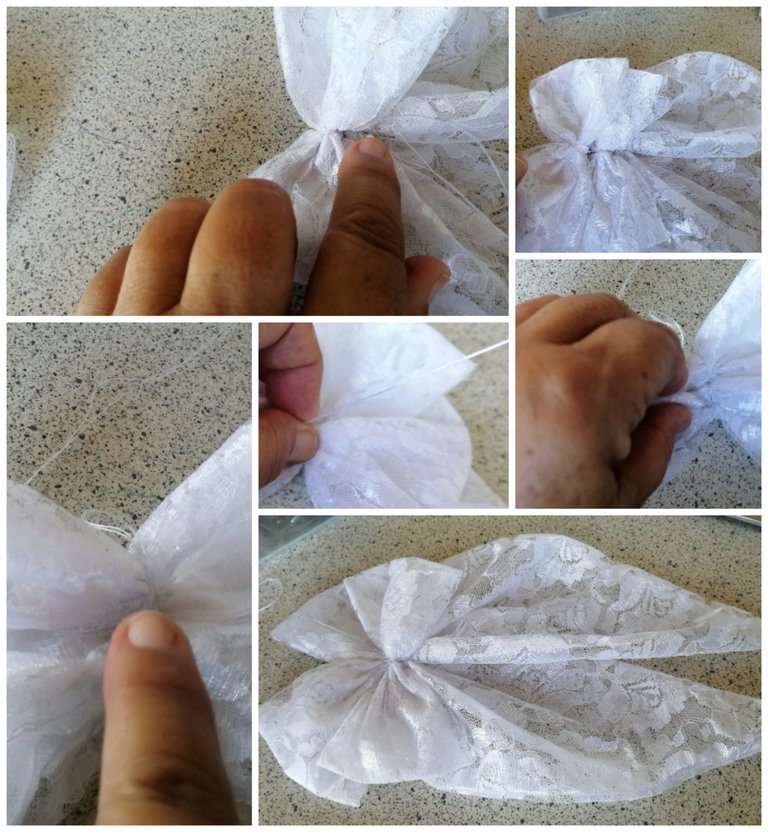
🎀 Agarre el triangulo que ya tenía fruncido y lo uni por el medio al lazo más pequeño con la aguja y el hilo y luego al lazo más grande, asegure las tres piezas dándole vuelta al hilo alrededor de las 3 piezas asegure el hilo y corte el sobrante, hice un rectángulo de 15cms de largo por 10cms de ancho lo cosí por el revés, lo voltee y con ese rectángulo uní la cola al lazo, le di 2 vueltas corte el sobrante y cosí y ya esta listo mi lazo, también pueden usar una pinza.
🎀 I grabbed the triangle that was already gathered and attached it in the middle to the smaller loop with the needle and thread and then to the larger loop, secured the three pieces by turning the thread around the 3 pieces, secured the thread and cut the excess, I made a rectangle of 15cms long by 10cms wide, I sewed it on the back side, I turned it over and with that rectangle I joined the tail to the loop, I gave it 2 turns, cut the excess and sewed and my loop is ready, you can also use a clamp.
🎀 Se me ocurrió cortar un cartón y adornarlo como si fuera a vender los lazos, también es una idea para el que se anime a hacerlo para la venta.
🎀 It occurred to me to cut a cardboard and decorate it as if I were going to sell the ribbons, it is also an idea for whoever is encouraged to do it for sale.
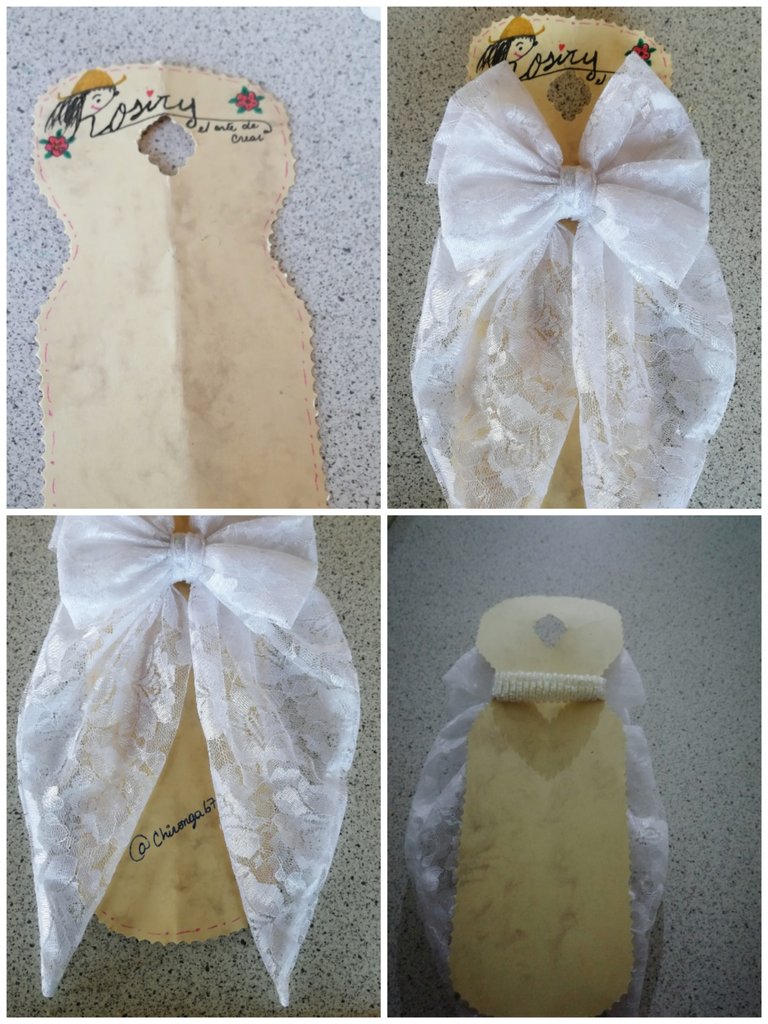
En las manualidades la creatividad se va desarrollando a medida que vamos creando.
In handicrafts, creativity is developed as we create.
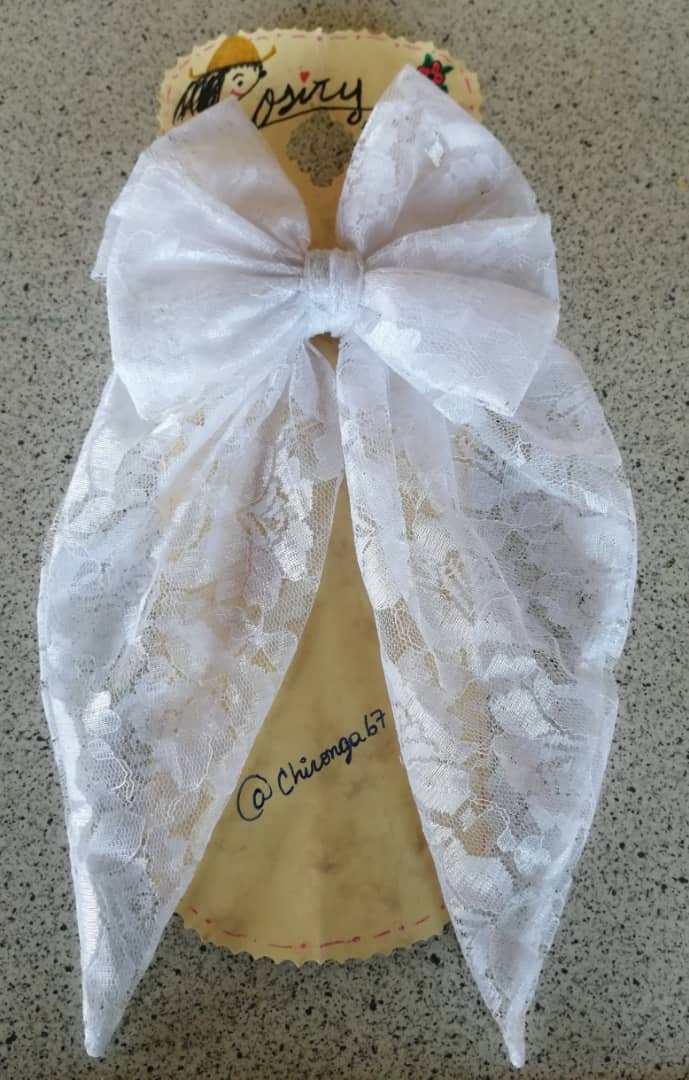
Hasta aquí mi post de hoy espero les guste y se animen a hacer estos hermosos lazos para regalar o para empezar un emprendimiento.
Las fotos aquí utilizadas fueron tomadas por mi con mi celular huawei mate lite20, use Deelp traductor
This is my post today I hope you like it and I encourage you to make these beautiful ribbons to give as a gift or to start a business.
The photos used here were taken by me with my cell phone huawei mate lite20, use Deelp translator.
🎀🎀🎀🎀🎀🎀🎀🎀🎀🎀🎀🎀🎀