Hello Creatives✨
For today, I will be sharing with you one project I was really excited to make. About a month ago, I got an order from a male client and I was thrilled. This is because I made a resolution to focus more on male clients this year since the female-dom is already extremely saturated. I spoke with a lot of males about their preferences and as you would imagine, some preferred more tightly stitched wears while others preferred designs with wide spaces. Either way, I got them covered.
My resolution did not spam from a place of nonchalance because I've actively been making moves to enhance my success. This would be a discussion for another day. Today, let me brief you about my first male client. Casual male wears are really limited in that they just go with a shirt, a pair of pants and they’re good to go. However, detailing and finishing is pertinent when dealing with the male clientele. My client on the flip side wanted something heavy and not too tightly stitched. He sent a few samples of what he wanted, we discussed, came up with a few modifications and soon after I got to work.

I started making his piece a week to my examinations and during my exams, I couldn’t get myself to touch this project; even when I desperately wanted to. I guess at this point, I had clearly outlined my priority. The beautiful thing is that the client wasn’t in a haste and was in agreement with my terms.
Fast forward to the day after my exam, I picked up the project once again and in two days, I was done with it; or at least almost done because I haven't attached the buttons yet. I plan to do that today.

Materials Needed
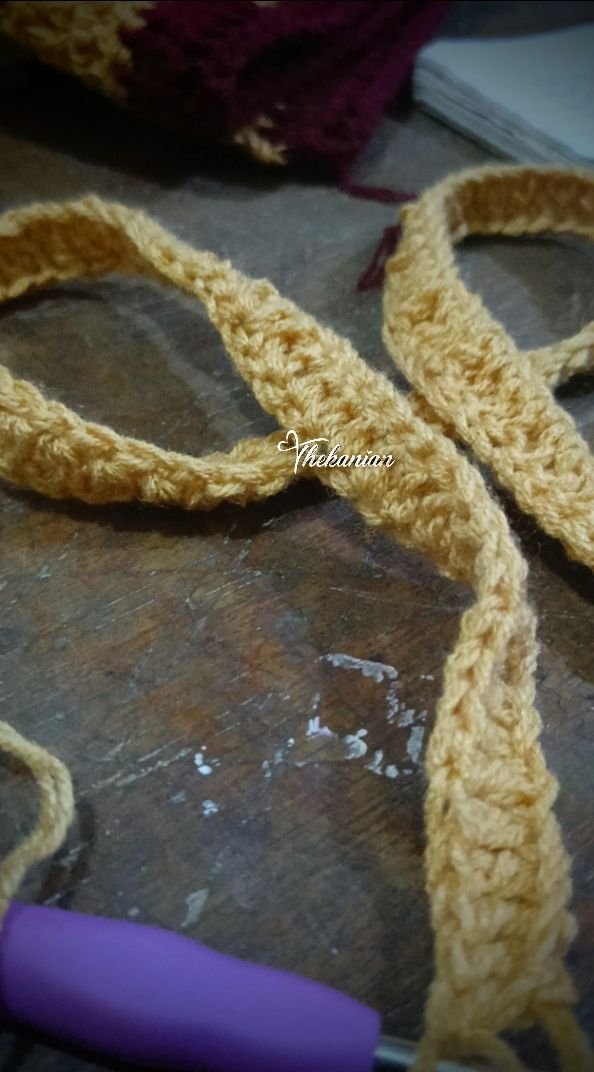
- Yarn
- 5.0mm crochet hook
- Darning needle
- A pair of scissors
- Lots of stitch markers
- A lighter
Procedure
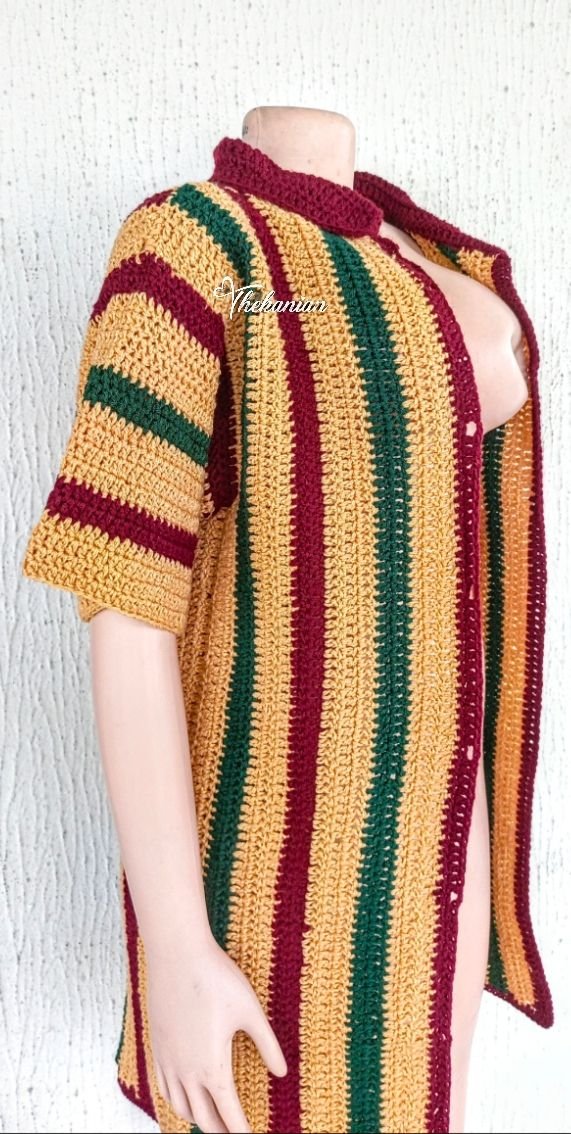
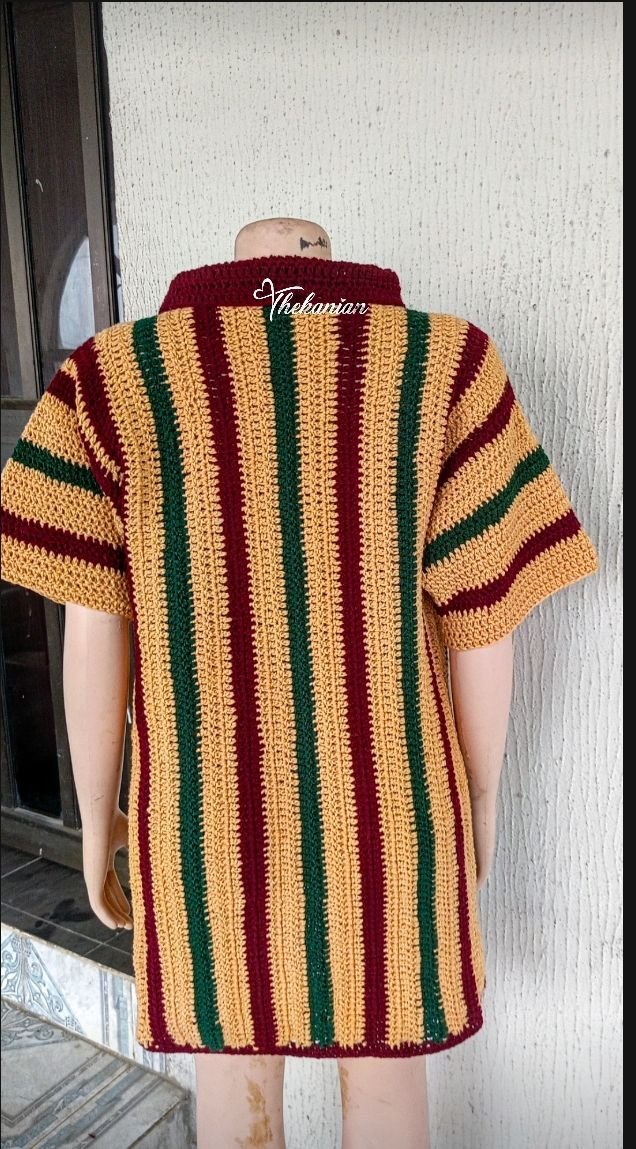
I made this crochet button-up shirt in three panels, two front panels and the back panel, using the client's measurement. I must state that the client is quite a tall fellow and things that seem extra long for average people are normal on him
I made my starting chain equivalent to the inches I measured and then proceeded to make a number of rows using double crochet stitches. The double crochet stitch with the hook size I used gave the shirt a little bit but not too much space, just like the client wanted.
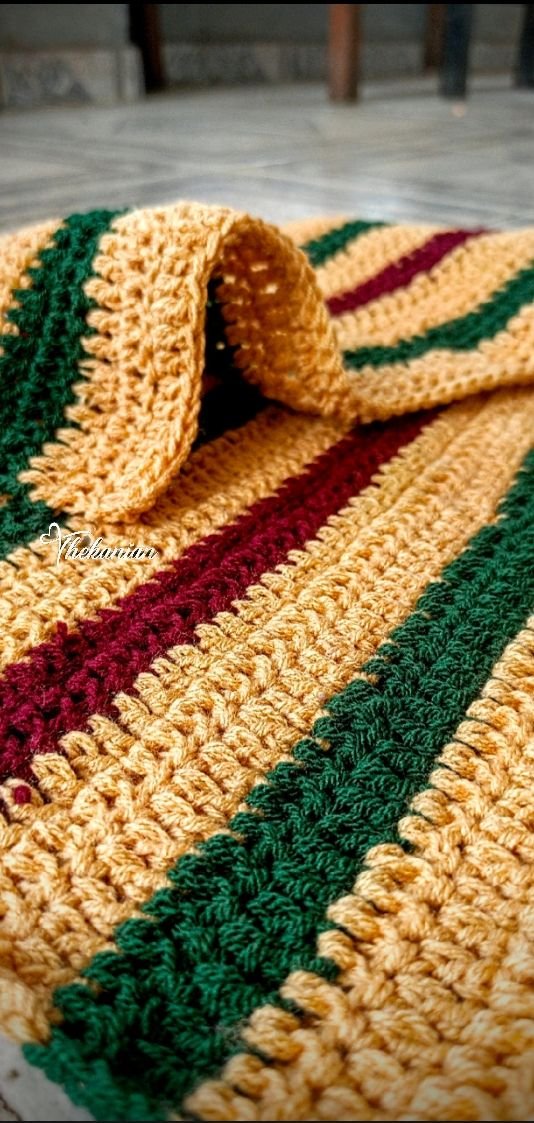
The most tasking part of the entire project was not just changing colour intermittently but changing colours and still striving to maintain my stitch count. I know that on a few occasions, I may have made one stitch less or one stitch more and this of course warranted me to loosen the row and do the right thing.
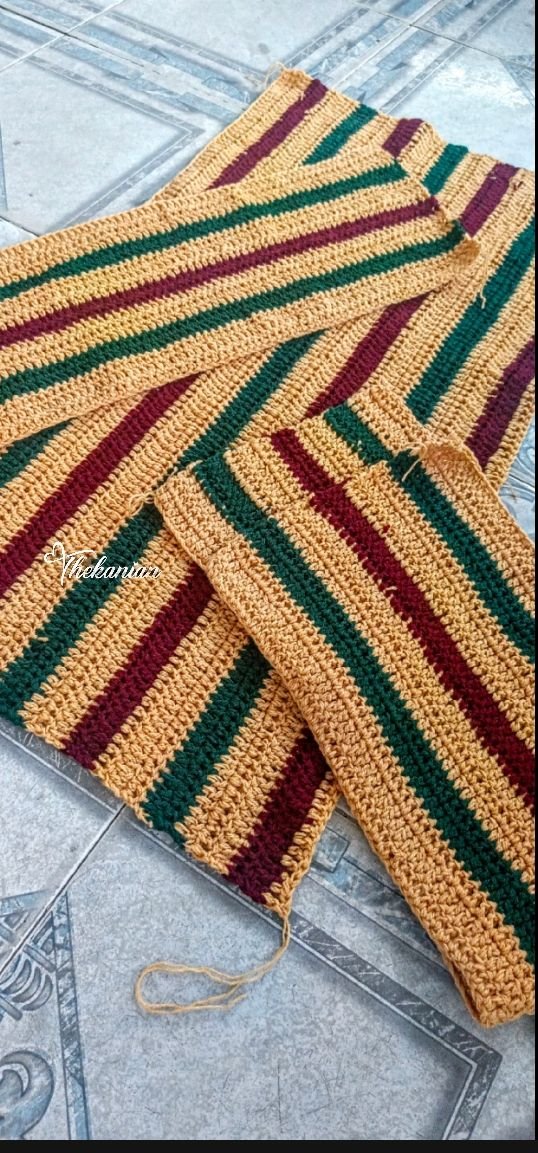
I made a total of eighteen rows on the front panel and thirty-six rows on the back panel. While doing this, It is pertinent to know that some humans have broad shoulders and this should be factored in while making tops, shirts or polos.
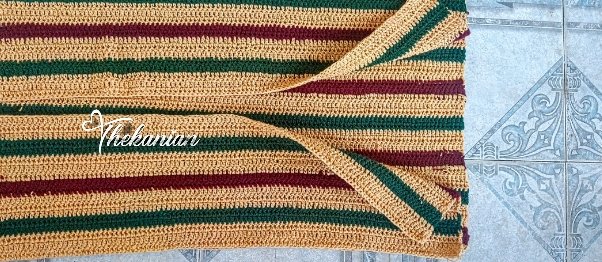
After I got all my rows intact, It was time to couple the sides. Leaving space for the arm hole. In the past, I always had issues with my arm holes and sleeves but I'm glad I got it right this time.
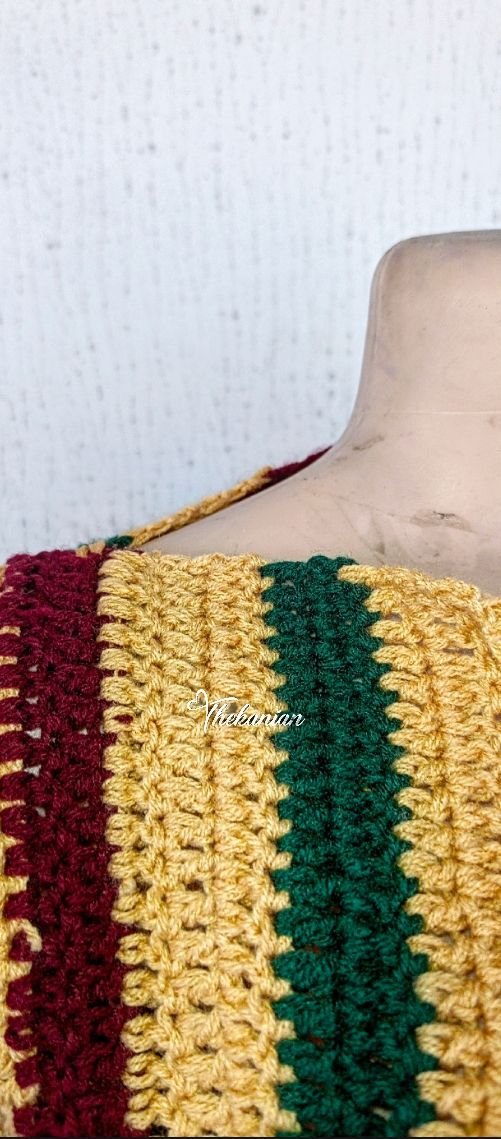
Before the collar.
After coupling, I made both sleeves, joined the panels at the shoulders and then proceeded to make the collar. After making the collar, I gave the shirt a proper finish using a row of half double crochet stitches and another row of single crochet stitches on both sides. While doing this, I made sure to factor in button holes in strategic places.
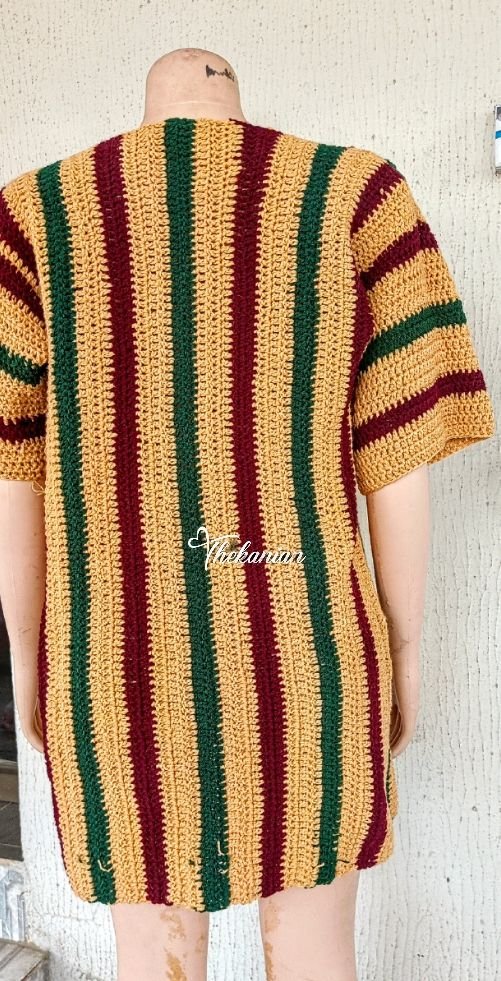
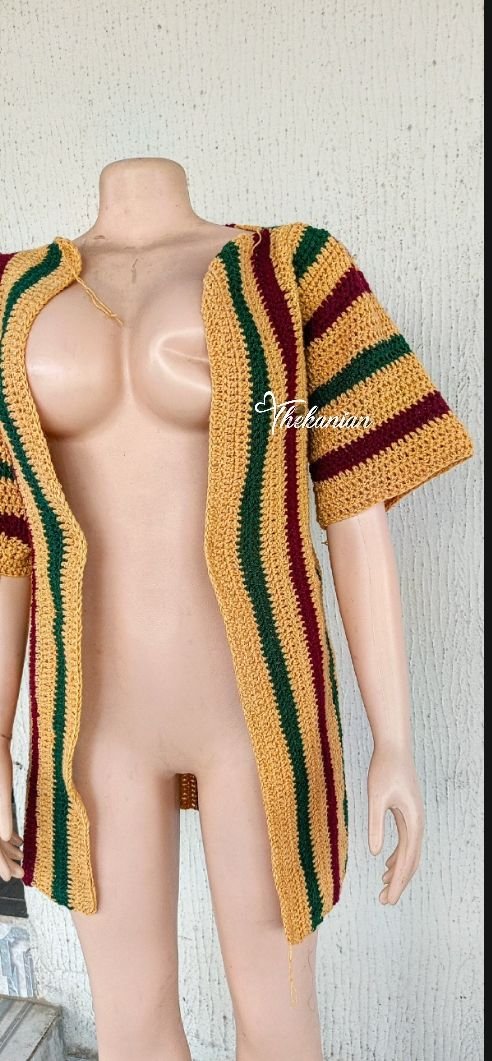
I worked round the edges, sewed in my loose ends and lighted up the strands and fuzzies that needed to be eradicated.
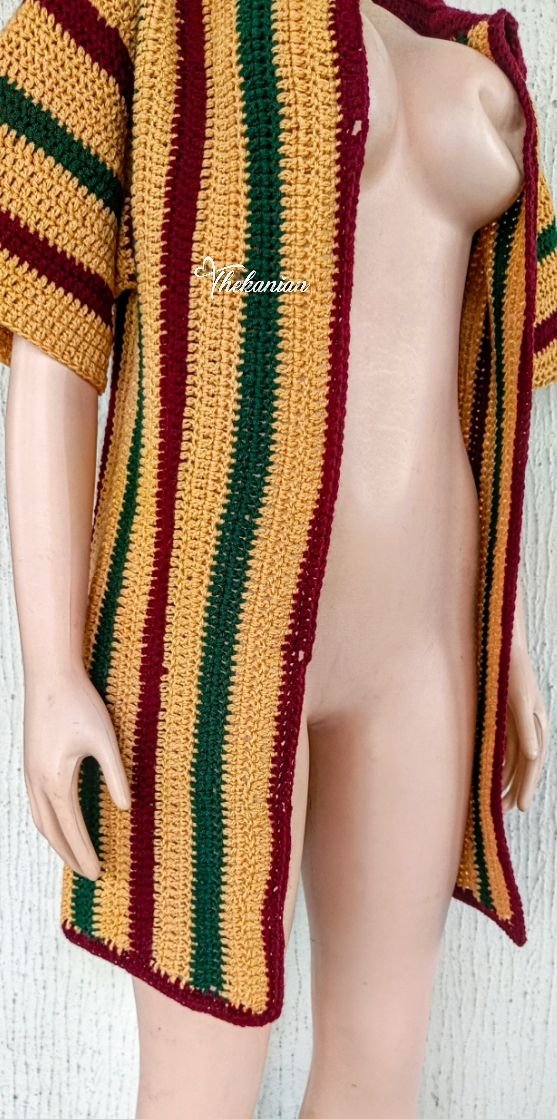
I absolutely love how this looked in the end. I'm waiting for my cloth tags to arrive and that would be the final touch to this masterpiece before it is sent out. What do you think of it?
Images are mine.
©Thekanian
LIEBE🤍
Posted Using INLEO


