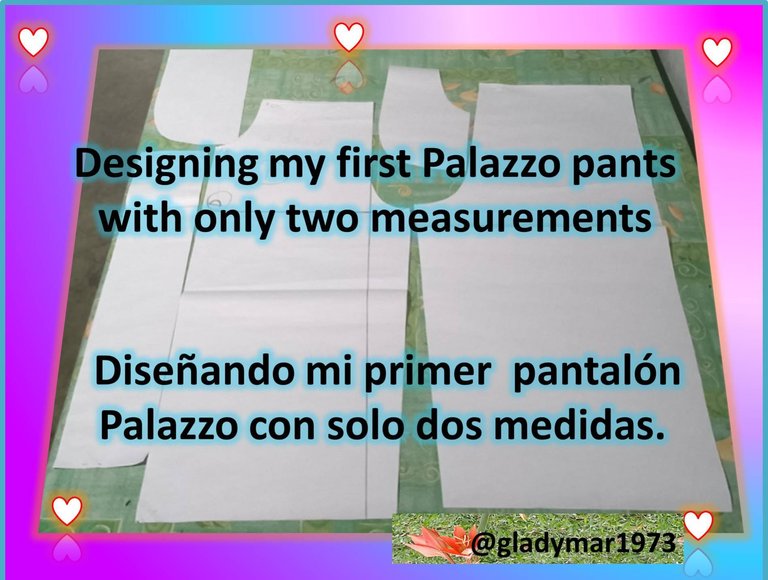
Un feliz y bendecido día tengan todos mis queridos creadores, en esta oportunidad les voy a compartir como diseñar un elegante Pantalón Palazzo con elástica, de manera fácil y sencilla con tan solo 2 medidas (la medida de la cadera y el largo deseado); les invito a compartir conmigo de este nuevo proyecto.
A happy and blessed day to all my dear creators, in this opportunity I am going to share with you how to design an elegant Palazzo Pants with elastic, in an easy and simple way with only 2 measures (the measure of the hip and the desired length); I invite you to share with me this new project.

Como parte de mi trabajo en mi iglesia es requerido el uso de faldas o vestidos, así que hasta ahora no me había llamado mucho la atención confeccionar un pantalón, más recientemente se nos autorizó a usar pantalones en clase siempre y cuando no fueran de Jeans.
Por lo quise diseñar mi propio pantalón para acudir a mis clases, es por ello que si varios tutoriales en Youtube y tomé un poquito de cada uno de ellos para realizar este pantalón a mi gusto, así que si te animas pulgares arriba y adelante aprendamos juntos.
So I wanted to design my own pants to go to my classes, that's why if several tutorials on Youtube and I took a little bit of each of them to make this pants to my liking, so if you dare thumbs up and go ahead and learn together.

Para confeccionar el patrón utilicé los siguientes materiales:
-2 pliegos de papel bond
-Lápiz y color
-Escuadra y regla larga
-Alfileres
-Cinta métrica.
To make the pattern I used the following materials:
- 2 sheets of bond paper
- Pencil and color
- Square and long ruler
- Pins
- Tape measure.

Delantero
Paso 1 para comenzar el patrón extendemos 1 pliego de papel bond y hacemos un rectángulo con la Cuarta de Cadera y el largo de pantalón, bajamos de la esquina superior hacia abajo marcamos nuevamente la misma medida de cuarta de cadera, a ambos lados (que vendrá siendo nuestra altura de cadera) y unimos con una línea que sobresalga unos centímetros del rectángulo.
Step 1to start the pattern we extend 1 sheet of bond paper and make a rectangle with the hip quarter and the length of the pants, we go down from the top corner down and mark again the same measure of hip quarter, on both sides (which will be our hip height) and join with a line that protrudes a few centimeters from the rectangle.
Paso2 Seguidamente para el tiro del pantalón dividimos nuestro contorno de cadera entre 16 y esa medida la marcamos en línea sobresaliente y también del cruce de esa línea hacia arriba, unimos con una semicurva, posteriormente en el ruedo de marcamos la misma media menos 3 cm y unimos una línea recta con nuestro tiro y cortamos .
Step2 Then for the trouser's drawcord we divide our hip circumference by 16 and we mark that measure in a protruding line and also from the crossing of that line upwards, we join with a semicurve, then in the hem we mark the same average minus 3 cm and join a straight line with our drawcord and cut.
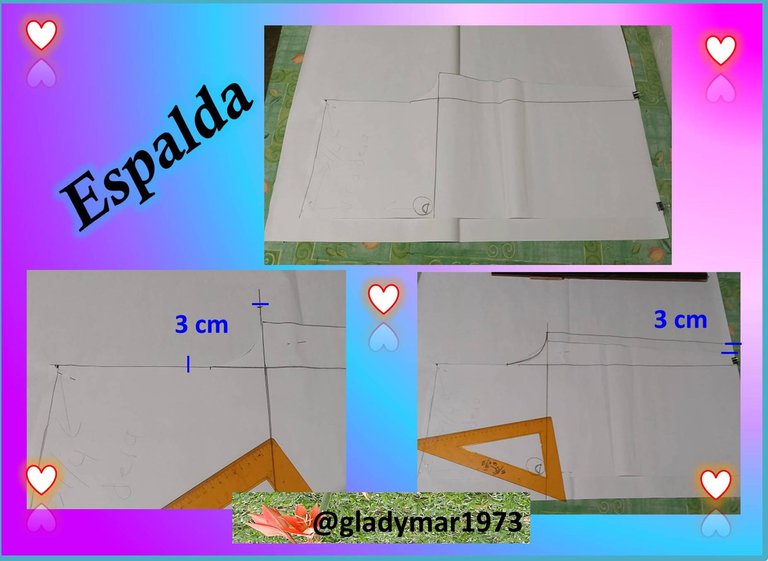
Espalda
Paso 3 Traslado de tiro colocamos el patrón delantero sobre el otro pliego de papel bond dejando unos 6 cm de margen y extendemos las líneas del tiro, marcamos 3 cm hacía la derecha y hacía arriba, y trazamos una semicurva, lo mismo hacemos en el ruedo marcamos 3 cm y unimos en línea recta.
Step 3 Transfer of the draft pWe place the front pattern on the other sheet of bond paper leaving about 6 cm of margin and extend the lines of the draft, we mark 3 cm to the right and up, and draw a semicurve, the same thing we do in the hem we mark 3 cm and join in a straight line.
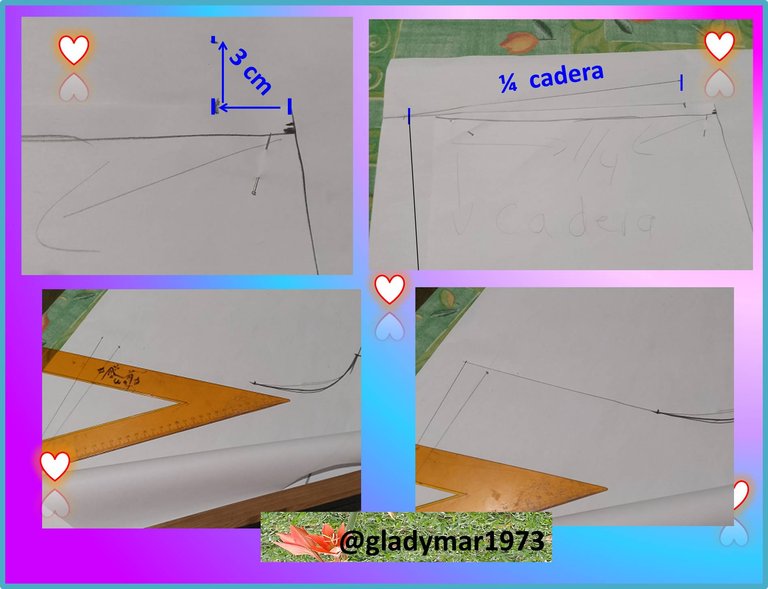
Paso 4 marcado de cintura marcamos 1 cm (en rojo) desde el borde del papel hacia abajo en la parte del tiro y marcamos una línea recta hacia el otro borde del papel, luego marcamos 3 cm (en azul) desde el mimo punto hacia adentro y seguidamente subimos 3 cm haciendo un ángulo recto, posteriormente extendemos la línea del borde del papel hacia el margen que dejamos y trasladamos la medida de ¼ de cadera (ósea la cintura) desde los 3 cm superiores hasta la línea que extendimos y unimos con una línea recta. Levantamos el borde del papel por el tiro y trazamos una línea recta desde los extremos del tiro y la cintura y cortamos.
Step 4 waist marking we mark 1 cm (in red) from the edge of the paper down in the part of the draft and we mark a straight line towards the other edge of the paper, then we mark 3 cm (in blue) from the same point inwards and then we go up 3 cm making a right angle, then we extend the line of the edge of the paper towards the margin that we left and we transfer the measure of ¼ of hip (that is the waist) from the 3 cm above to the line that we extended and we join with a straight line. Lift the edge of the paper by the draft and draw a straight line from the ends of the draft and the waist and cut.
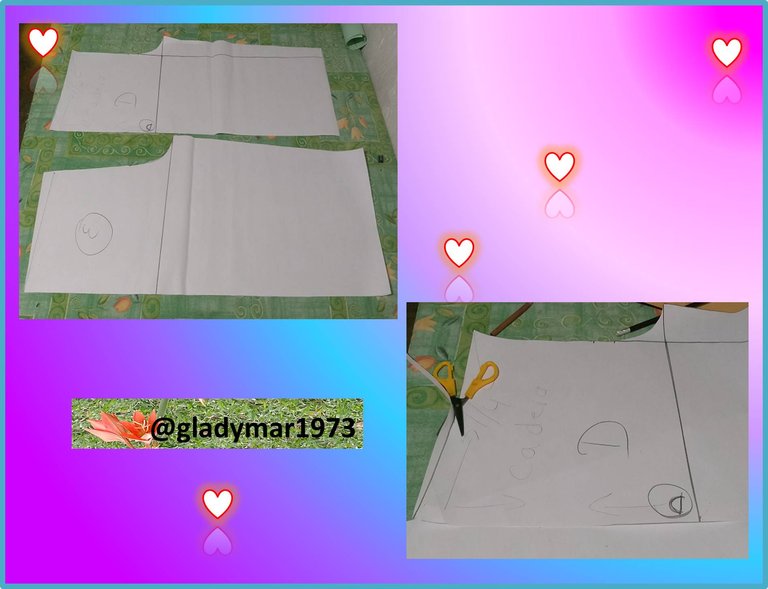
Paso 4 ya teniendo nuestros dos patrones listos, procedemos a cortar la línea de la cintura en la parte delantera.
Step 4 now that we have our two patterns ready, we proceed to cut the waist line at the front.
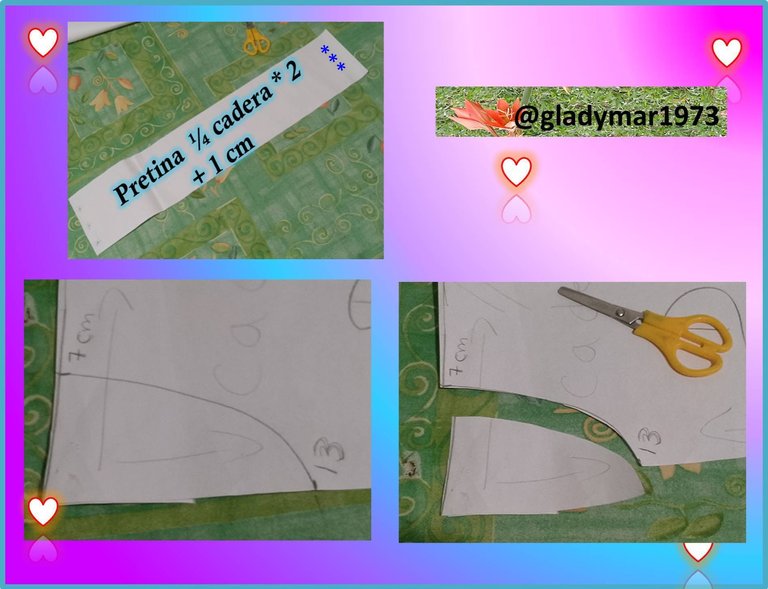
Pretina y marcado de bolsillo en patrón delantero
Paso 5 para la pretina marcaremos un rectángulo con el doble de medida de la ¼ de cadera + 1 cm para costura para el largo; y para el ancho (nota: esta será con elástica) dependerá del ancho de la elástica más 4 cm. Para marcar el bolsillo en nuestro delantero marcamos 7 cm desde el costado hacia adentro y 13 cm hacia abajo, unimos con una semicurva y cortamos.
Step 5 for the waistband we will mark a rectangle with the double measurement of the ¼ of the hip + 1 cm for the seam for the length; and for the width (note: this will be with elastic) it will depend on the width of the elastic plus 4 cm. To mark the pocket on our front we mark 7 cm from the side inwards and 13 cm downwards, join with a half curve and cut.
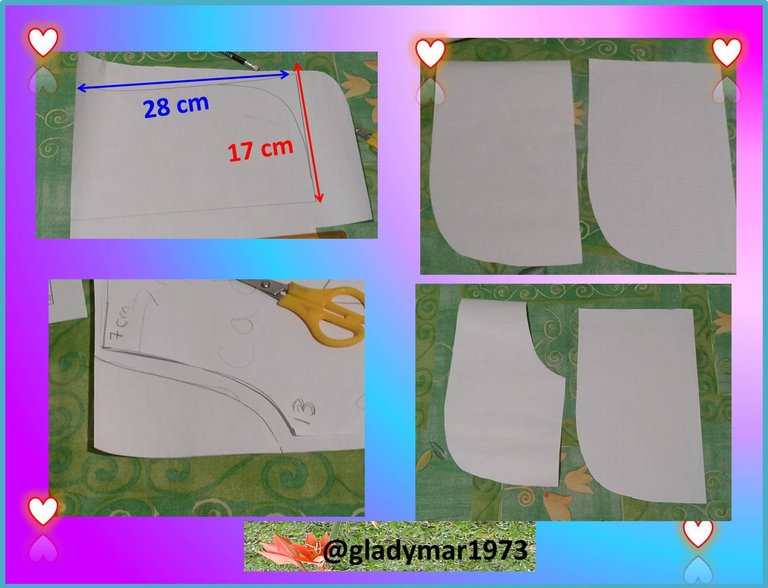
Bolsillos
Paso 6 para nuestros bolsillos marcamos un rectángulo de 28 cm largo por 17 cm de ancho y en una de las esquinas hacemos una semicurva para darle forma y cortamos 2 piezas; seguidamente colocamos una de las piezas debajo del patrón delantero y marcamos la semicurva y cortamos.
Step 6 for our pockets we mark a rectangle of 28 cm long by 17 cm wide and in one of the corners we make a semi-curve to give it shape and cut 2 pieces; then we place one of the pieces under the front pattern and mark the semi-curve and cut.
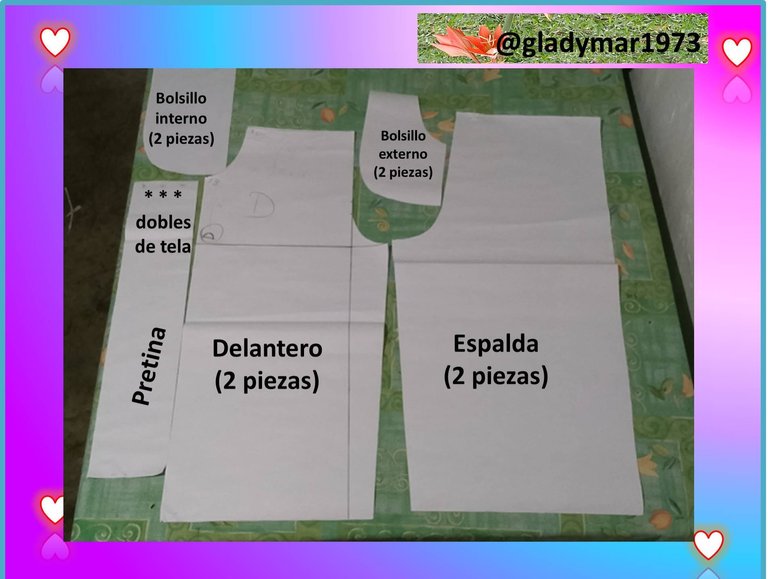
Y listo ya tenemos los patrones para empezar a cortar, para ello cortaremos de la siguiente manera
-2 piezas delantera
-2 piezas espalda
-2 piezas por cada parte del bolsillo
-Pretina 1 pieza.
And ready we have the patterns to start cutting, for this we will cut as follows:
- 2 front pieces
- 2 back pieces
- 2 pieces for each part of the pocket
- Waistband 1 piece.
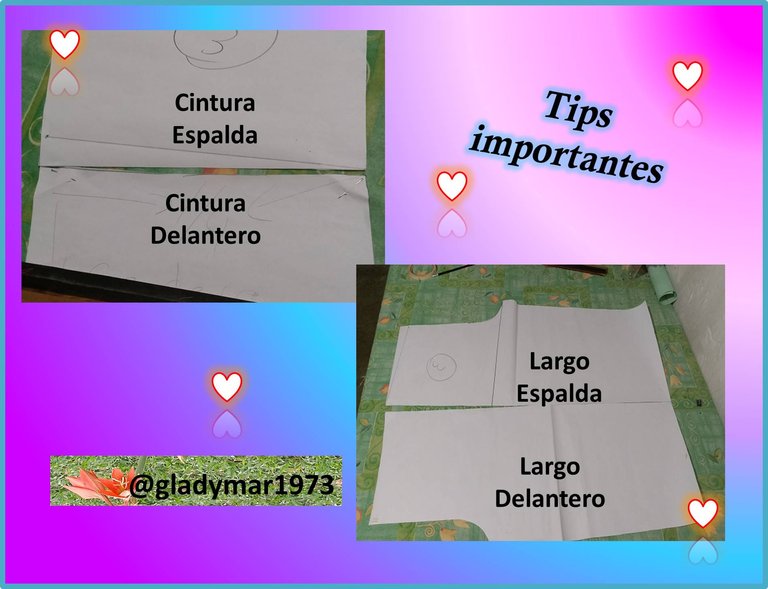
Tips importante
Para comprobar que nuestros patrones estén bien marcados, comparamos cintura con cintura que ambos estén a la misma medida y al igual el largo del pantalón; si hay algún error poder corregirlo antes de cortar.
Important tips.
To check that our patterns are well marked, we compare waist with waist that both are the same size and the same length of the pants; if there is any error we can correct it before cutting.

Hasta aquí mis queridos amigos, ahora a cortar. Aprovecho la oportunidad para animar a aquellas amigas que se están aventurando en este mundo de la costura a disfrutar junto conmigo de esta aventura, les espero en mi próximo blog, gracias por visitarme.
So far my dear friends, now to cut. I take this opportunity to encourage those friends who are venturing into this world of sewing to enjoy this adventure with me, I hope to see you in my next blog, thank you for visiting me.

Contenido original.
Las fotos fueron captadas con mi celular Moto E6I y editadas en PowerPoint, utilizando los elementos disponibles del mismo.
Los banner fueron creados por mí en PowerPoint.
La traducción fue a través de www.DeepL.com,Translator (versión gratuita).
Original content.
The photos were captured with my Moto E6I cell phone and edited in PowerPoint, using the available PowerPoint elements.
The banners were created by me in PowerPoint.
The translation was done through www.DeepL.com,Translator (free version).