12/3/25
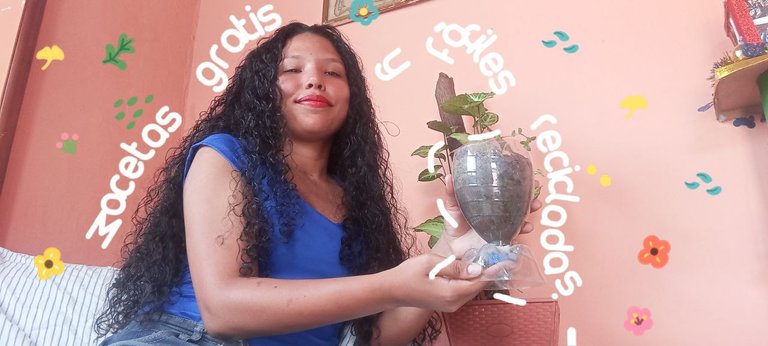
Esta es la segunda vez que hago una de estas macetas, y ahora que dominé la técnica, quise traerte este blog para que también tengas nuevas macetas en casa.
Estas macetas son solo para plantas pequeñas (como cactus, suculentas, y otras) debido a que usaremos envases pequeños.
Son tan fáciles que usaremos muy pocos materiales, los cuales se pueden encontrar en casa porque son los mismos que se emplean en electricidad y arreglos del hogar. Estos son:
- Una tijera punta roma.
- Un cúter.
- Un cautín.
- El envase que se transformará en una maceta. En este caso usaré dos envases distintos: uno de la crema para el cabello Skala de 1 litro sin su tapa, y una botella de refresco de 2 litros con su tapa.
This is the second time I've made one of these pots, and now that I've mastered the technique, I wanted to bring you this blog so you can also have new pots at home.
These pots are only for small plants (like cacti, succulents, and others) because we'll be using small containers.
They're so easy that we'll use very few materials, which can be found at home because they're the same ones used in electrical and home improvement projects. These are:
- Blunt-tipped scissors.
- A box cutter.
- A soldering iron.
- The container that will become a pot. In this case, I'll be using two different containers: a 1-liter Skala hair cream container without its cap, and a 2-liter soda bottle with its cap.
[Maceta 1, con una botella de refresco de 2 litros]
[Pot 1, with a 2-liter soda bottle]
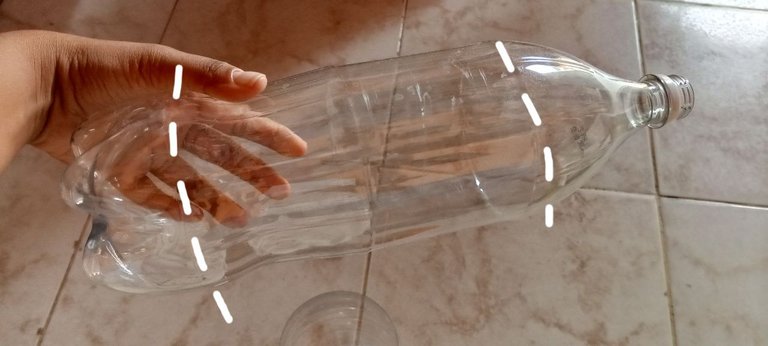
Paso 1
Haremos dos cortes, para ambos nos guiaremos de las líneas que ya tiene la botella de fábrica. Que serían la primera línea de la botella y la última línea.
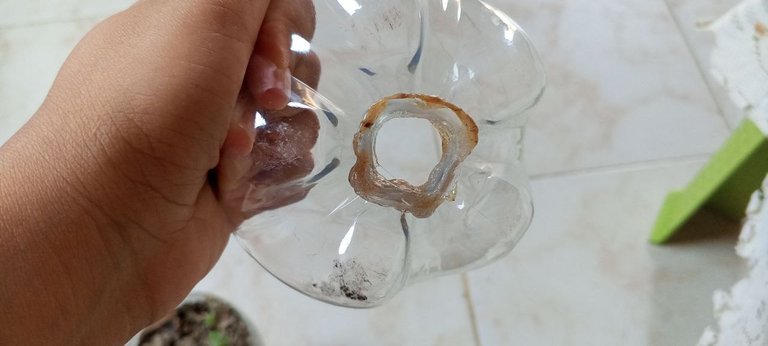
Abriremos una perforación en el centro con un cúter, y esto nos permitirá que podamos introducir la tijera y cortar fácilmente.
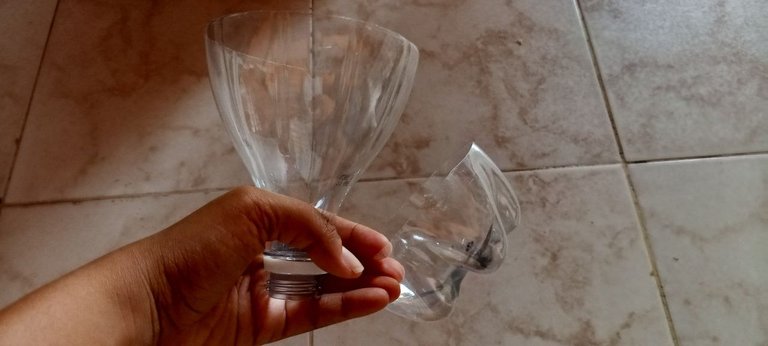
Con esto tendremos dos piezas, una copa y la base de la maceta.
Step 1
We'll make two cuts, using the factory-cut lines on the bottle as a guide. These are the first and last lines.
We'll cut a hole in the center with a box cutter, allowing us to insert the scissors and cut easily.
This will give us two pieces: a cup and the base of the pot.
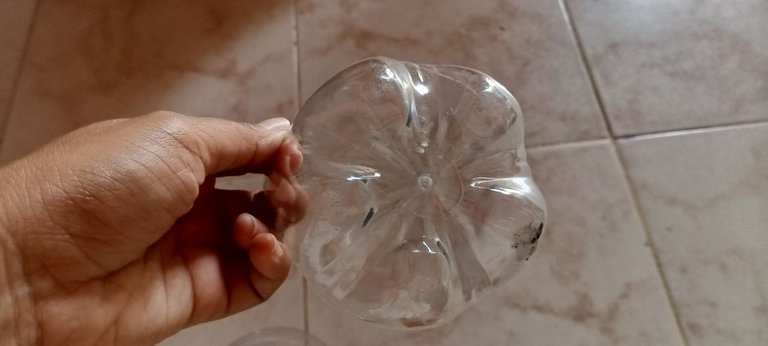
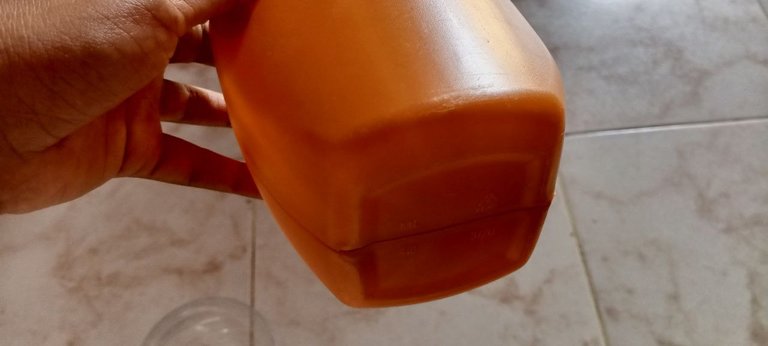
Paso 2
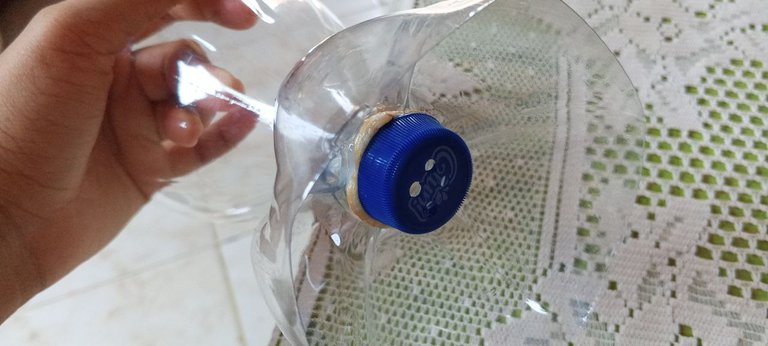
Trabajaremos ahora en la base. Para ello, le haremos hoyos a la tapa con el cautín. La tapa será lo que nos permitirá drenar el agua de la maceta, así que le haré 4 hoyos.
Por otra parte, también abriremos un hoyo a la base de la botella, porque en ella incrustaremos la copa.
Step 2
Now we'll work on the base. To do this, we'll make holes in the lid with a soldering iron. The lid will be what allows us to drain the water from the pot, so I'll make 4 holes.
We'll also make a hole in the base of the bottle, as we'll be embedding the glass in it.
Paso 3
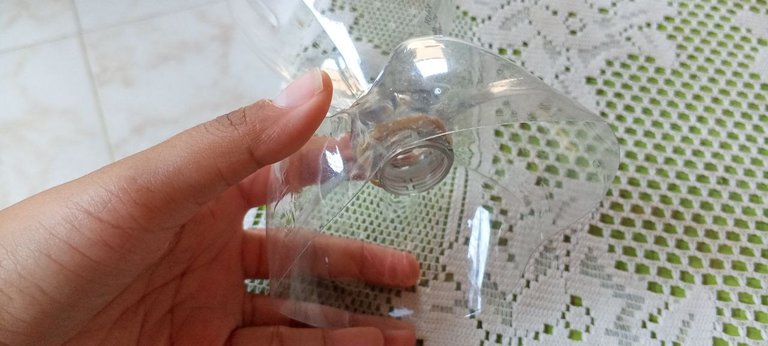
¡Este paso debemos hacerlo rápido! En cuanto terminemos de abrir el hoyo a la base con el cautín, hay que incrustar la copa rápidamente debido a que esta base estará blanda por el calor del cautín, lo que hace que sea más sencillo que la copa atraviese la base.
¿Por qué? Porque si esperamos a que se seque el hoyo de la base de la botella, se endurece y no se puede incrustar la copa. Lo cual ya me pasó en el primer intento, así que aprovecho de contarte este secreto.
Step 3
We need to do this step quickly! As soon as we finish opening the hole in the base with the soldering iron, we need to insert the glass quickly because the base will be soft from the heat of the soldering iron, making it easier for the glass to pass through.
Why? Because if we wait for the hole in the base of the bottle to dry, it hardens and the glass can't be inserted. This already happened to me on my first attempt, so I'm taking this opportunity to share this secret with you.
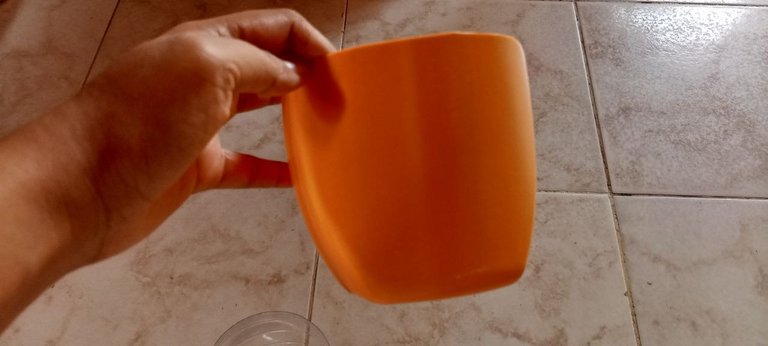
Paso 4
Cerramos ambas partes colocándole la tapa en la parte inferior en la botella. Y con esto tendríamos nuestra primera maceta.
Step 4
We close both parts by placing the lid on the bottom of the bottle. And with this, we have our first flowerpot.
[Maceta 2, con un envase de crema para el cabello Sakala]
[Pot 2, with a container of Sakala hair cream]
Paso 1
Solo le haremos 1 corte, en la parte superior con una tijera quitaremos toda la rosca donde se usa la tapa. Y lo haremos de forma que quede lo más prolijo posible.
Step 1
We'll only make one cut: at the top, using scissors, we'll remove all the threads where the cap is used. We'll do this in a way that makes it as neat as possible.

Paso 2
Ahora perforamos la parte inferior, aproximadamente se le pueden hacer 6 hoyos, que fue la cantidad que le hice a cada uno. Y con esto terminaríamos la segunda maceta.
Step 2
Now we drill holes in the bottom. You can make approximately 6 holes, which is the number I made for each one. This completes the second pot.
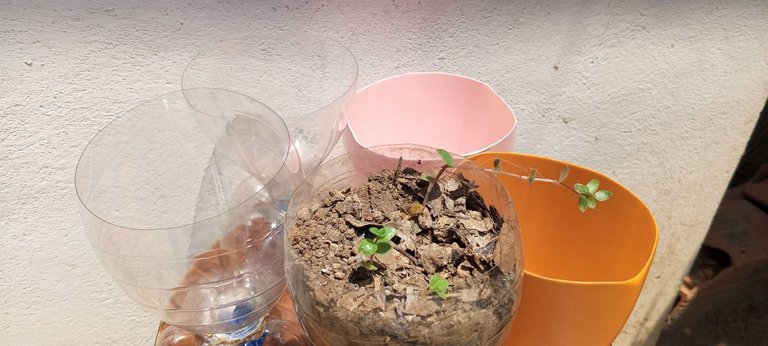
Este será el resultado, próximamente te mostraré qué plantas sembré en ellos, y por supuesto que te lo contaré en Hive.
Cómo verás, son macetas que toman pocos minutos de hacer, la misma cantidad que toma botar estos materiales. Lo que me hizo pensar que no me cuesta nada reciclarlos para así reducir los residuos en casa lo más posible.
Además de ello, también necesitaba macetas en casa para algunas plantas, por lo que estoy cubriendo una de mis necesidades como jardinera en casa.
Sin duda es algo que vale la pena hacer, que ayuda a nuestro planeta y que nos beneficia un montón.
This will be the result. I'll show you what plants I planted in them soon, and of course, I'll tell you about it on Hive.
As you'll see, these pots take just a few minutes to make, the same amount of time it takes to throw these materials away. Which made me think it wouldn't cost me anything to recycle them so I can reduce waste at home as much as possible.
In addition, I also needed pots at home for some plants, so I'm covering one of my needs as a home gardener.
It's definitely something worth doing, helping our planet and benefiting us all.
Texto de mi autoría.
Imágenes en el post creadas por mi en estos software:
- Iconos hechos en Photoshop, usando como referencia los logos de las redes sociales correspondientes.
- Banners y portada realizados en Canva en la versión gratuita.
- Todas las fotografías en el post son de mi autoría, las cuales edito con las apps de Lightroom y Meitu.
Contacto a mis RRSS, o escribe a mi Discord: zulfrontado#2666
 |  |  |  |  |
|---|