
¡Hola, encantadora gente de la comunidad @hivediy!
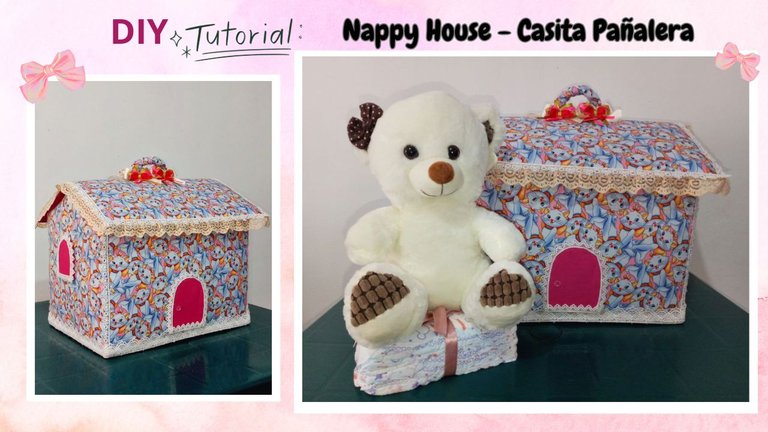
Todos los proyectos con telas me fascinan, aunque a veces me lleve horas terminarlos, como fue el caso de esta casita para guardar pañales, que fue un regalo muy especial para mi preciosa sobrina Alma .Compré una tela estampada de "Duquesa", la mamá gata de la película "Los Aristogatos", esta tela fue amor a primera vista cuando la vi, porque a ella le gustan mucho los gaticos.
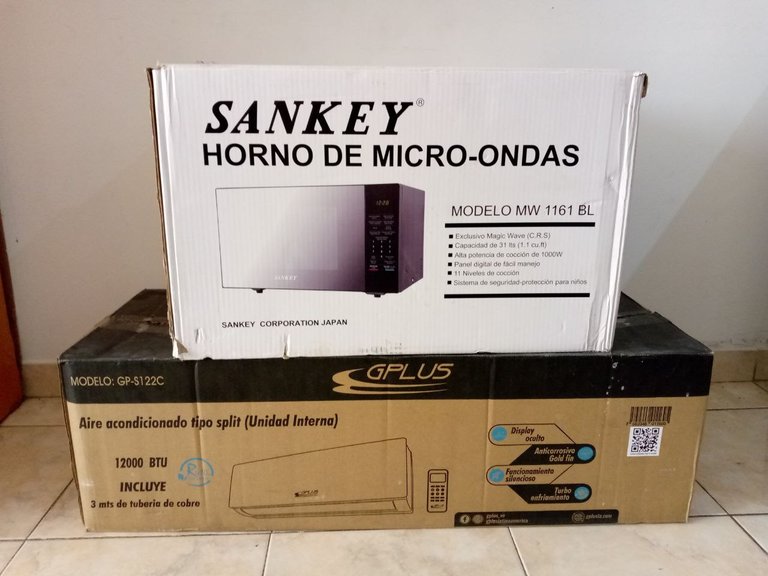
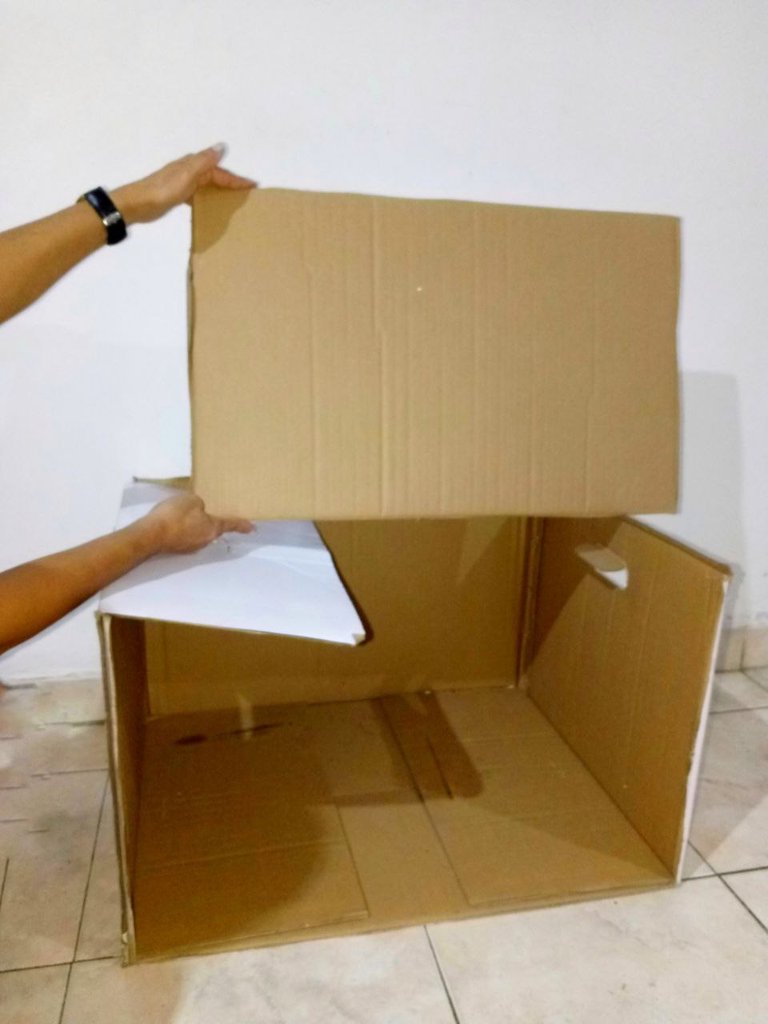
Esta casita se hace con cartón 1 en kilo, el mismo que se utiliza para hacer piñatas, pero ésta vez quise usé unas cajas vacías de un aire acondicionado y un microondas que tenía en casa y que eran lo suficientemente grandes para copiar los moldes, también quería ver si quedaba tan bien como hacerla solo con el cartón 1 en kilo, pero oh oh me encontré algunos desafíos.Pero antes les dejo la lista de los materiales que usé:
Hello, lovely people of the @hivediy community!
All fabric projects fascinate me, although sometimes it takes me hours to finish them, as it was the case of this little house to keep nappies, which was a very special gift for my beautiful niece Alma, I bought a printed fabric of ‘Duchess’, the mother cat from the movie ‘The Aristocats’, this fabric was love at first sight when I saw it, because she likes cats very much.
This little house is made with 1 in kilo cardboard, the same used to make piñatas, but this time I wanted to use some empty boxes from an air conditioner and a microwave that I had at home and that were big enough to copy the moulds, I also wanted to see if it was as good as making it with just the 1 in kilo cardboard, but oh oh I found some challenges.But first I leave you the list of the materials I used:
 |  |
|---|
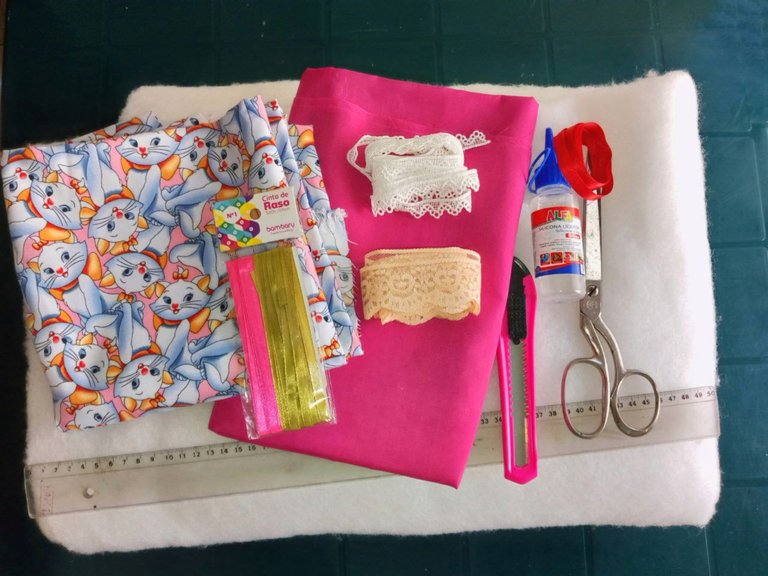
Materiales/ Materials
- Cajas de cartón grandes
- 1/2 lámina Cartón 1 en kilo
- Tela estampada 1 m
- Tela unicolor 1 m
- Guata F40 1 m
- Silicón frío y/o pistola y barras de silicón
- Encaje grueso color salmón 2,60 m
- Encaje grueso color blanco 2 m
- Encaje delgado color blanco 3 m
- Cintas de raso y organza
- Tijera de costura
- Regla
- Lápiz
- Cutter o exacto
- 1 botón pequeño
- Large cardboard boxes
- 1/2 sheet of cardboard 1 in kilo
- Printed fabric 1 m
- Unicolour fabric 1 m
- Wadding F40 1 m
- Cold silicone and / or silicone gun and sticks
- Salmon colored thick lace 2,60 m
- White thick lace 2 m
- Thin white lace 3 m
- Satin and organza ribbons
- Sewing scissors
- Ruler
- Pencil
- Cutter or exacto
- 1 small button
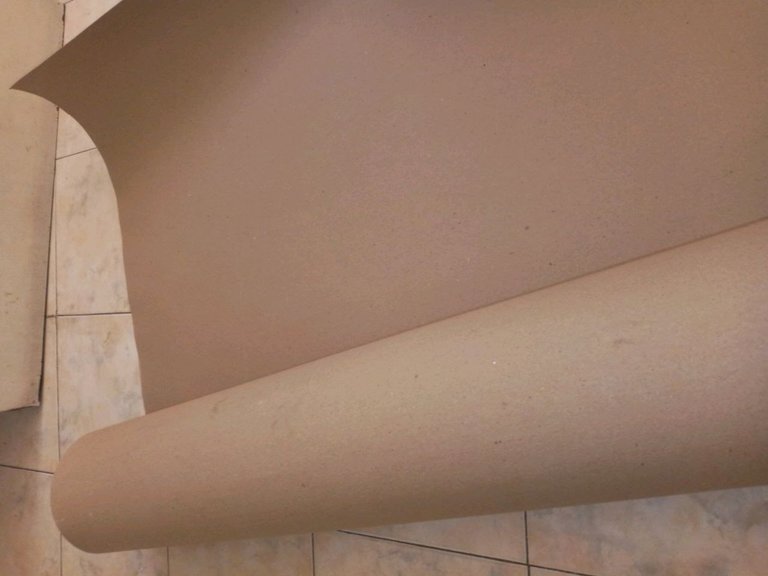
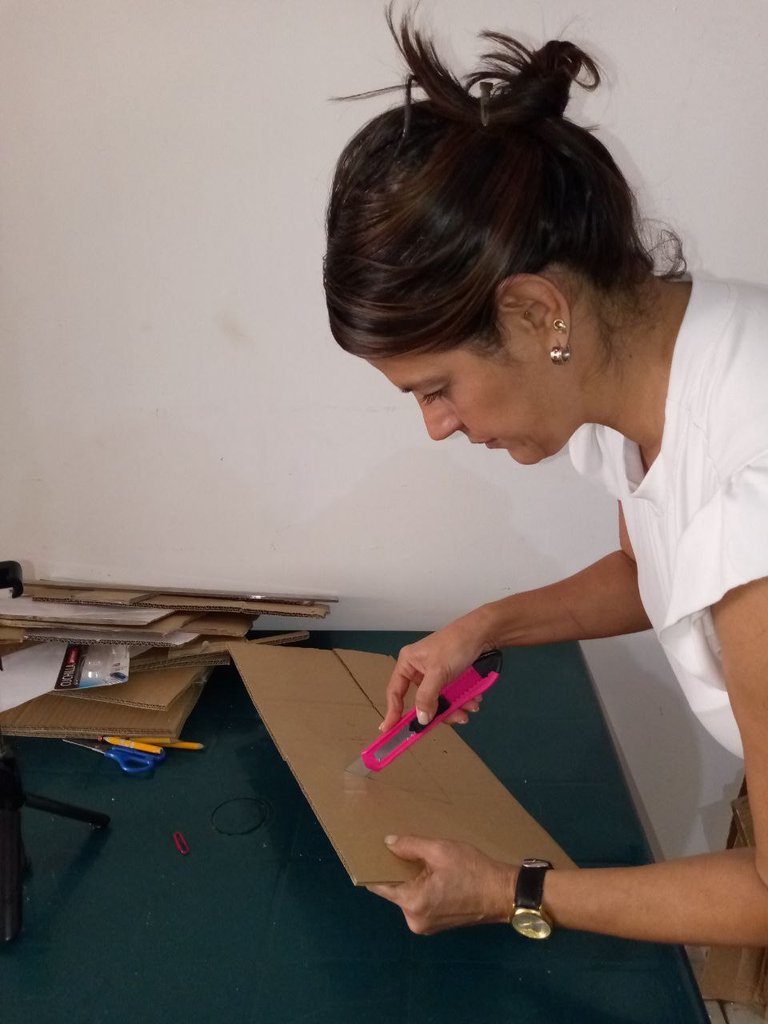
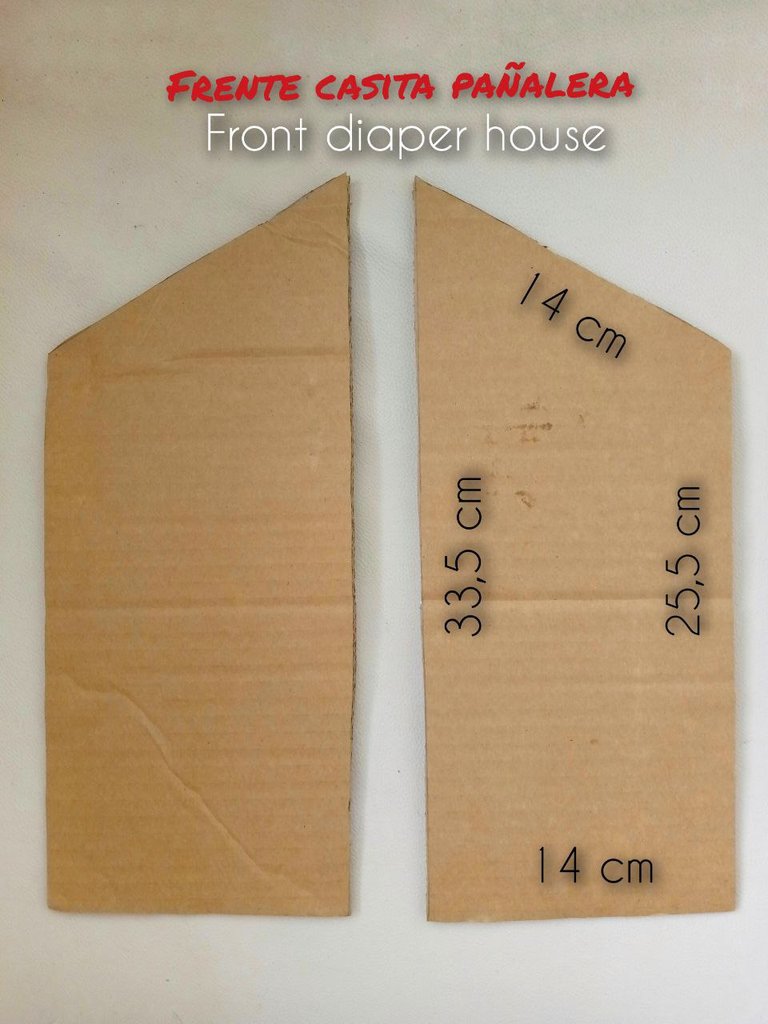
Como les venía diciendo; aunque la tarea se logró, 👏 debo decir que con el cartón de las cajas tardé mucho más en recortar las piezas; porque aunque parecía resistente, al recortarlo por dentro tenía ranuras, así que tuve que ser muy paciente para cortar todas las piezas y que quedaran de la misma medida; lo segundo es que no pude doblar el cartón para hacer la pieza delantera completa , que debería salir en una sola pieza, por lo que la corté separado y luego pegué cartón en el centro para unirlas. Esta pieza debe cortarse doblando el cartón por la mitad, colocando el patrón sobre el doblez como si se recortara el patrón de una blusa.
Y en cuanto al techo, no tomó la forma y se levantaba al juntar las piezas, así que tuve que reforzar algunas partes de la casita con el cartón 1 en Kilo.
As I was telling you; although the task was achieved, 👏 I must say that with the cardboard from the boxes it took me much longer to cut out the pieces; because although it seemed resistant, when I cut it out it had grooves inside, so I had to be very patient to cut all the pieces so they were the same size; the second thing is that I could not fold the cardboard to make the whole front piece, which should come out in one piece, so I cut it separately and then glued cardboard in the middle to join them together. This piece should be cut by folding the cardboard in half, placing the pattern over the fold as if you were cutting out the pattern for a blouse.
And as for the roof, it didn't take the shape and it lifted up when I put the pieces together, so I had to reinforce some parts of the house with the 1 in Kilo cardboard.
Paso a Paso / Step by step
Paso 1 / Step 1
 |  |
|---|
 |  |  |
|---|
 |  |
|---|
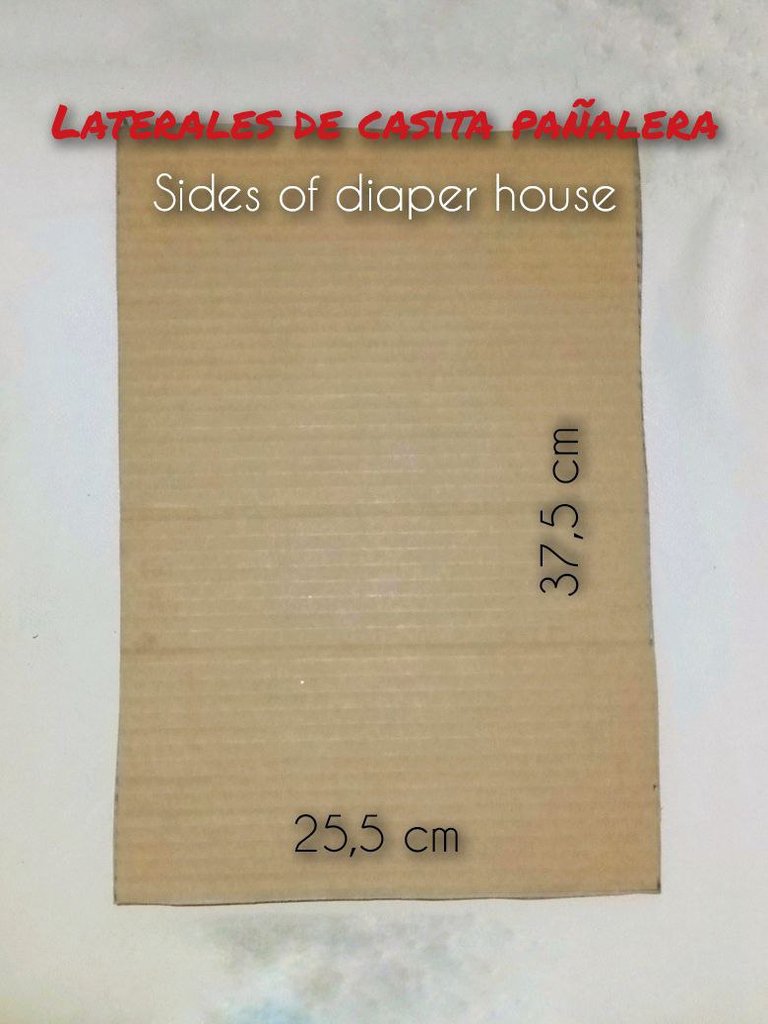
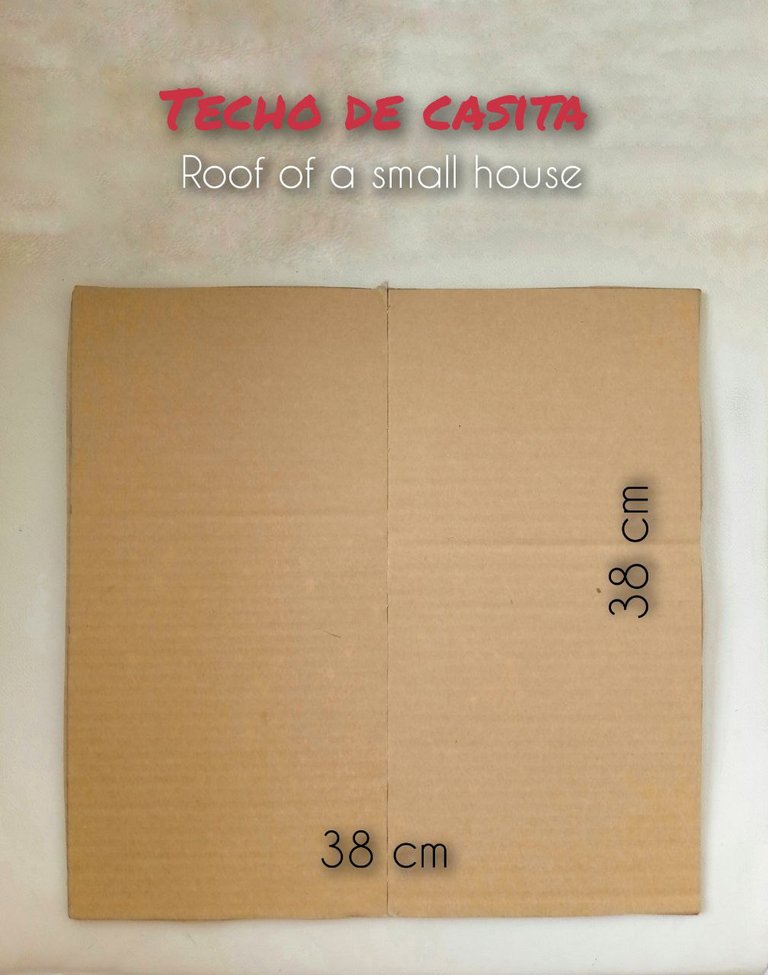
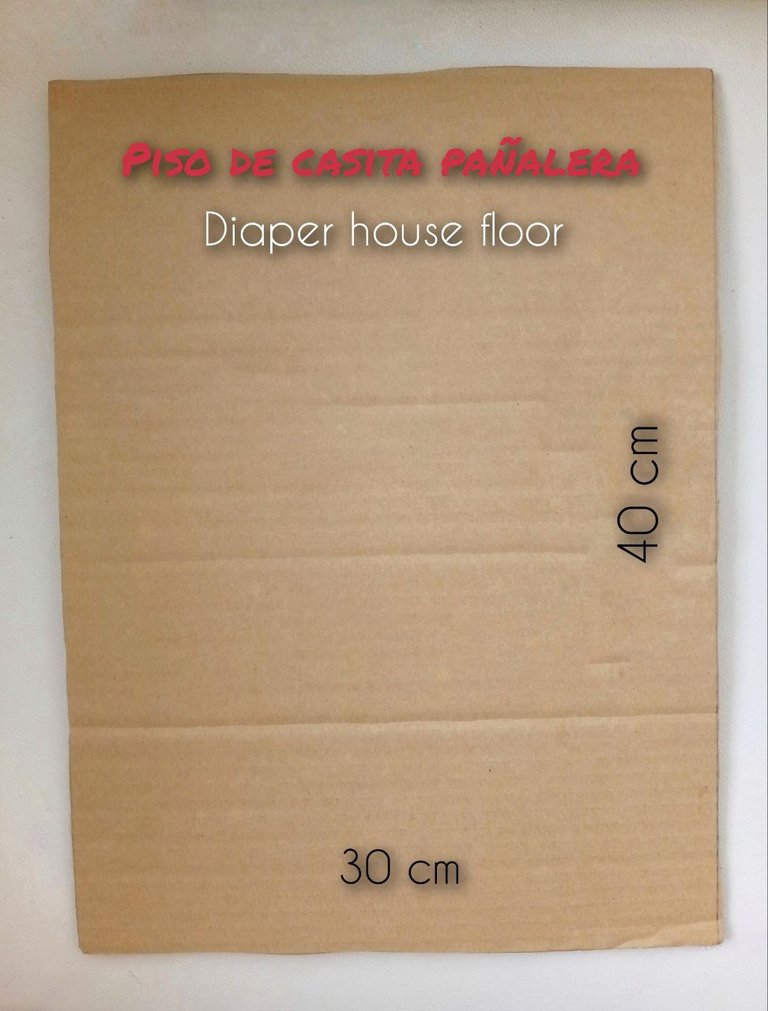
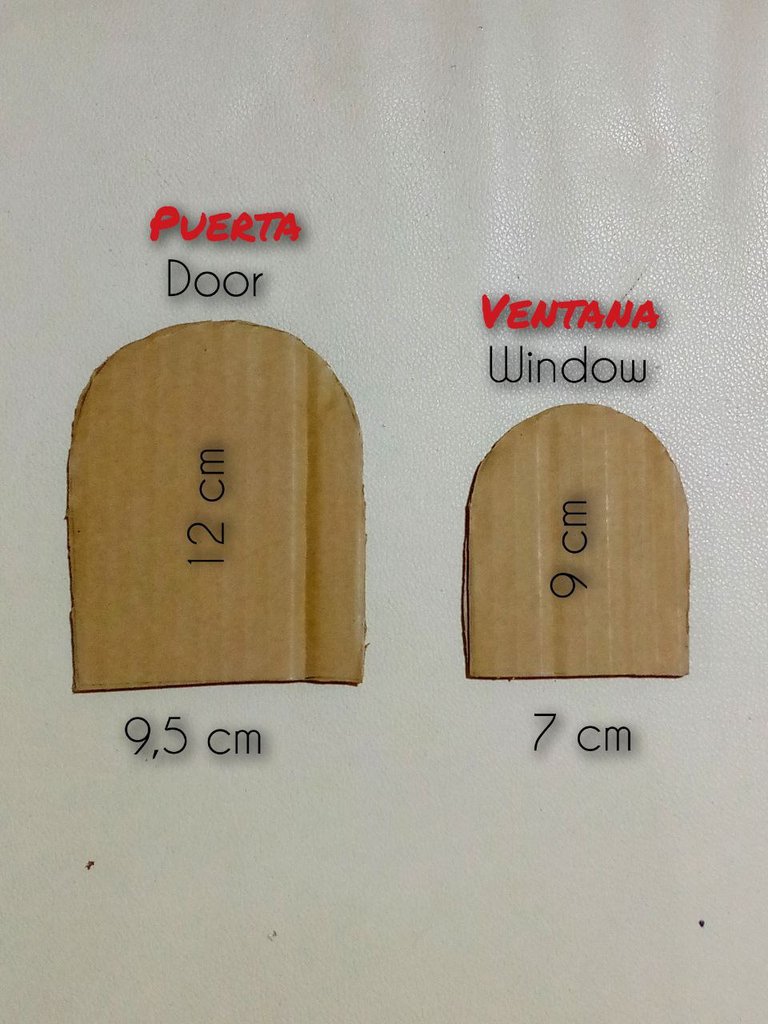
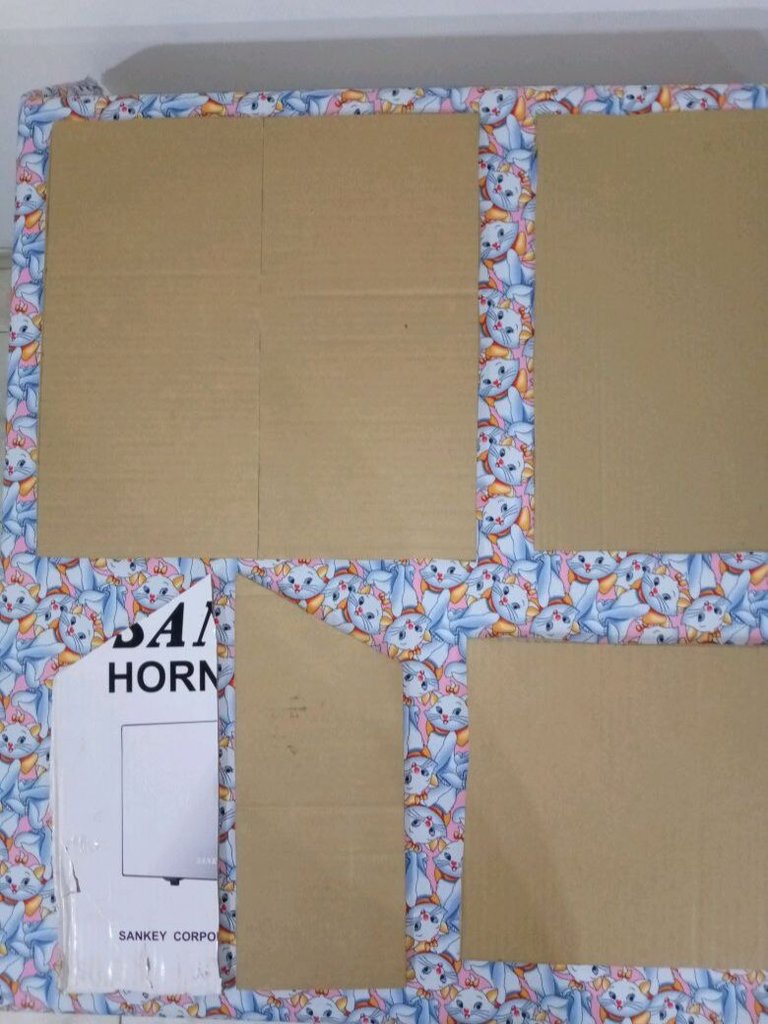
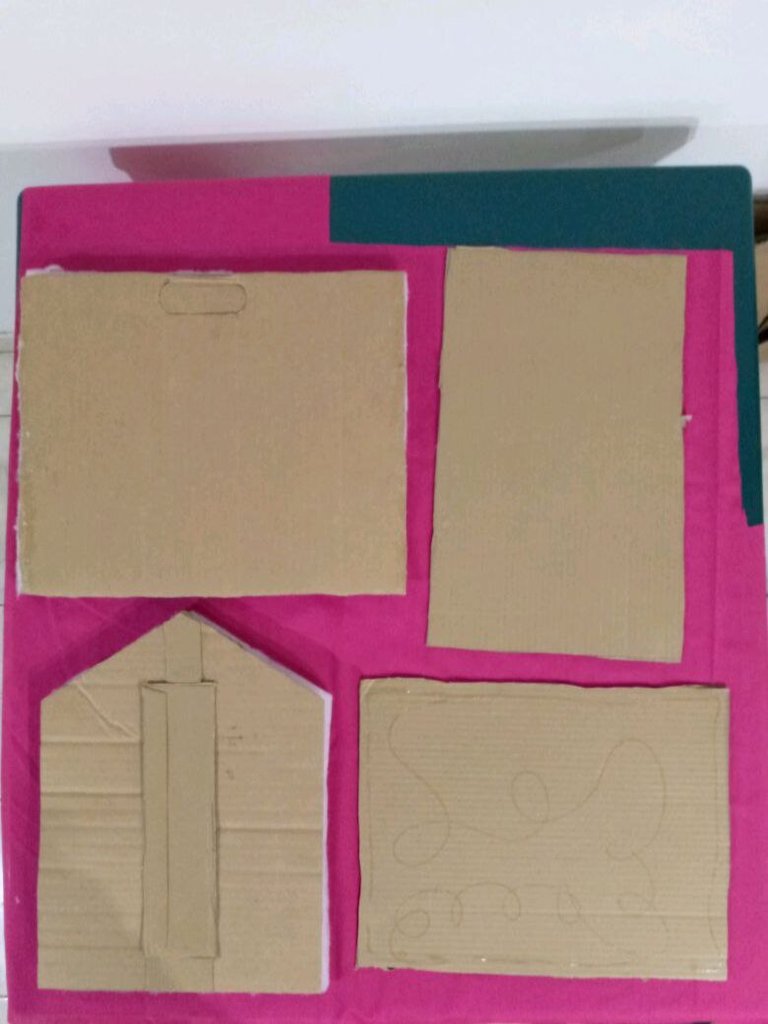
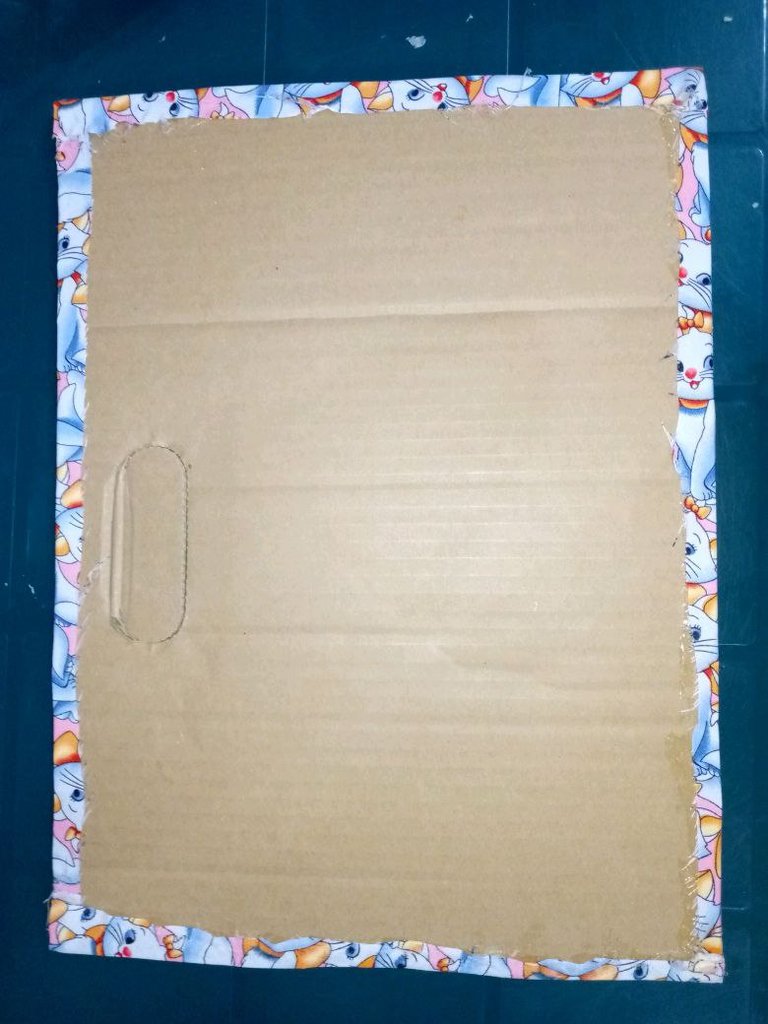
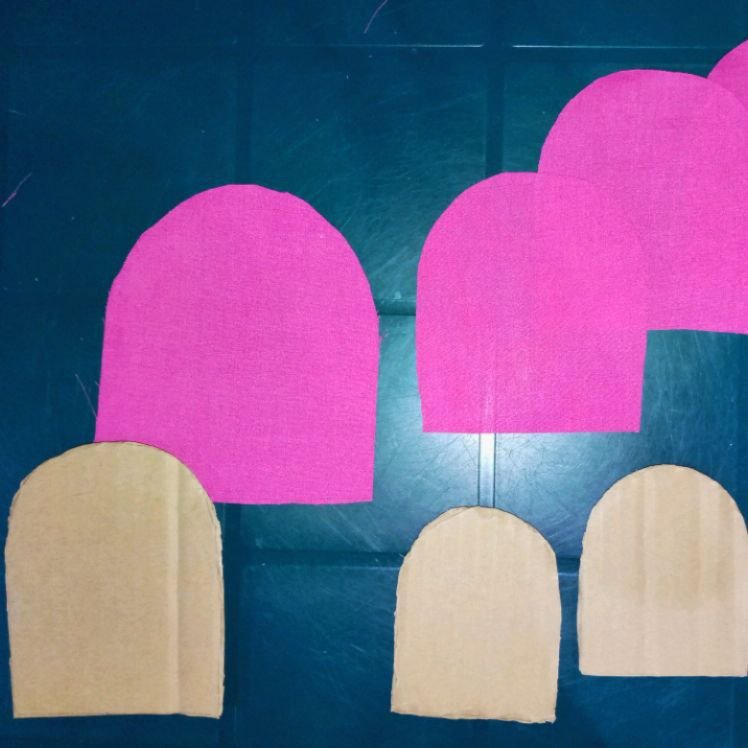
Lo primero que hice fue abrir las cajas y recortar con el exacto para dejar las láminas que pudiera utilizar, y luego tracé los patrones sobre el cartón y los recorté. He incluido esta tabla con el número de piezas a cortar y también he dejado las medidas en cada foto como guía. Por ejemplo, para los frentes necesitamos cuatro (04) piezas de cartón, dos (2) irán forradas con tela y las otras dos (2) con tela y guata, a excepción de la puerta y ventanas que son forradas con tela.
The first thing I did was to open the boxes and cut them out with the exacto to leave the sheets I could use, and then I traced the patterns on the cardboard and cut them out. I have included this table with the number of pieces to cut and I have also left the measurements in each photo as a guide. For example, for the fronts we need four (04) pieces of cardboard, two (2) will be lined with fabric and the other two (2) with fabric and wadding, except for the door and windows which are lined with fabric.
Piezas a cortar en cartón / Pieces to be cut in cardboard
| PIEZA- PIECE | CANTIDAD - QUANTITY |
| Frentes - Fronts | 04 |
| Laterales - Sides | 04 |
| Techo- Roof | 02 |
| Piso - Floor | 02 |
| Puerta - Door | 01 |
| Ventanas - Windows | 03 |
Paso 2 / Step 2
 |  |  |
|---|
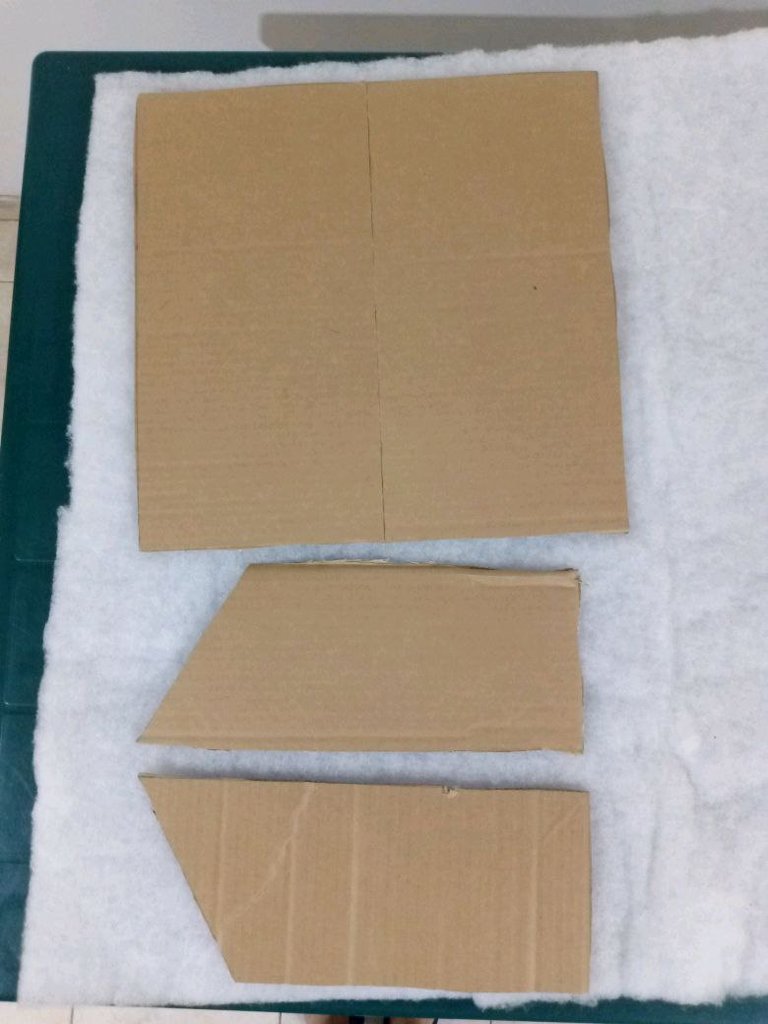
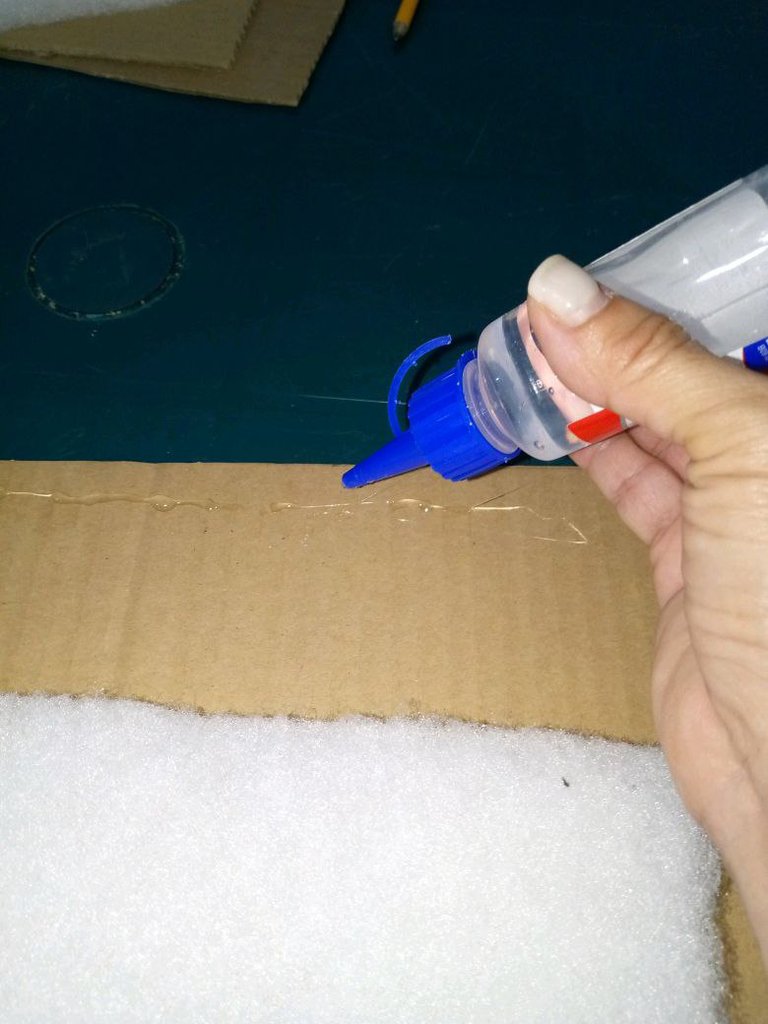
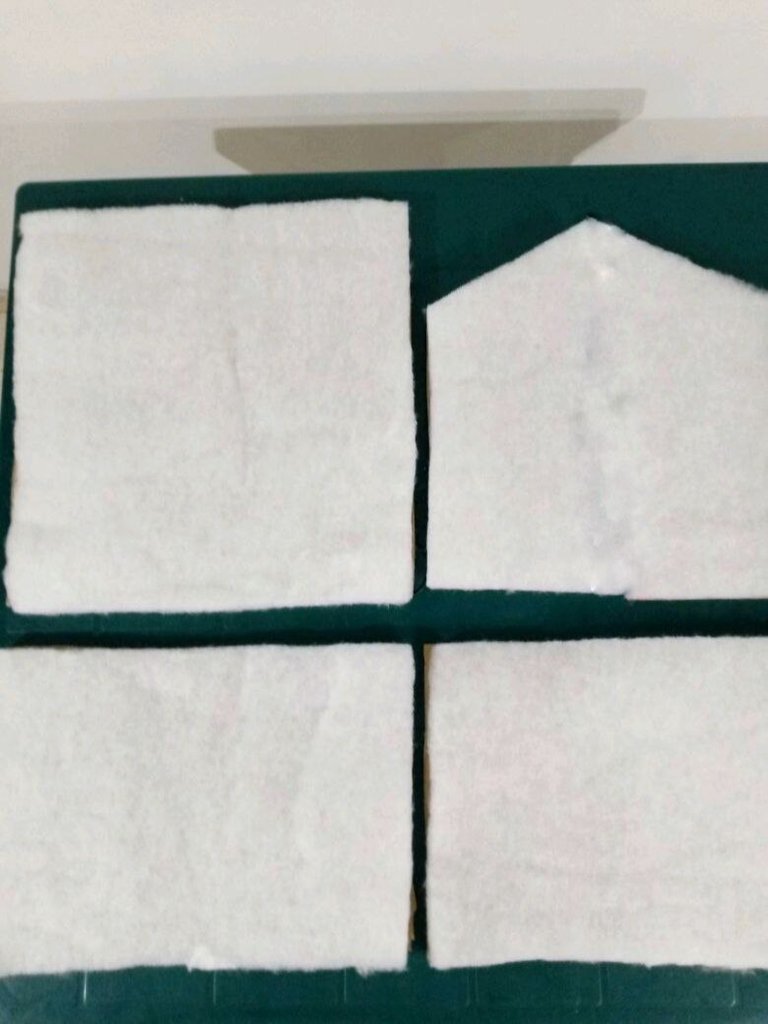
Coloqué los patrones sobre la guata y corté sin dejar margen, aquí hice un total de siete (07) cortes ya que la guata solo irá en un lado de la pieza. Para el techo si corté dos (2) piezas uno para cada ala y utilicé el exacto para hacer un medio corte en el centro del cartón para facilitar el doblez. Dejaré otra tabla para saber cuanto de guata cortar por pieza. Usando el silicón pegué la guata a la pieza de cartón correspondiente.
I placed the patterns on the wadding and cut without leaving a margin, here I made a total of seven (07) cuts as the wadding will only go on one side of the piece. For the roof I did cut two (2) pieces one for each wing and used the exact one to make a half cut in the centre of the cardboard to make the folding easier.I will leave another chart to know how much wadding to cut per piece. Using the silicone I glued the wadding to the corresponding piece of cardboard.
Piezas a cortar en guata o goma espuma / Pieces to be cut in cardboard
| PIEZA- PIECE | CANTIDAD - QUANTITY |
| Frentes - Fronts | 02 |
| Laterales - Sides | 02 |
| Techo- Roof | 02 |
| Piso - Floor | 01 |
Paso 3 / Step 3
 |  |  |
|---|
 |  |  |
|---|
 |  |
|---|
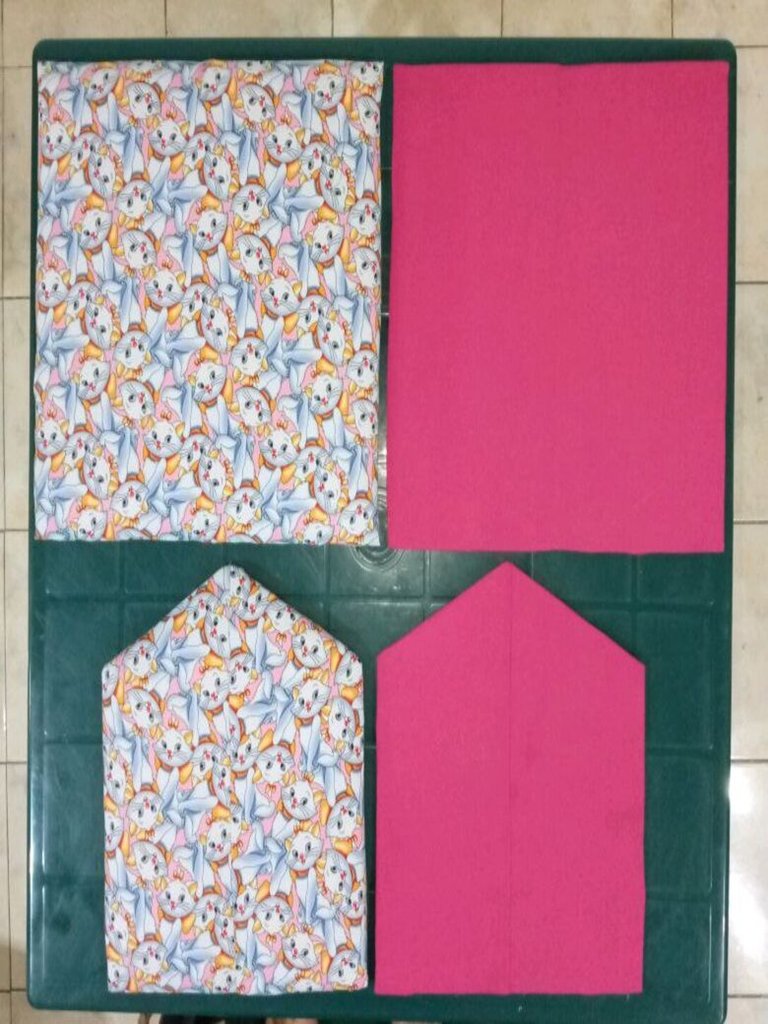
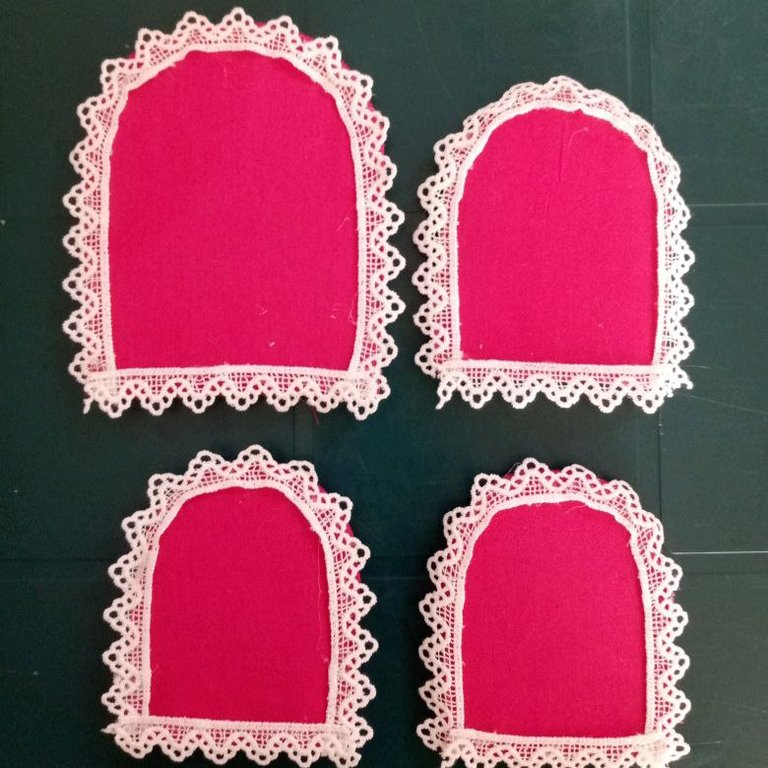
Coloqué las piezas sobre la tela y recorté, dejé un margen de 1,5 cm y forré pegando los bordes de la tela al cartón. Después se pegan las dos piezas forradas con silicón para formar una sola pieza (1 alcochada- 1 lisa).Recorté las ventanas y la puerta en la tela unicolor siguiendo el patrón dejando el margen de costura, las decoré con encaje alrededor pegando con silicón.Deben quedar así:
*Una pieza (1) de cartón y tela (lisa)
*Una pieza (1) de cartón, guata y tela (alcochada)
I placed the pieces on the fabric and cut them out, left a margin of 1.5 cm and lined them by gluing the edges of the fabric to the cardboard. I cut out the windows and the door from the one-colour fabric following the pattern, leaving the seam allowance, and decorated them with lace all around, gluing them with silicone.They should look like this:
*One (1) piece (1) of cardboard and fabric (plain).
*One (1) piece (1) of cardboard, wadding and fabric (padded)
Paso 4 / Step 4
 |  |
|---|
 |  |
|---|
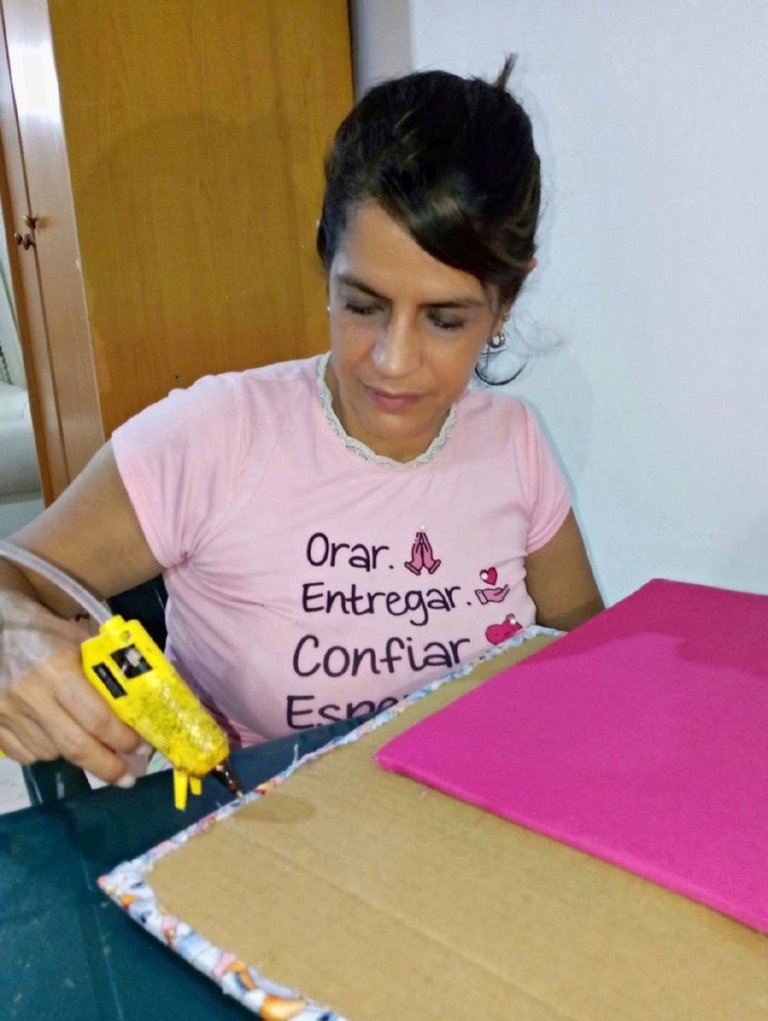
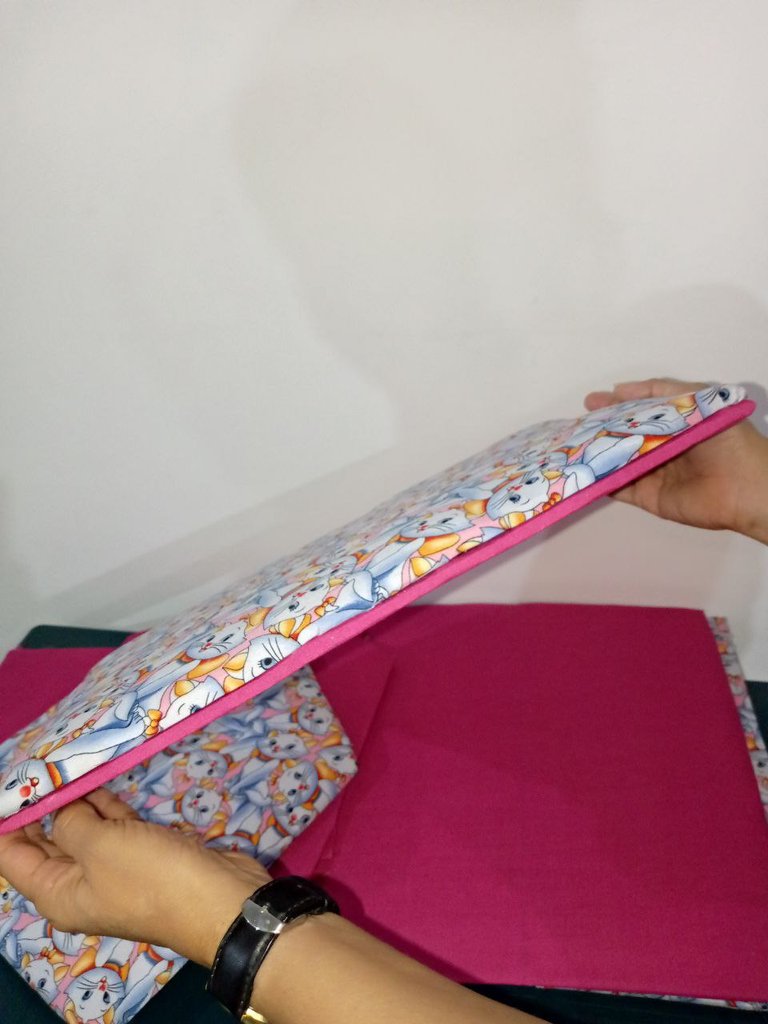
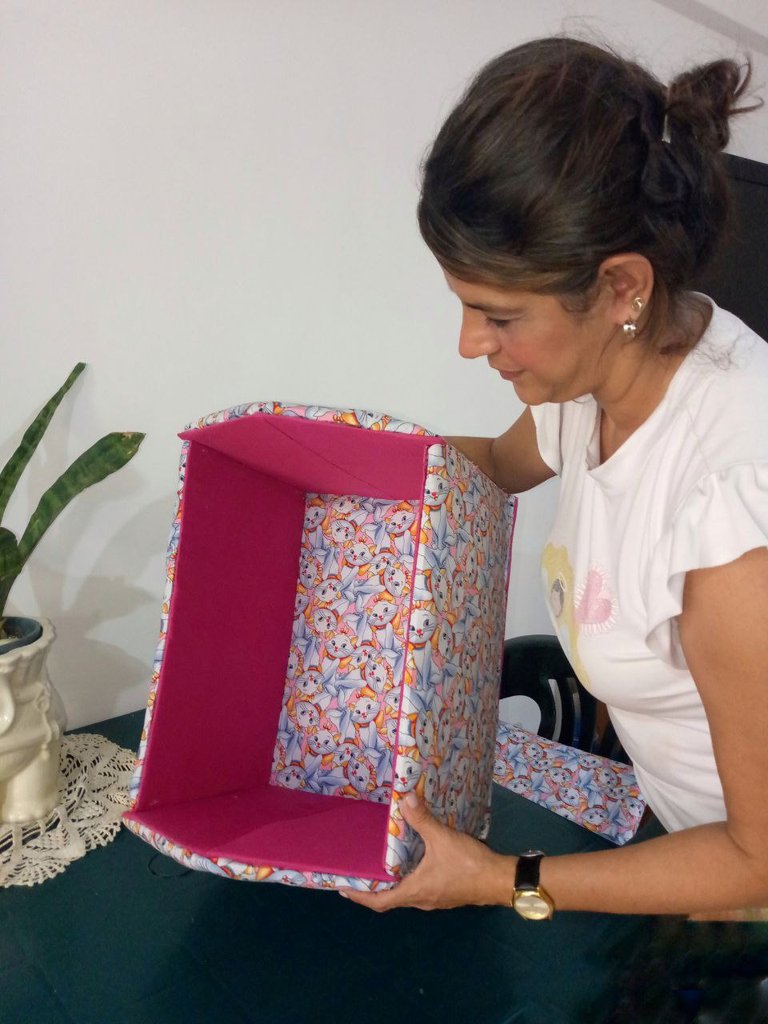
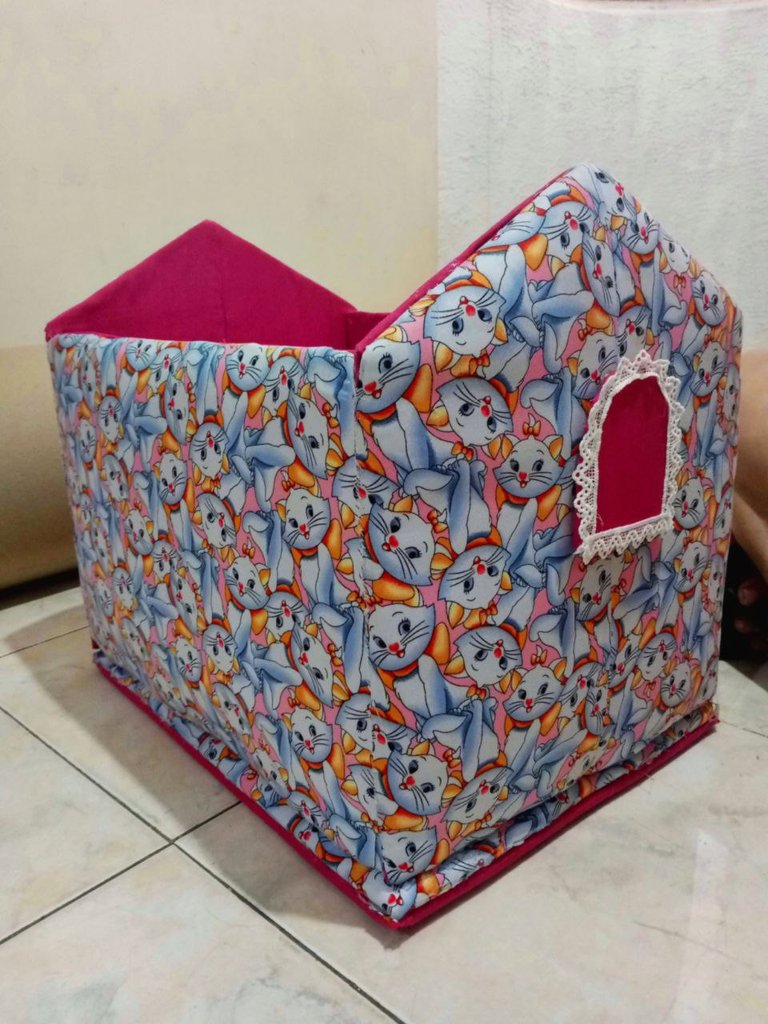
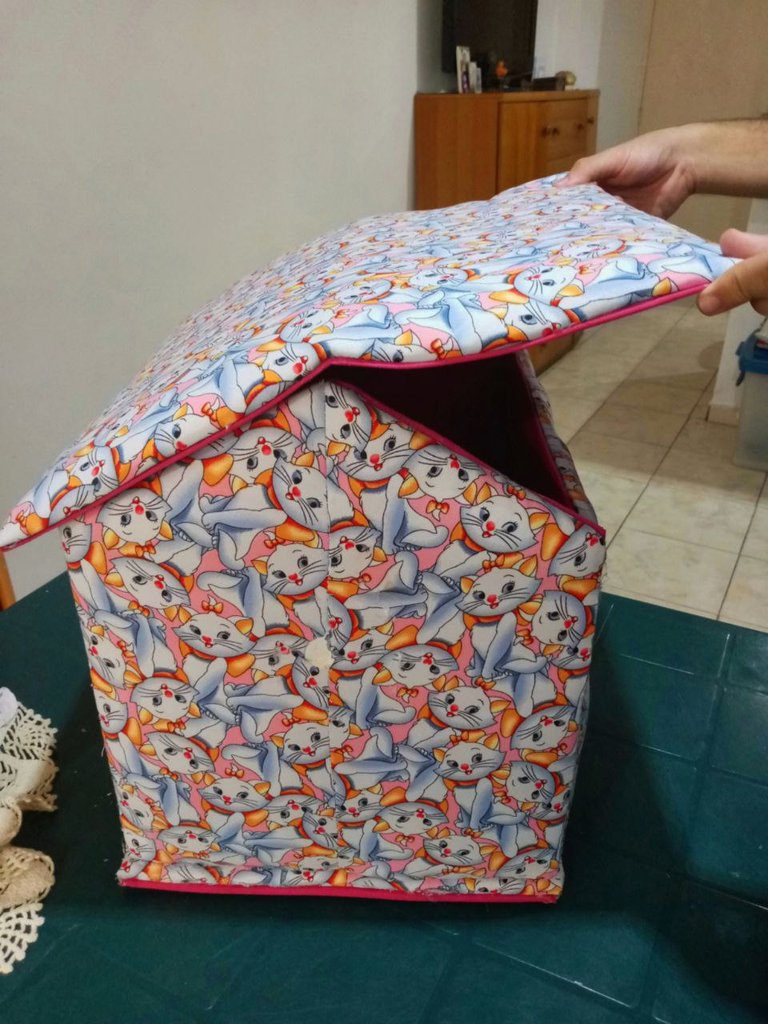
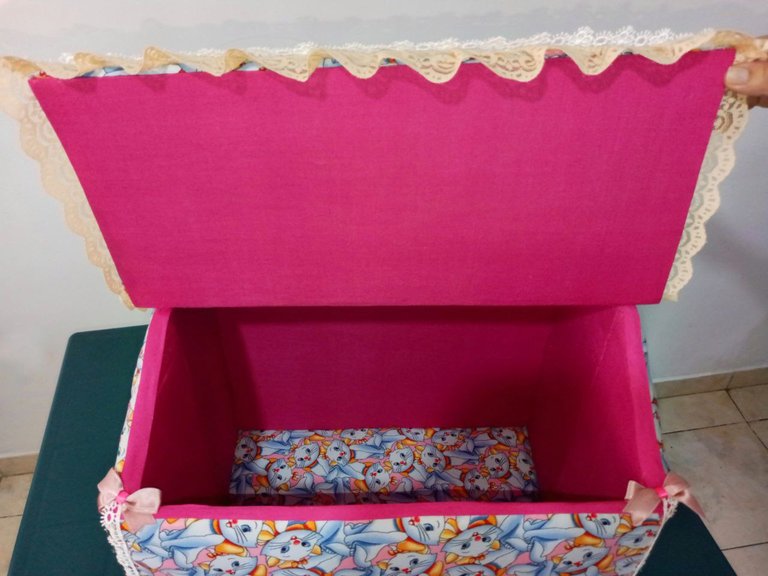
Una vez que tuve todas las piezas forradas, empecé el armado , colocando primero el piso y luego una a una las paredes , pegándolas entre sí con silicón . La parte acolchada de las paredes y del techo va hacia afuera y el lado acolchado del piso se queda dentro de la casa. Un truco es marcar con un lápiz previamente para saber dónde pegar. Con la tela fucsia hice unas tiras al bies y las pegué en el borde superior justo donde va el techo, luego se pega el techo por un solo lado, el otro se deja libre para poder abrirlo. Ya por aquí me dio emoción ¡se estaba viendo bien!
Once I had all the pieces lined, I started the assembly, placing first the floor and then one by one the walls, gluing them together with silicone . The padded part of the walls and the ceiling goes outside and the padded side of the floor stays inside the house. A trick is to mark with a pencil beforehand to know where to glue. With the fuchsia fabric I made some strips on the bias and glued them on the upper edge just where the roof goes, then glue the roof on one side only, the other side is left free to open it. I was really excited about this, it was looking good!
Paso 5 / Step 5
 |  |
|---|
 |  |  |  |
|---|
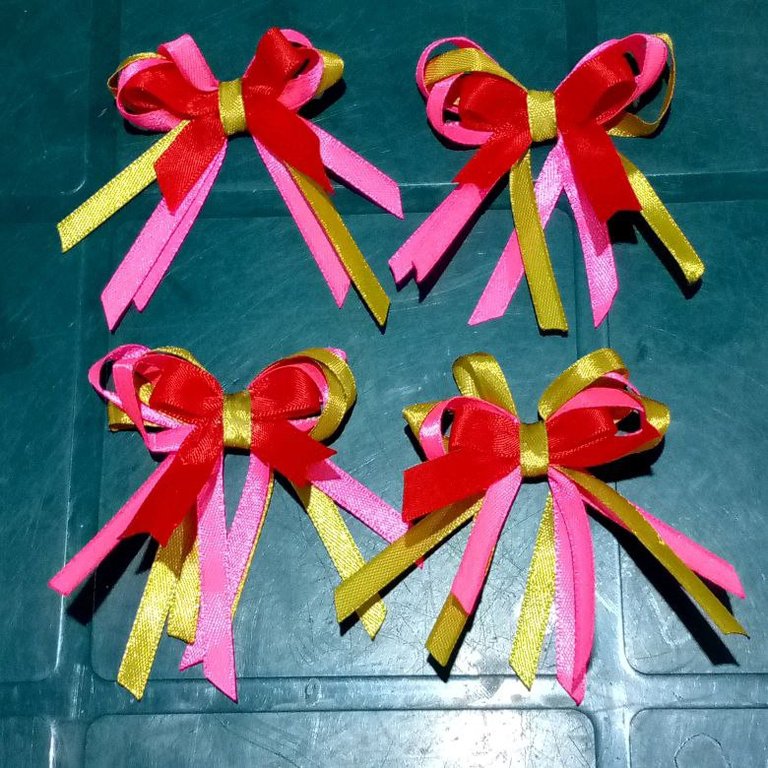
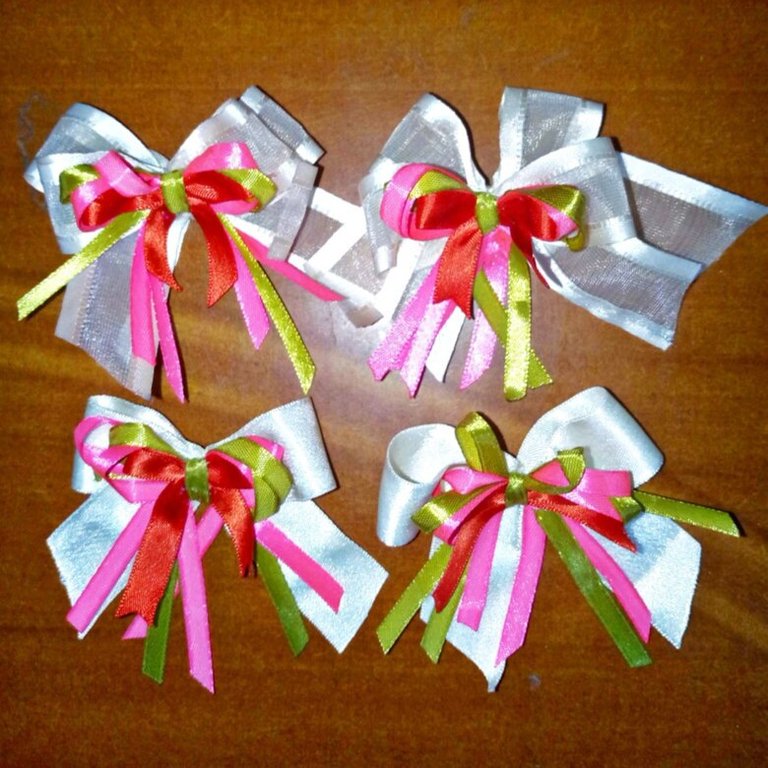
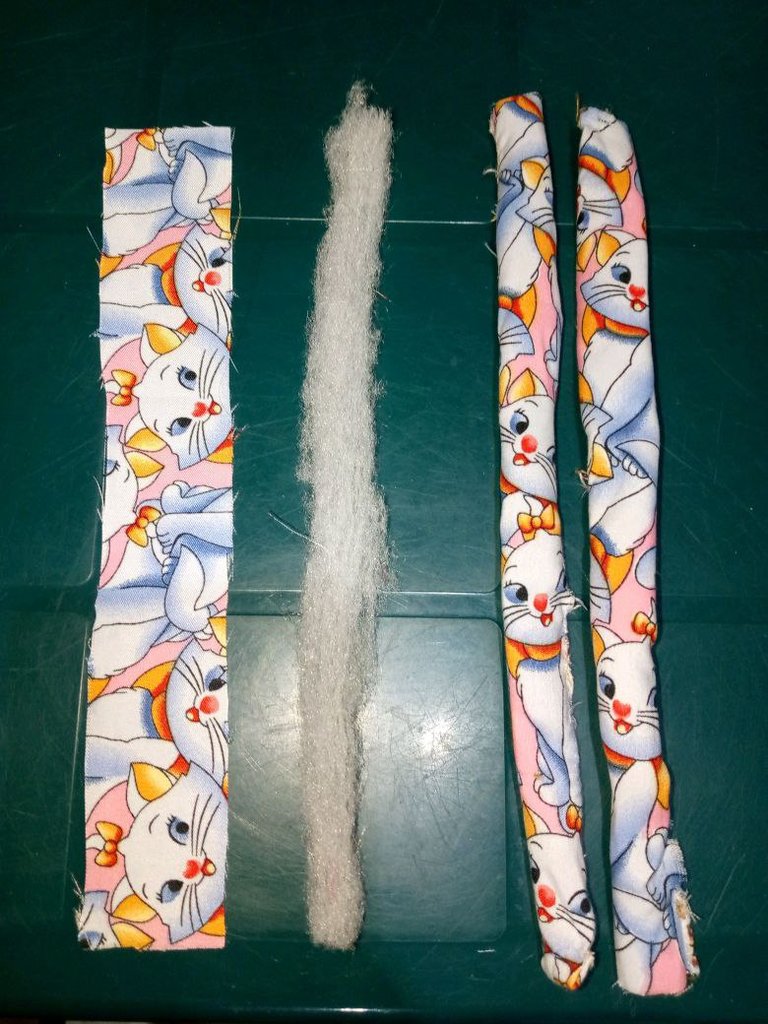
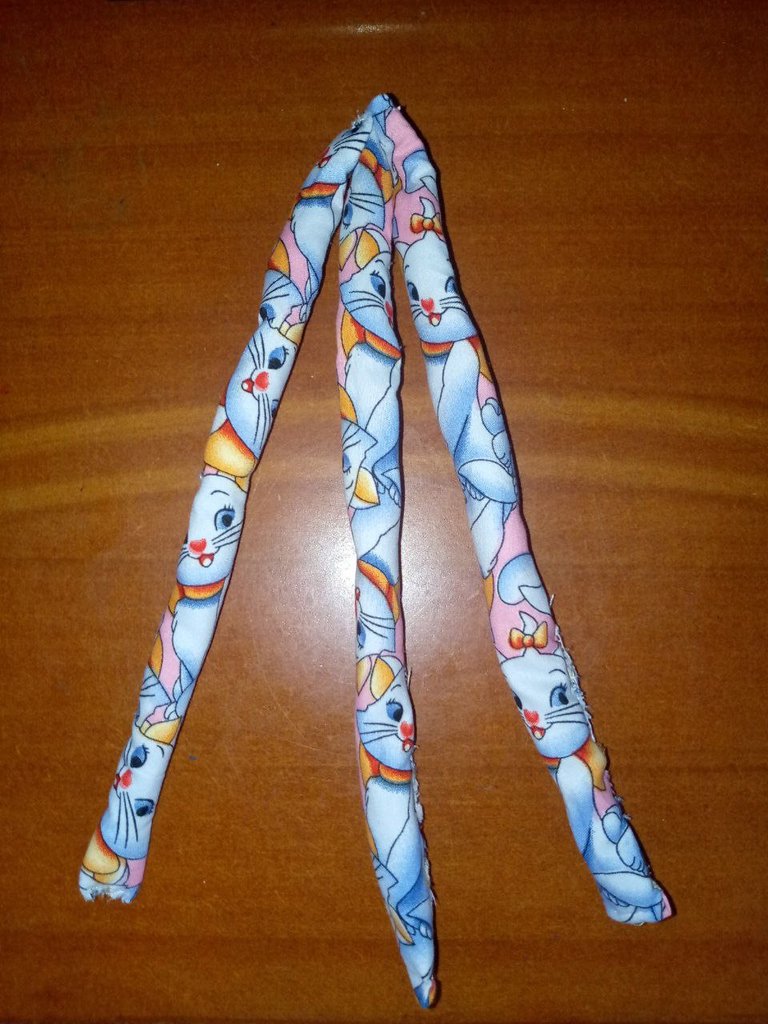
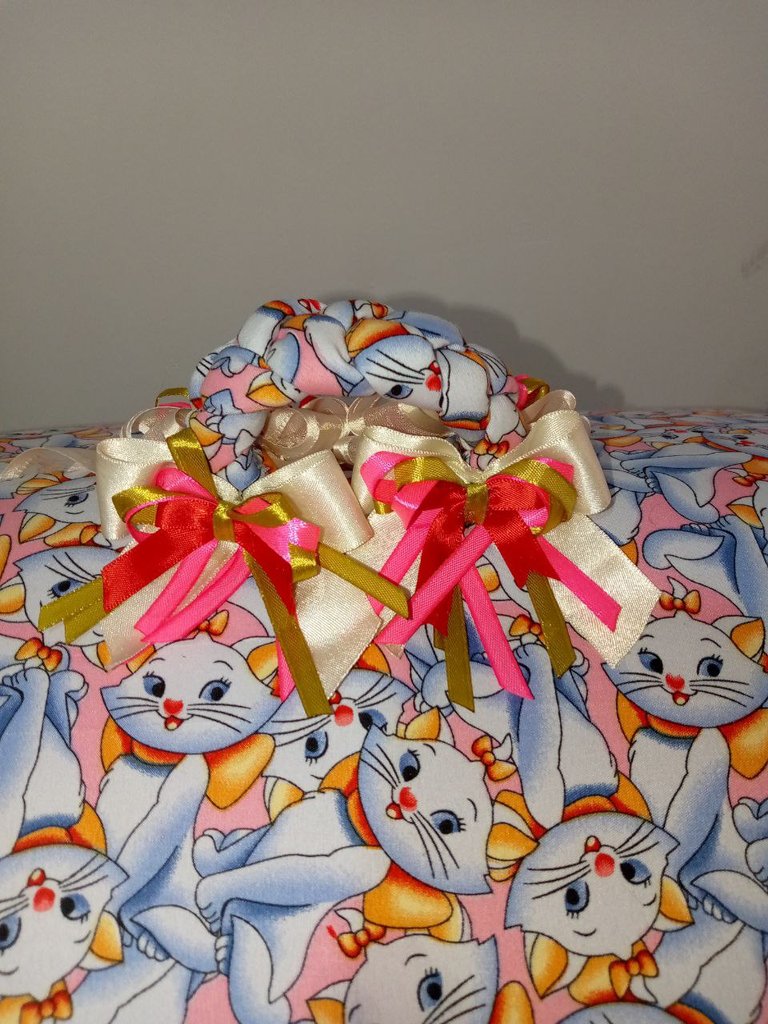
Ahora es el momento de los toques finales. Empecé por el techo, hice algunos lazos pequeños con cintas de raso y los cosí a otros lazos más grandes de organza. También hice un cordón con tres tiras de tela y tres tiras de guata. Enrollé la tela alrededor de la guata y cosí por detrás. Uní los tres cordones rellenos por un extremo con unas puntadas, tejí una cadeneta para unirlos, cosí el extremo y lo pegué al centro del techo para formar un asa. Coloqué los lazos alrededor del asa. A continuación, utilicé hilo y aguja para fruncir el encaje salmón más grueso y lo pegué al borde del techo con silicón. Encima coloqué encaje más fino sin ruchar.
Now it's time for the finishing touches. I started at the top, made some small bows with satin ribbons and sewed them to larger organza bows. I also made a cord with three strips of fabric and three strips of wadding. I wrapped the fabric around the wadding and sewed on the back. I joined the three stuffed cords together at one end with a few stitches, weaved a chain stitch to join them, sewed the end together and attached it to the centre of the roof to form a handle. I placed the loops around the handle. Next, I used thread and needle to gather the thicker salmon lace and attached it to the edge of the roof with silicone. On top I placed thinner lace without ruching.
Paso 6 / Step 6
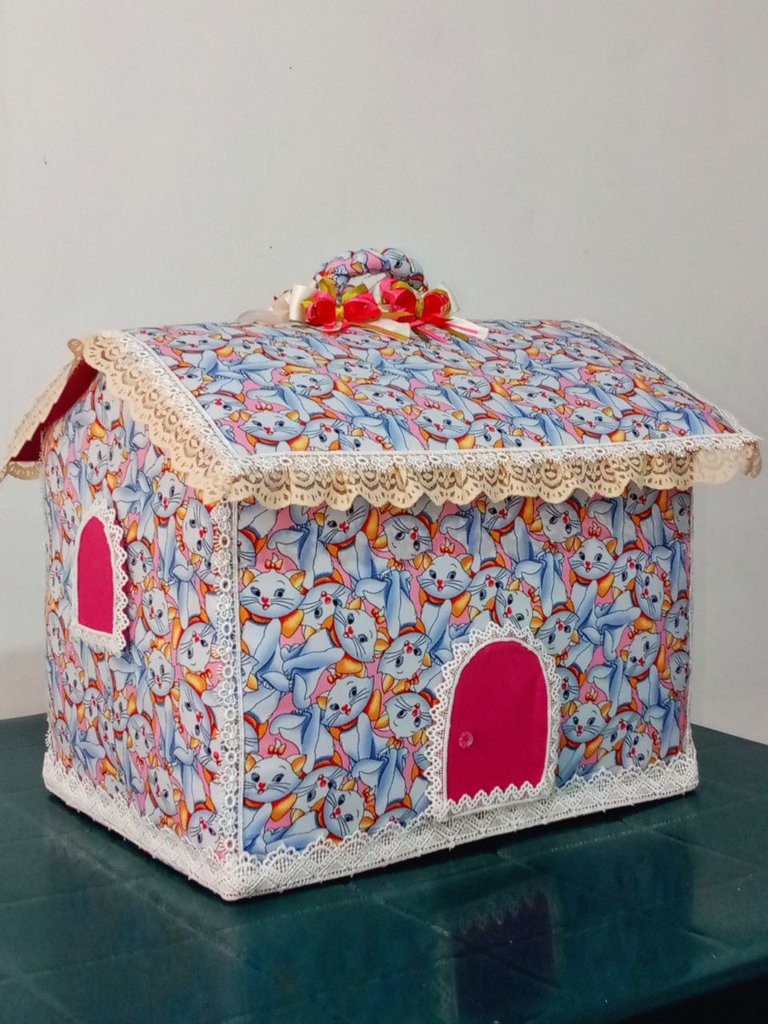
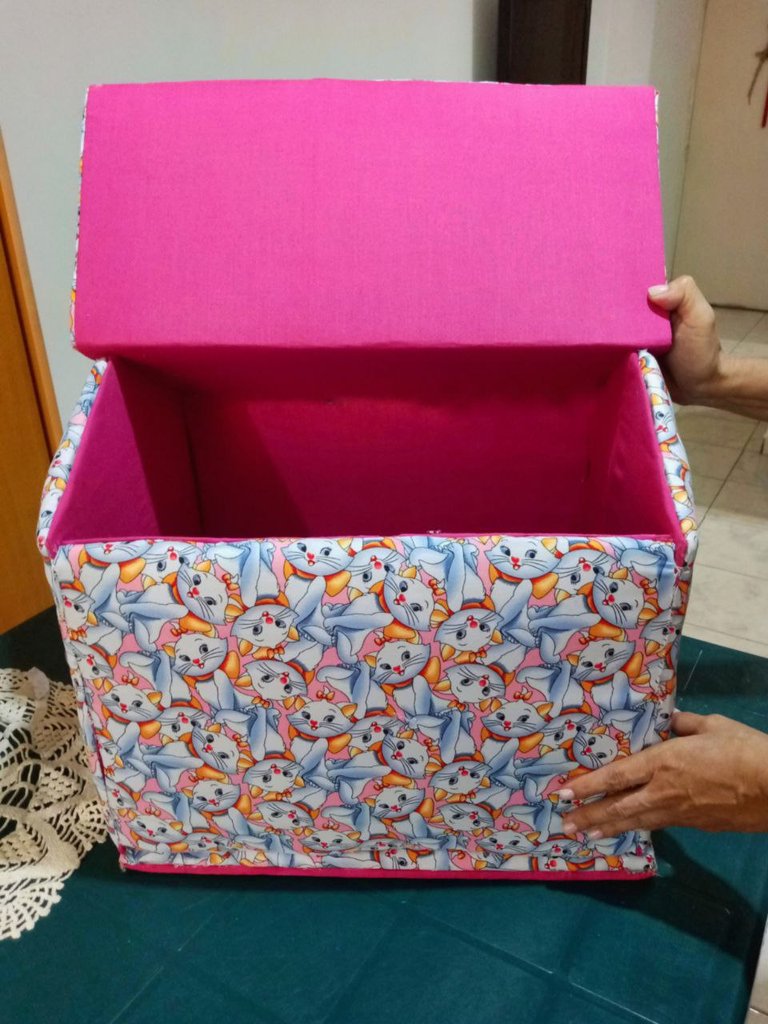
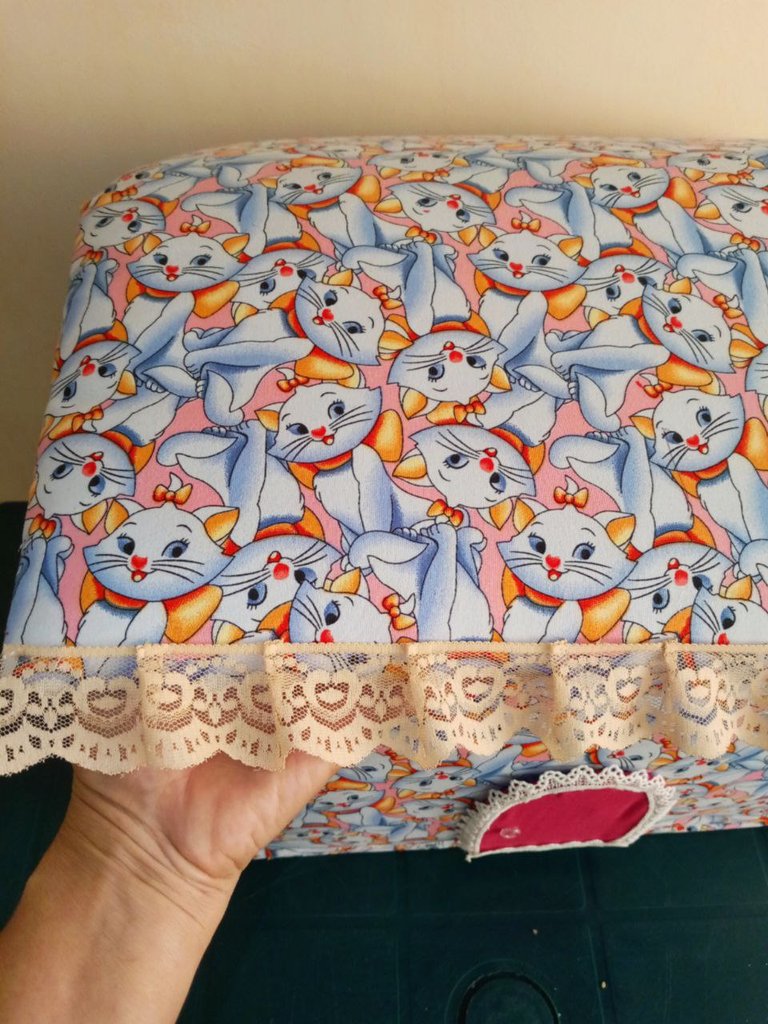
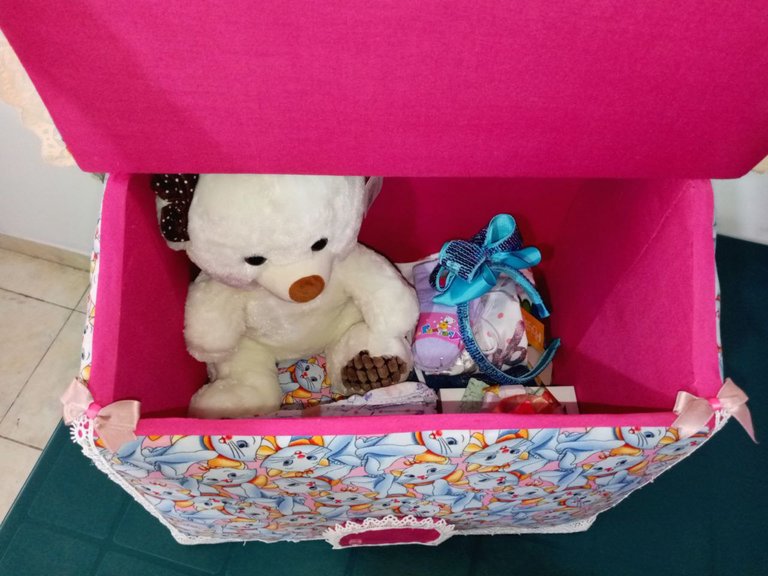
Para finalizar hice un par de lazos rosas pequeños, pegué uno en cada esquina para que lucieran cuando se abriera la casita. También pegué encaje blanco en los bordes de la casa con silicón y por todo el borde del piso. Esto le dio un acabado mas prolijo y delicado, por último se pegan la puerta, las ventanas y un botón pequeño como manilla de la puerta. La puerta la puse en uno de los laterales y no en el frente jajaja me gustó más así .
To finish off I made a couple of small pink bows, glued one on each corner so that they would show up when the house was opened. I also glued white lace around the edges of the house with silicone and all around the edge of the floor. This gave it a neater and more delicate finish. Finally I glued the door, the windows and a small button as a door handle. I put the door on one of the sides and not on the front hahaha I liked it better that way.
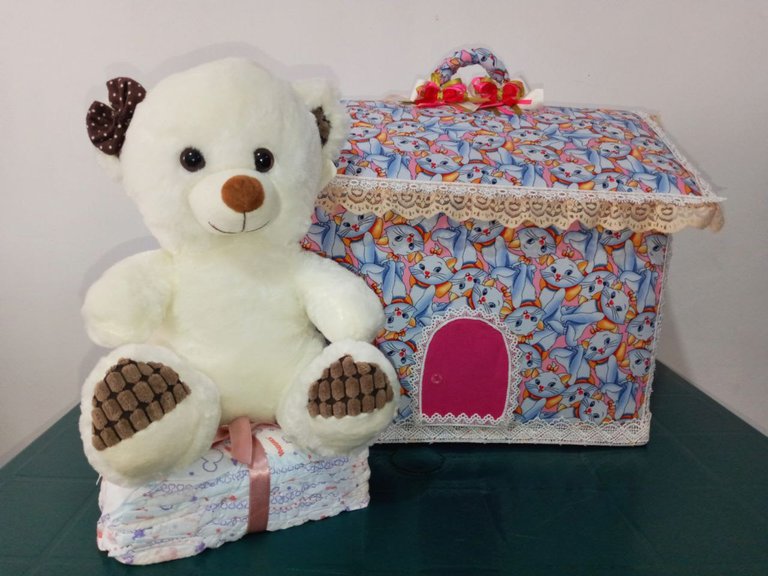
¡Y así se fue esta Casita Pañalera hecha con mucho amor y llenita de detalles para mi hermosa "Baby Bee" .
And so went this Casita Pañalera full of details for my beautiful "Baby Bee".
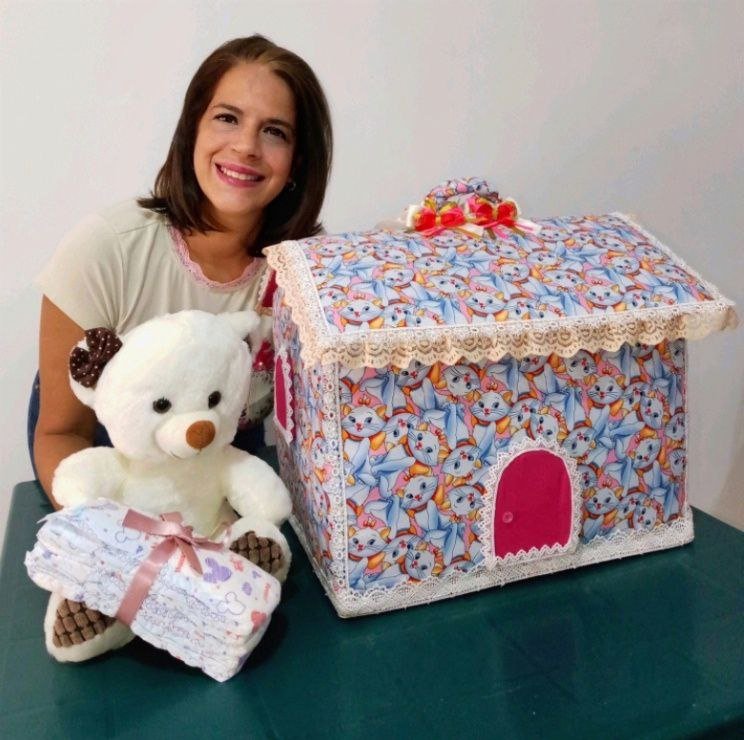
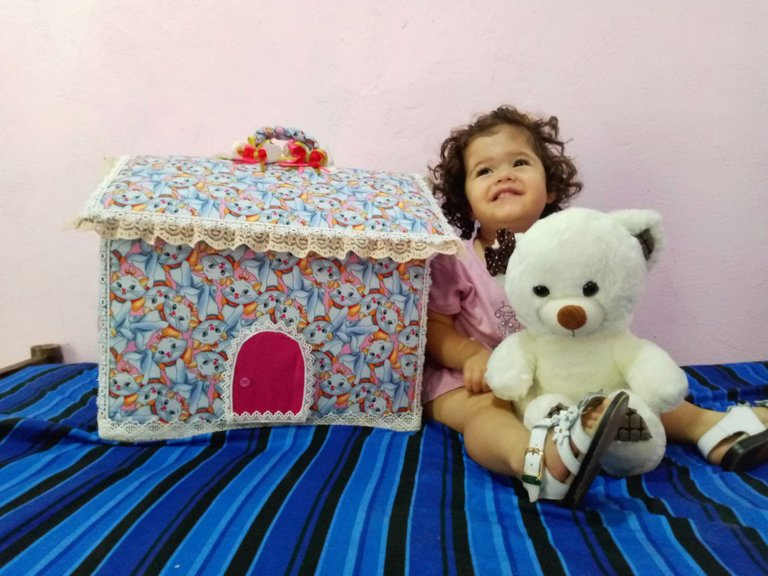
¿Te animarías a hacerla? te leo en los comentarios ¡Es un hermoso regalo para dar!
Como siempre fue un placer escribir ésto para ustedes❤️
Would you dare to make it? I read you in the comments! It's a beautiful gift to give
As always it was a pleasure to write and do this for you ❤️
Fotos hechas por mí - Photos made by me / Portada - Separadores y Banners realizados en Canva- Cover, Dividers y Banners created in Canva / Traducción realizada con www.DeepL.com - Translation made with www.deepl.com